Island/ land texture play
“Passion is one great force that unleashes creativity, because if you’re passionate about something, then you’re more willing to take risks”. Yo-Yo Ma
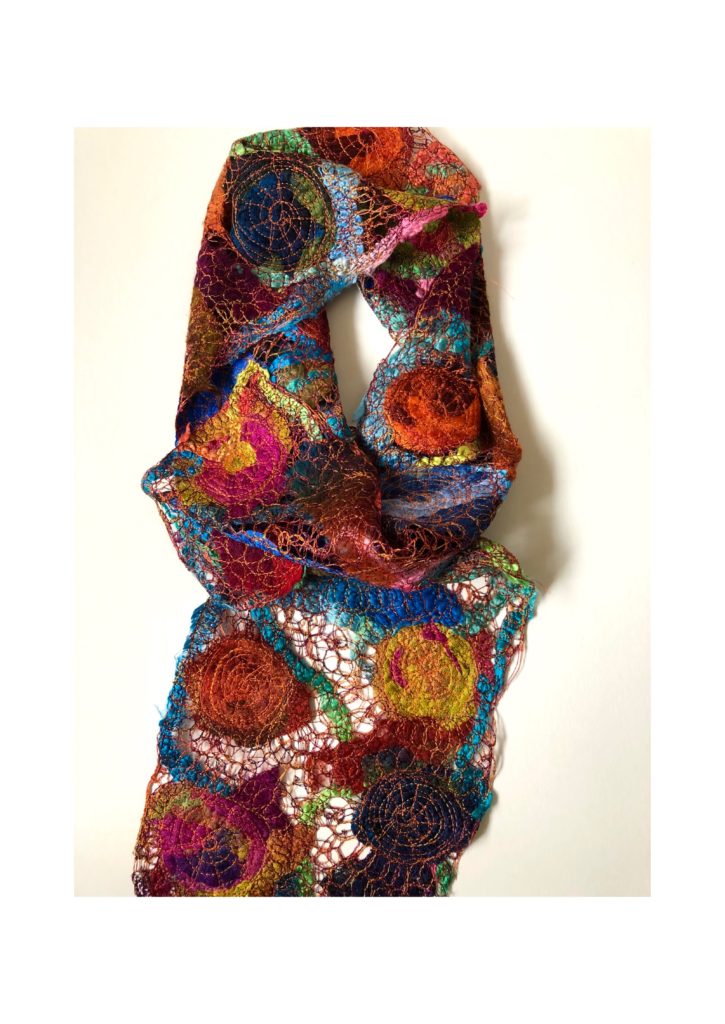
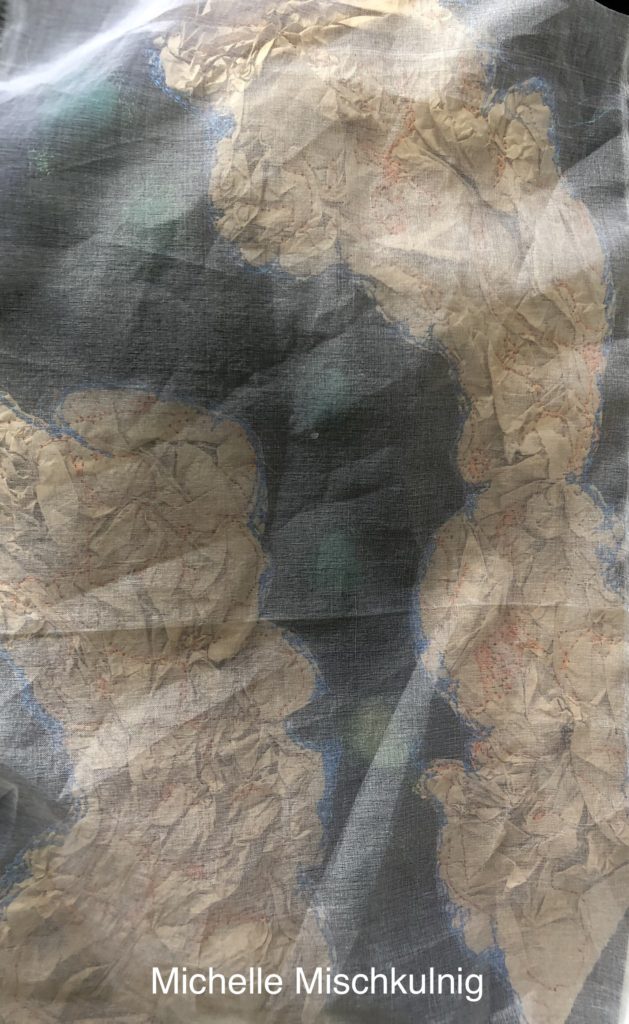
Hi I’m back with the first of the 8 textures posted every second week. This play time really has more than one texture in it because I got a little carried away :-) lol. In this last week I have added scarf kits to my website https://chelletextiles.com.au/product-category/scarfs-wraps/
 And I have had myself banned from a FB page which I think I didn’t understand the rules of , I was just trying to show that quilting can be used every where and the world is full of possibility so I will share my post here, you have probably already seen it, it is a collaborative piece with my son who believes that everything deserves a second chance.The story is on my Facebook page and it is on view and for sale at Stonehouse gallery Warrandyte Victoria, Australia . This is my sons website http://builtonenthusiasm.com
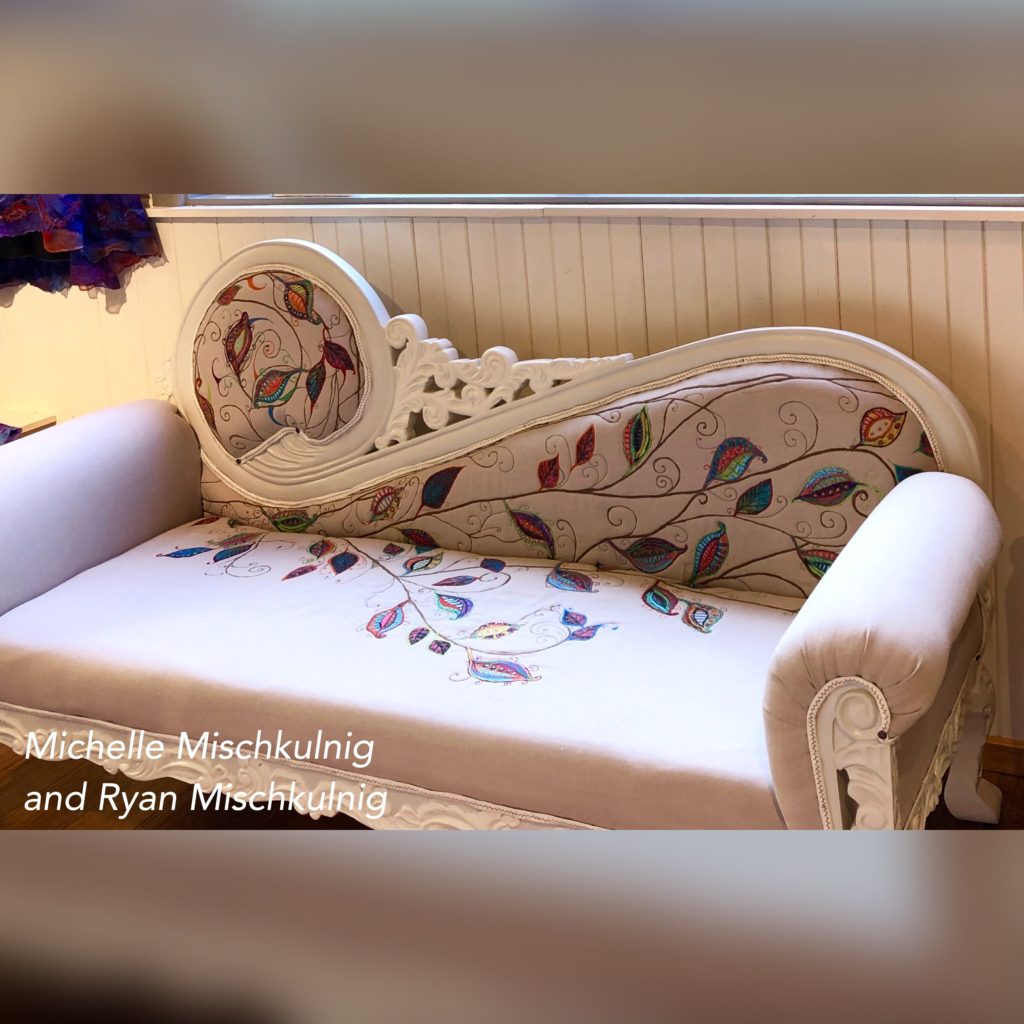
Materials
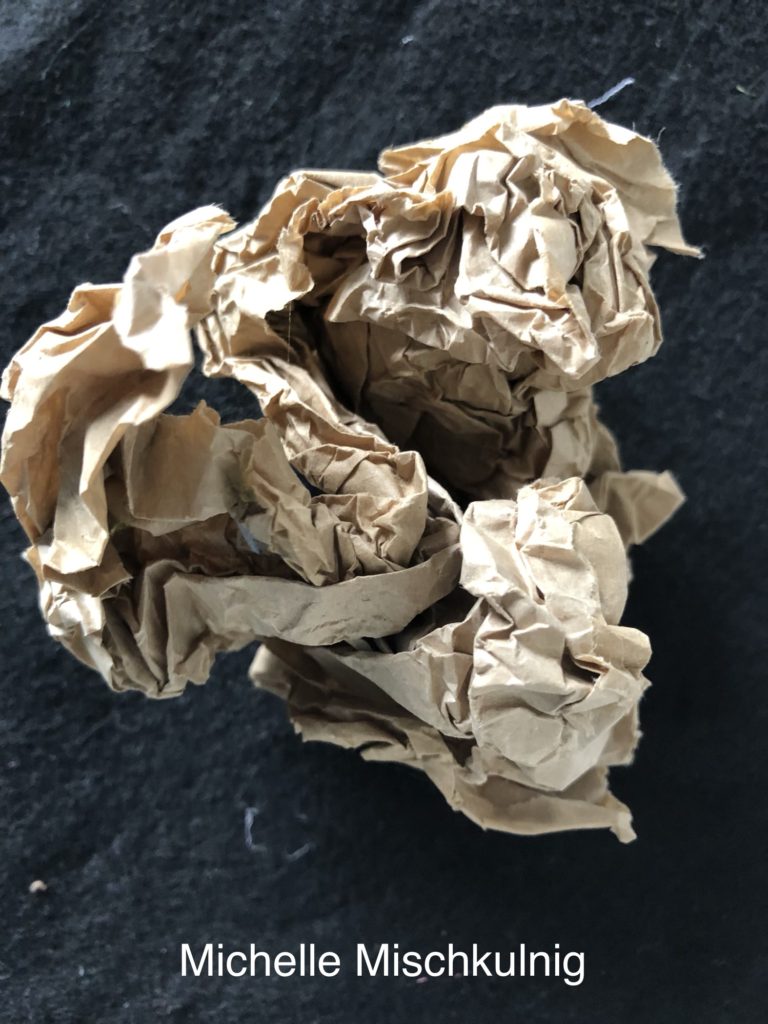
the humble brown paper bag
backing fabric I used a piece of black felt approx. size 23cm x 16cm
small amount of silk organza or similair
shiva sticks or wax crayon
metallic paint or similar
small amount of blue silk or similar
hand threads
small amount of fusible web
small amount of foil
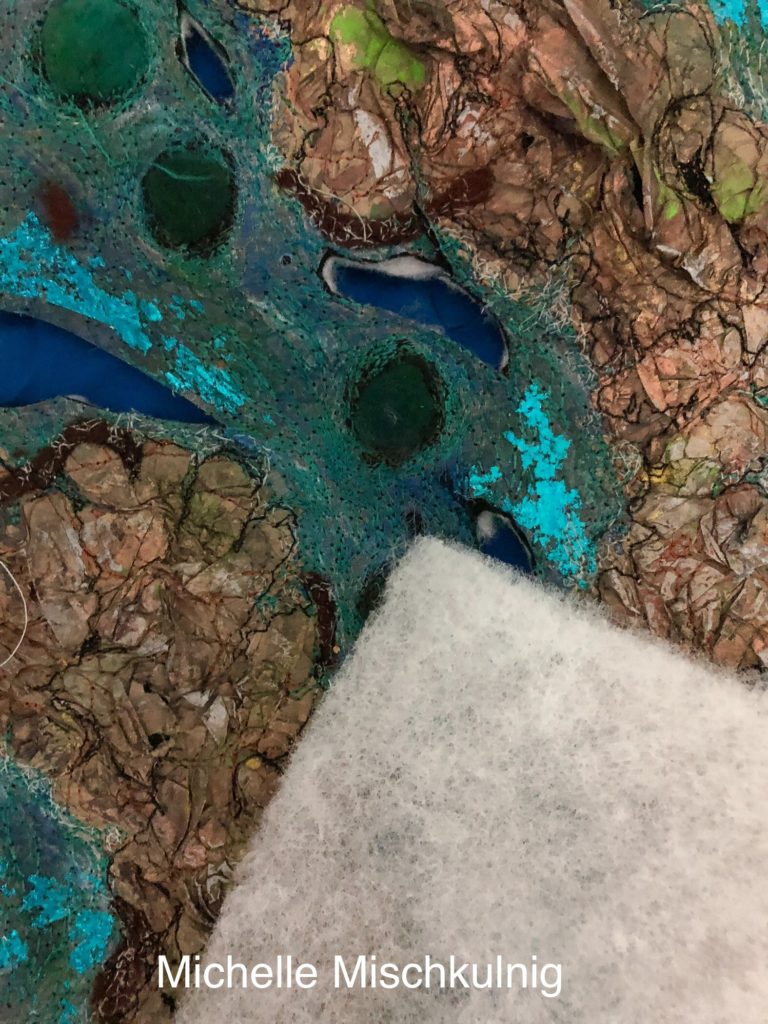
a little wadding
Intense blocks or similar
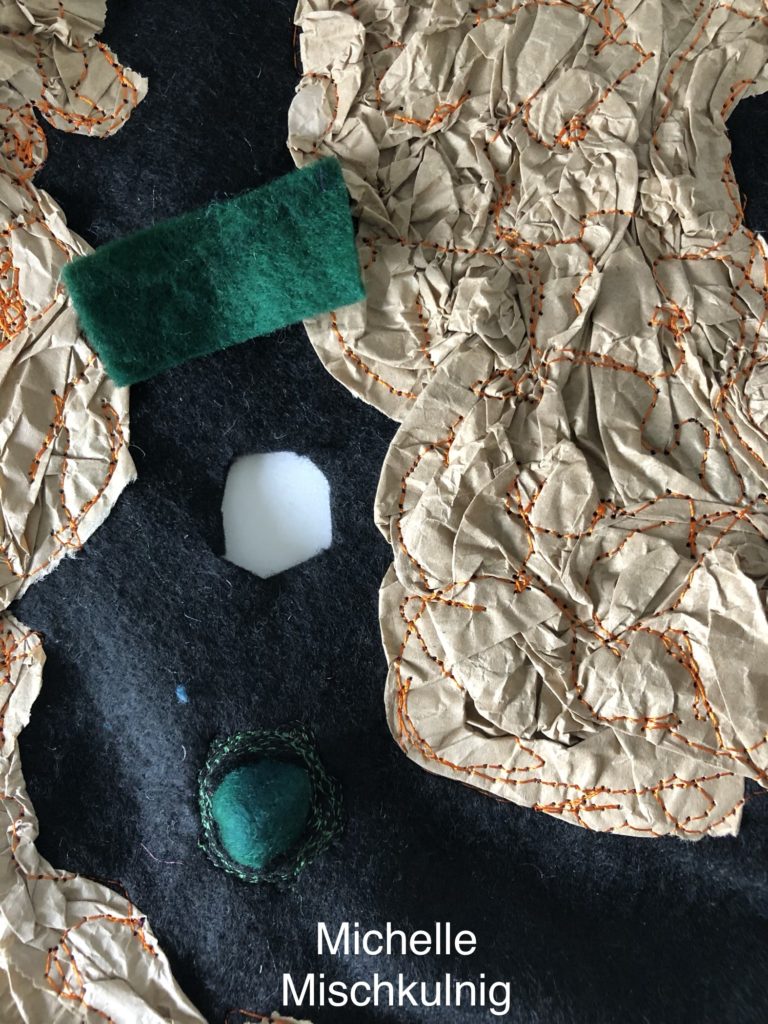
small amount of green felt or material that stretches and hold its shape.
sewing machine that can sew free motion
machine embroidery thread
closed toe free motion foot
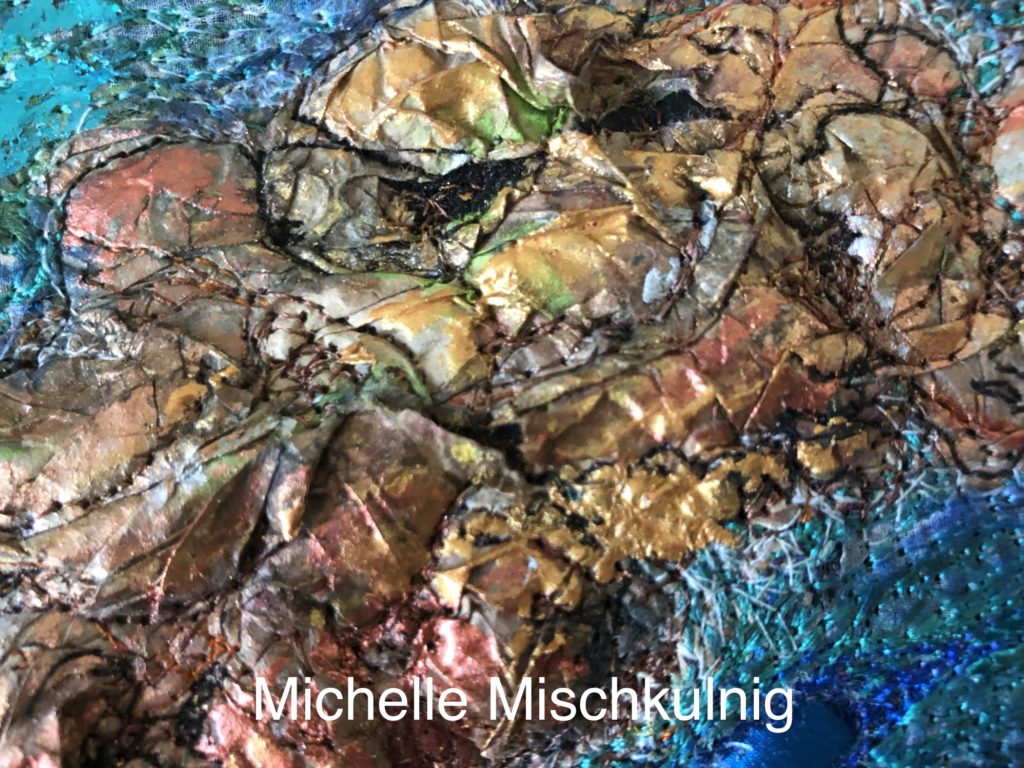
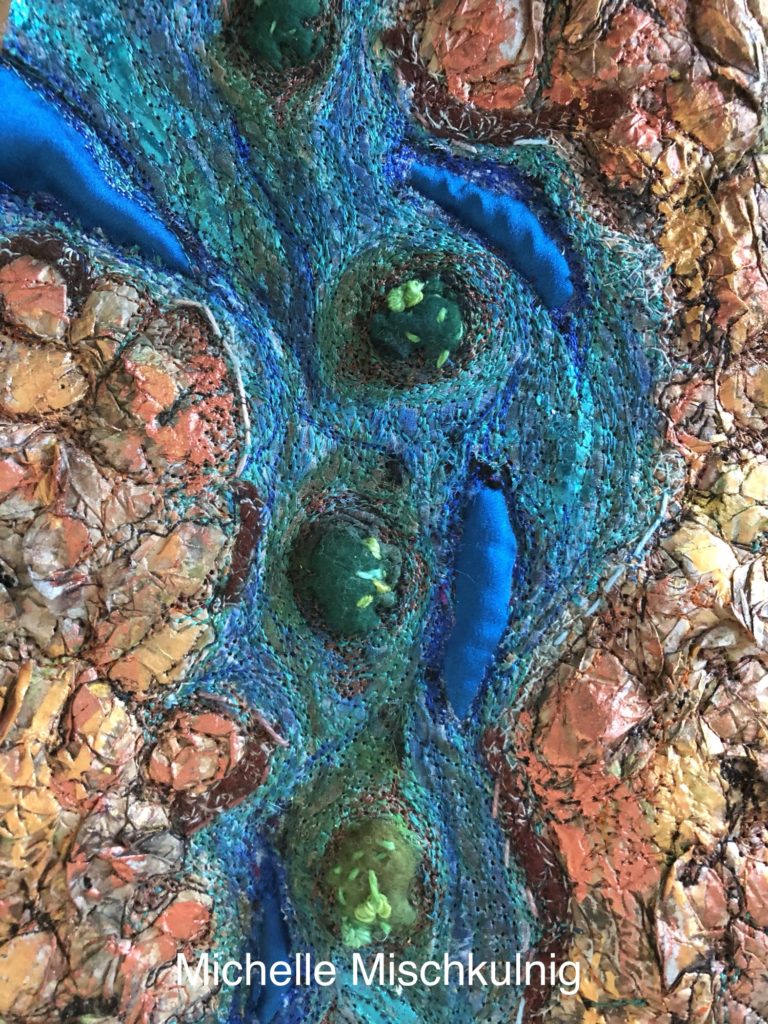
I love paper bags and all the interesting texture they make so lets play.
Scrunch your paper bag up tightly fill it full of creases and folds and then open it out a little.
Pull out the paper bag just a little but not to much because all those creases and folds are the beauty of the texture place on the top surface of your backing fabric here I have used black felt.
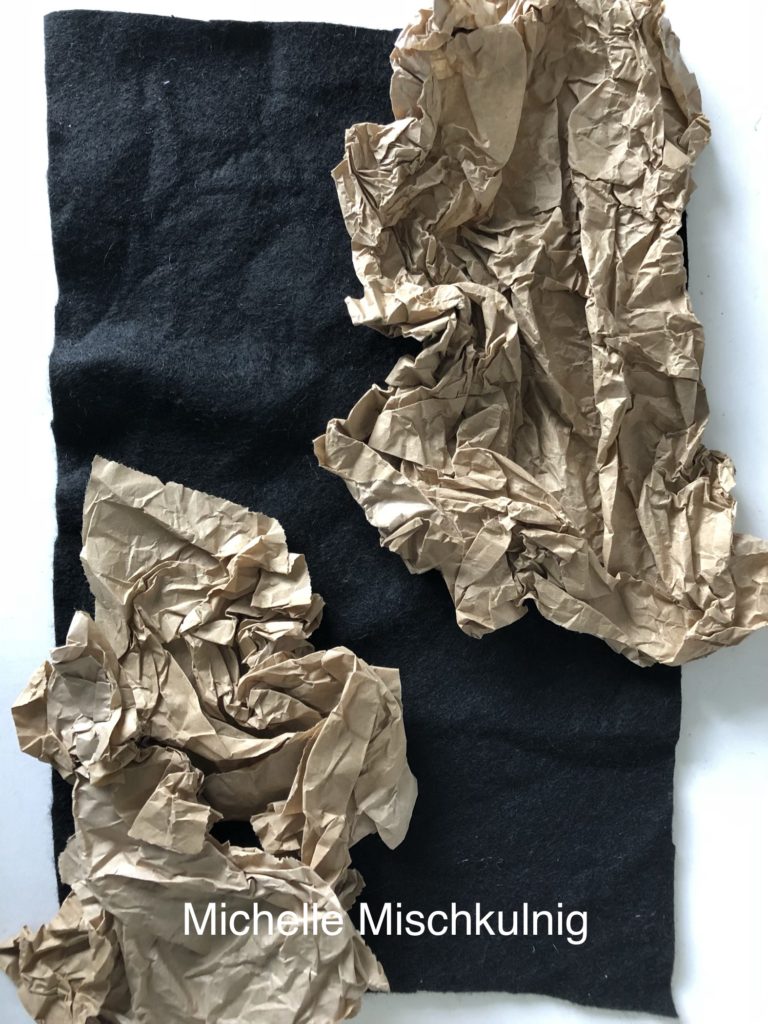
Randomly free motion stitch the paper bag to the backing cloth.
![]()
There are many small steps along this journey which is the same with all my artworks.
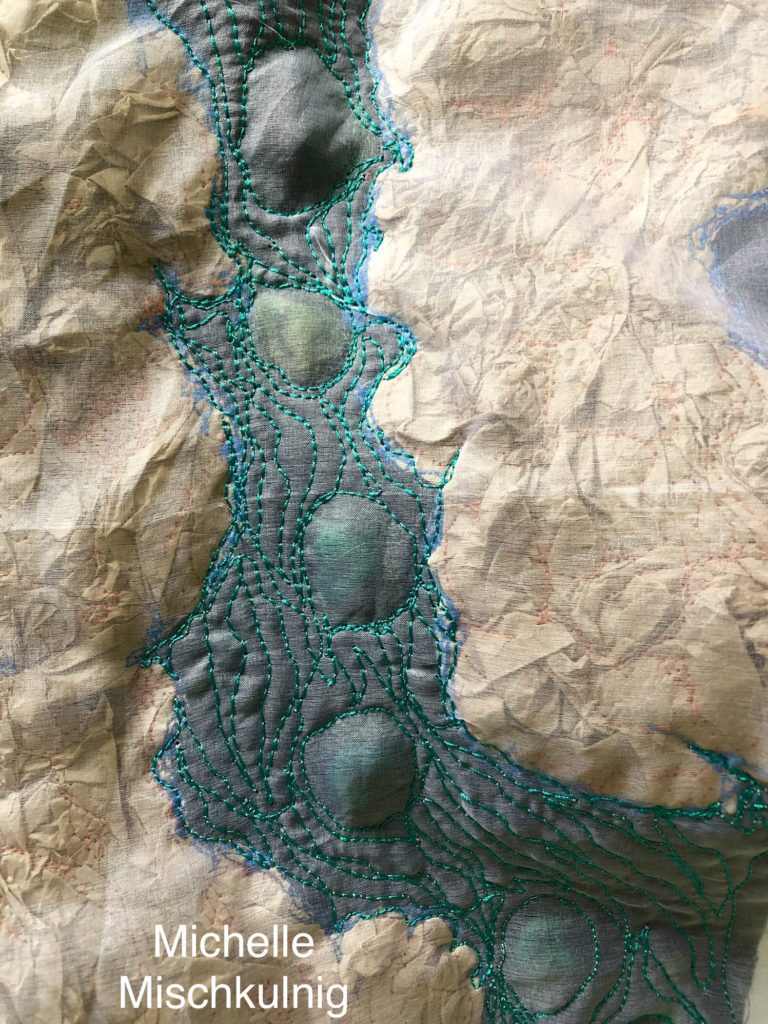
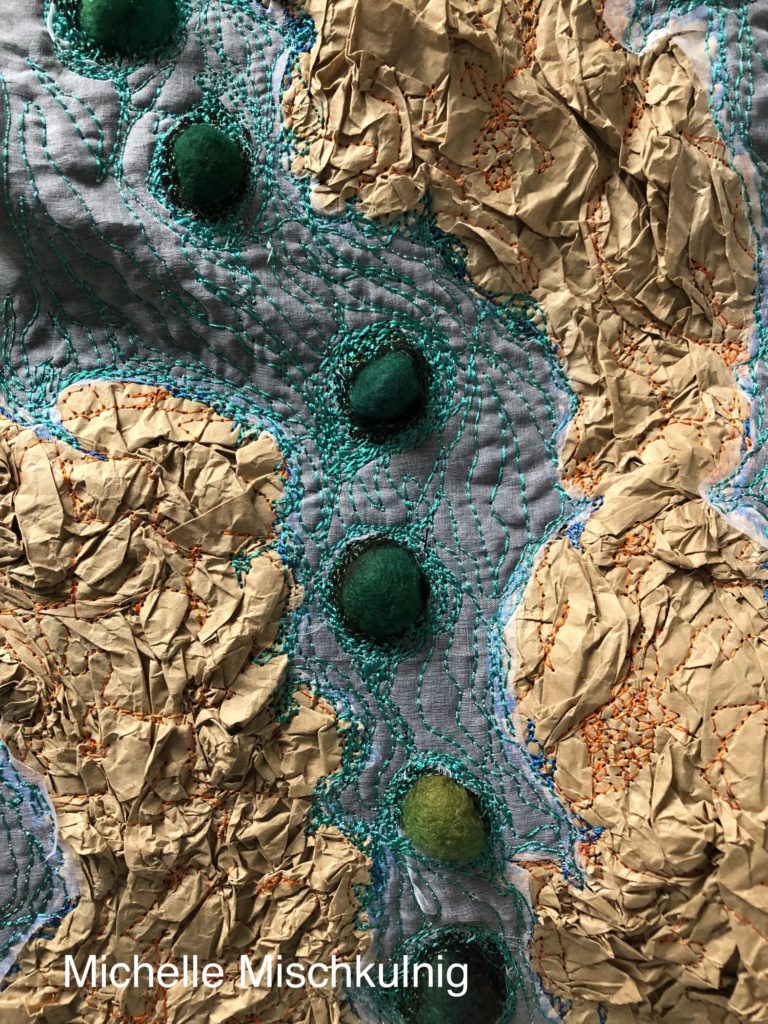
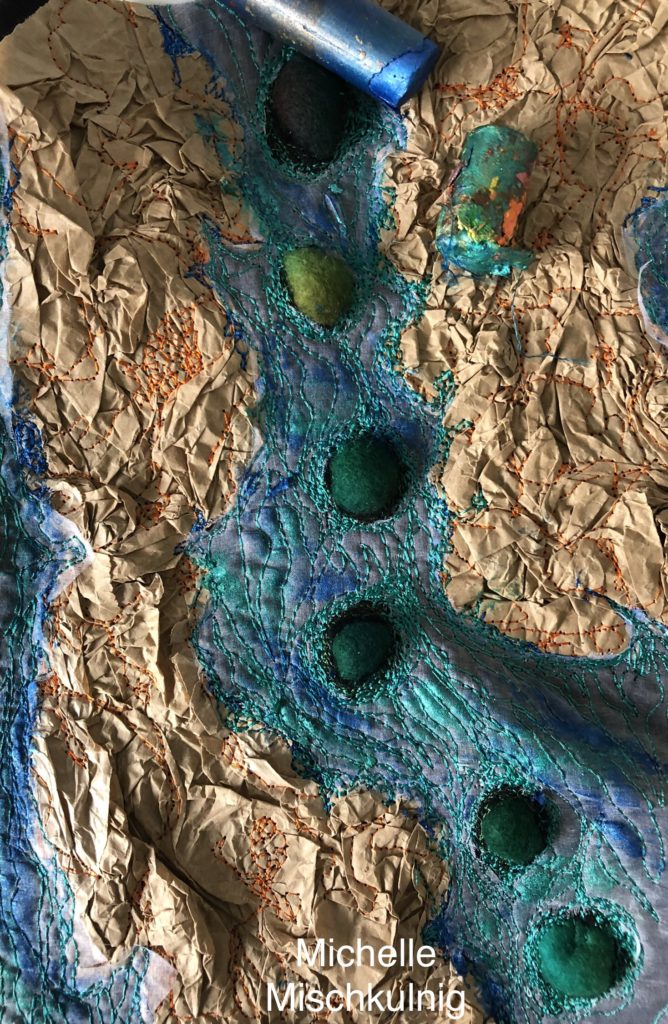
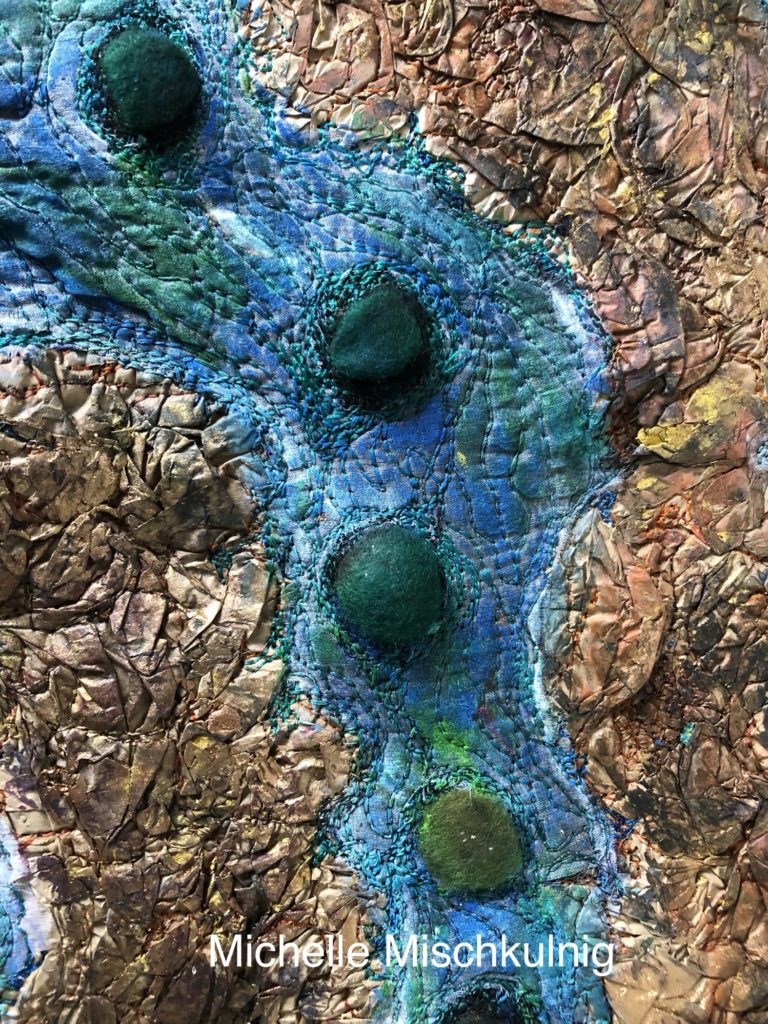
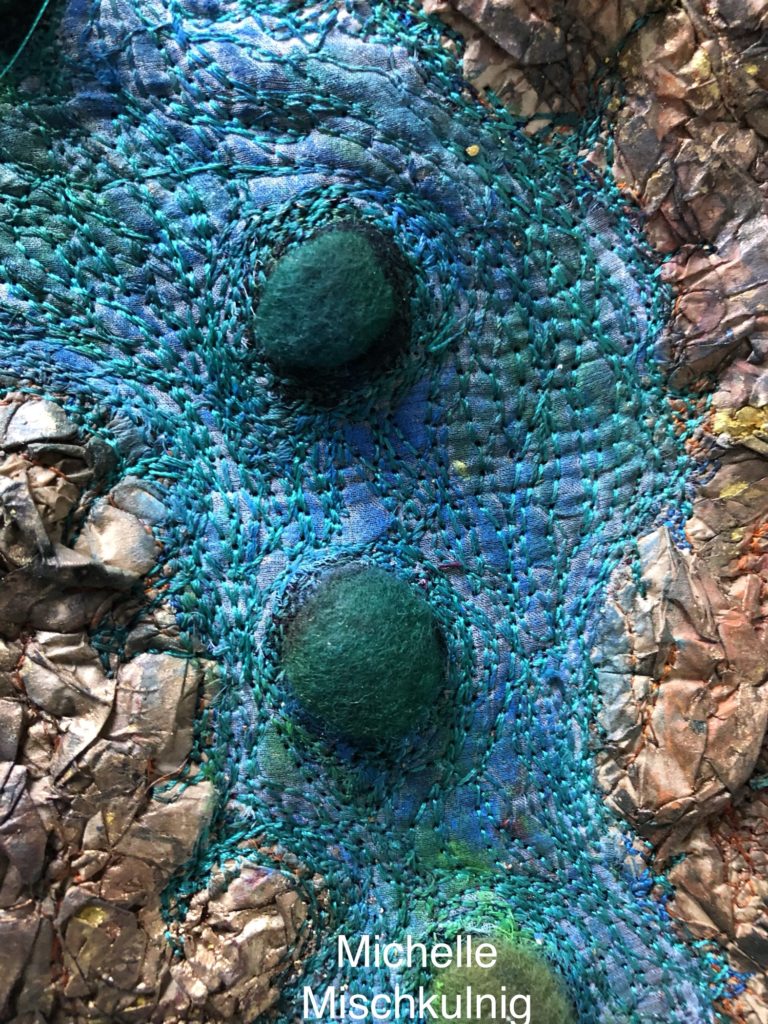
Cut holes in your backing cloth which you will then free motion stitch felt behind ( your choice of stretch fabric that hold its shape)
The felt is attached form underneath the backing fabric and stitched as you can see in the image below .
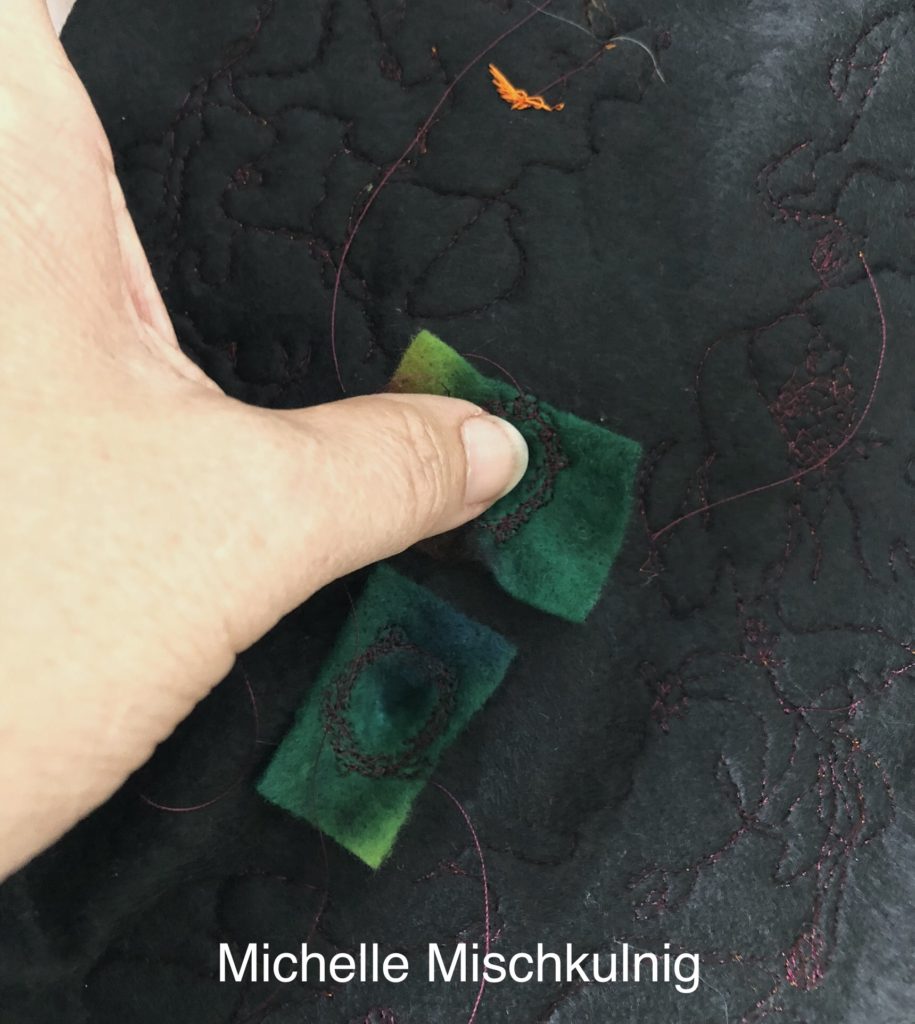
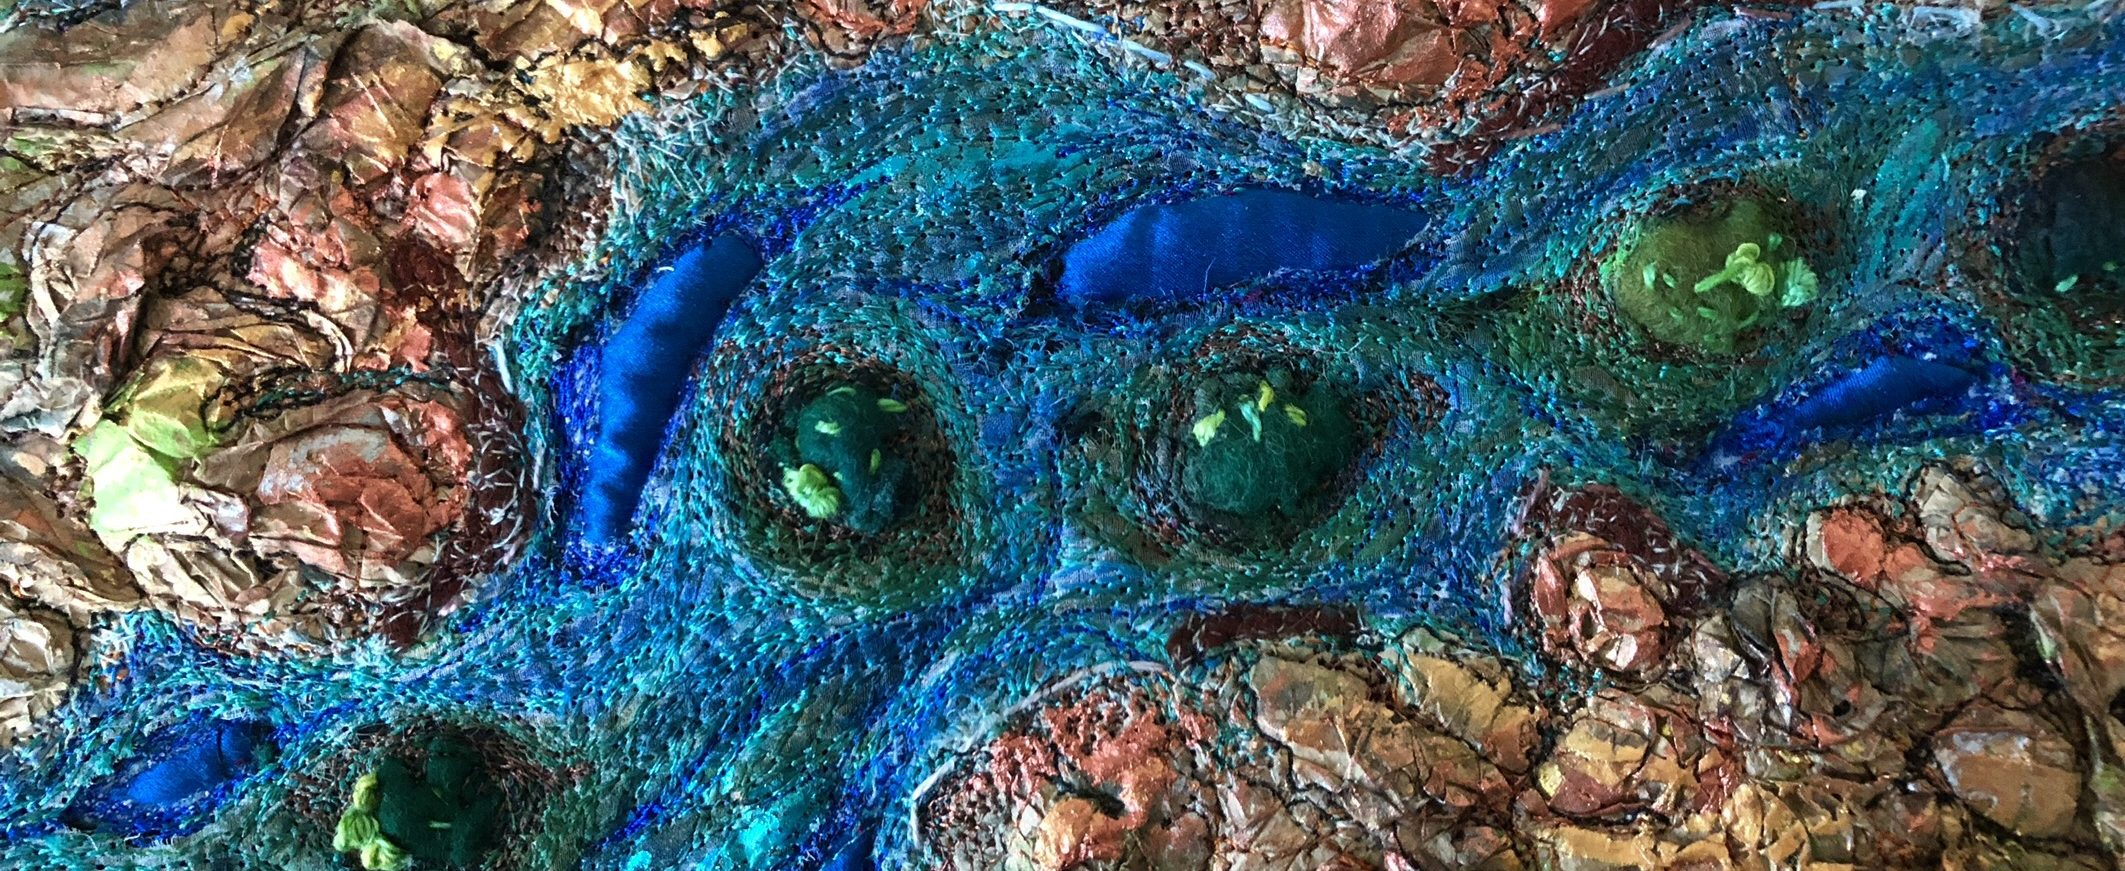
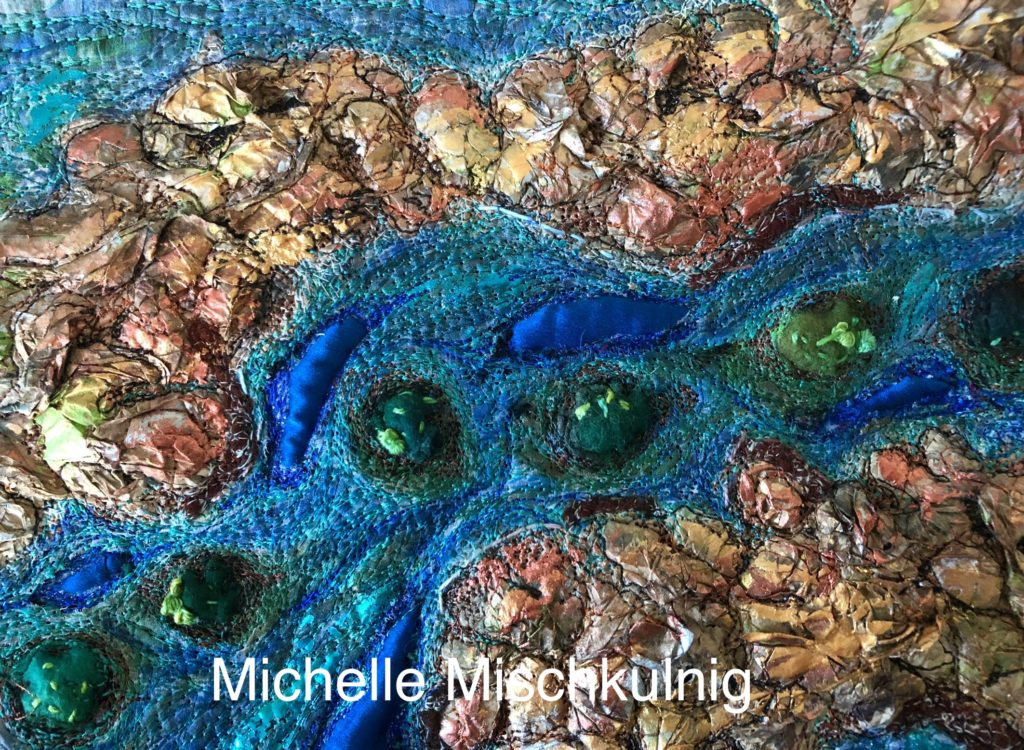
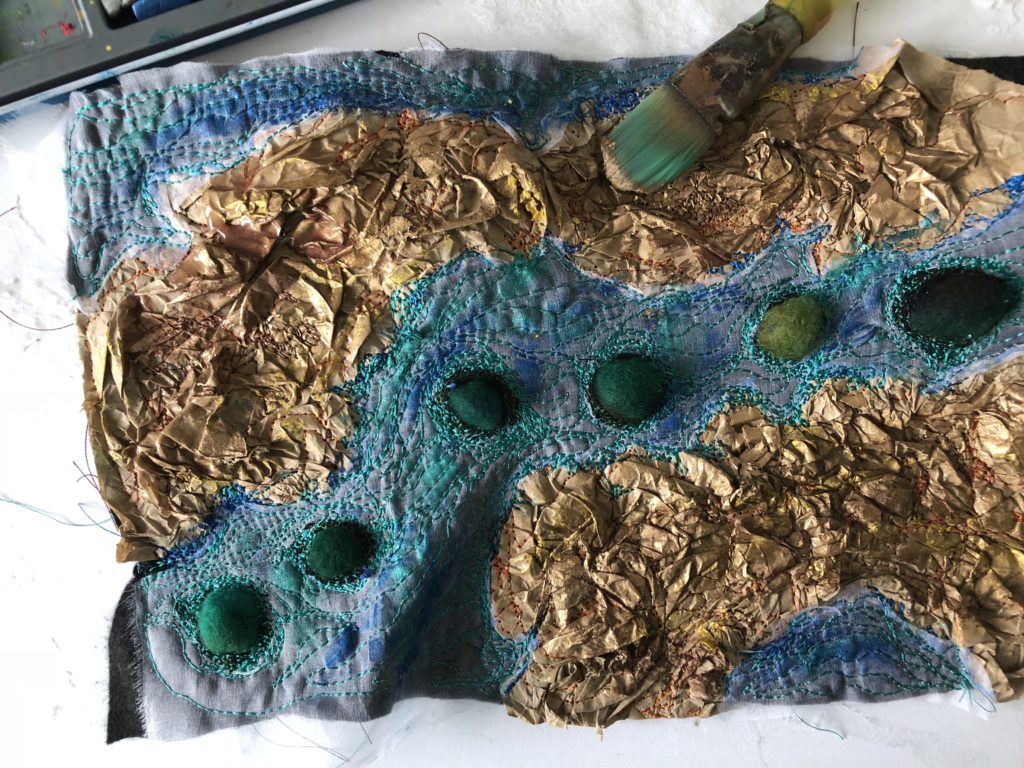
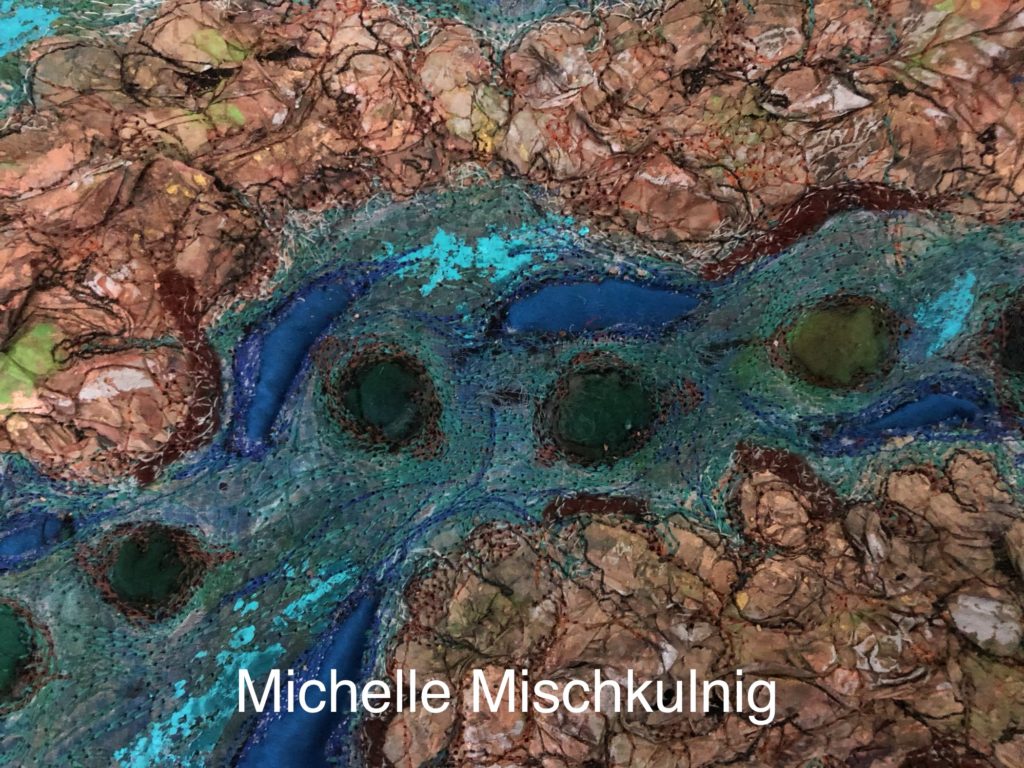
Gently stretch your fabric through the hole to lift it up as an Island would lift above the sea.
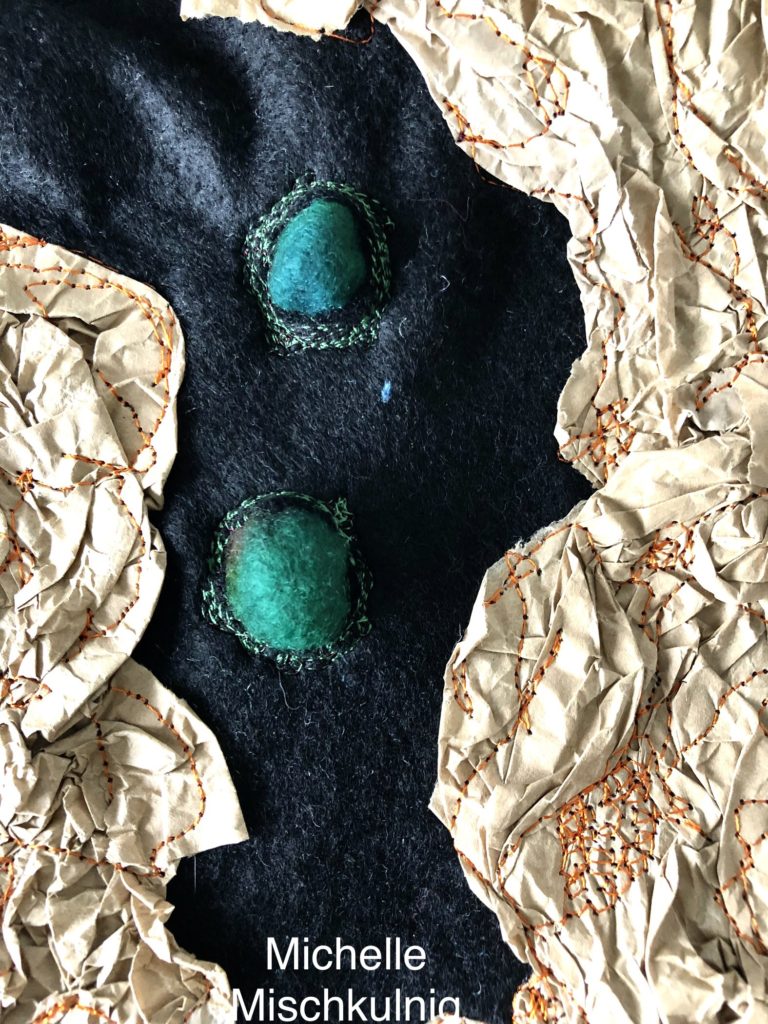
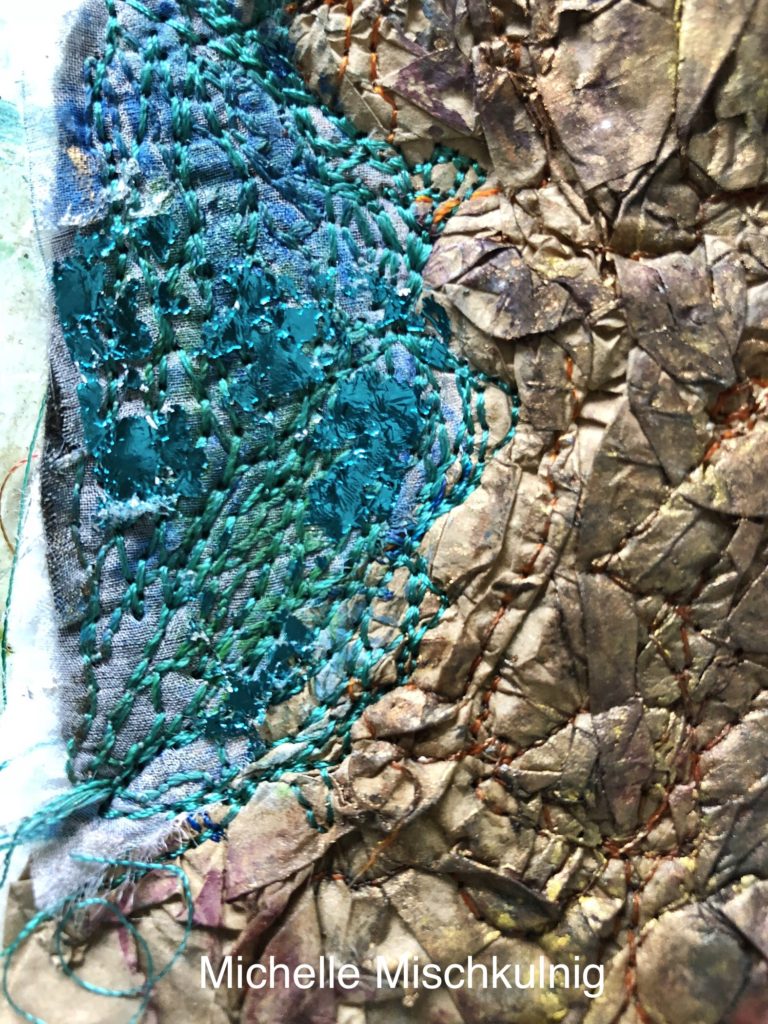
Start to define your coastal edge, free motion stitch around the edge of your paper bag which I have stitched in a blue thread .
Lay your pice of silk organza or similar over the top of your whole art work.
Stitch around the outer edge of your Islands and coast line and then cut the organza away from the edges .
A little bit of stuffing is added into the back of the islands to hold shape.
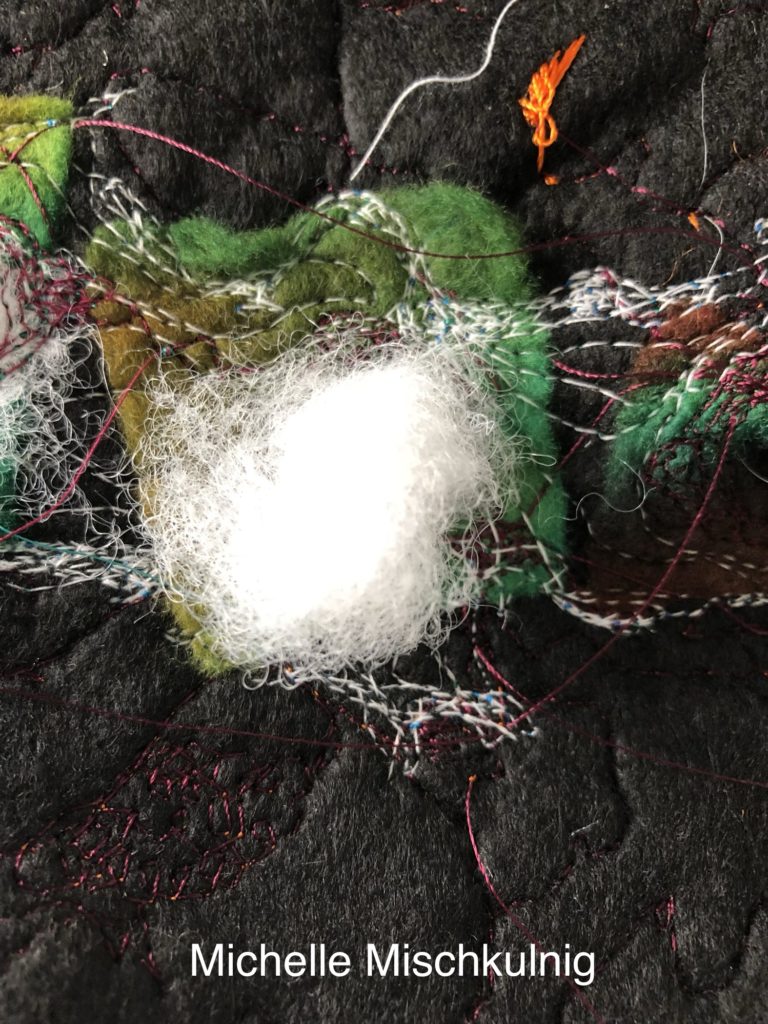
I have cut a piece of wadding the same size as the art work and backed the art work with the wadding, to give it loft when stitched
Next is time for some more colour using shiva sticks which are oil based I rub them over the paper bag and ocean just enough to pick up the textures not to cover over the whole of the fabrics and papers.
Using inktense blocks or similar to give a water colour effect. Use water and a brush to wet the whole art work area and then the intense blocks to colour it by rubbing them through the wet area .

When this has dried its time to get to work again with stitch
Add more stitching to your ocean and if you wish your land .
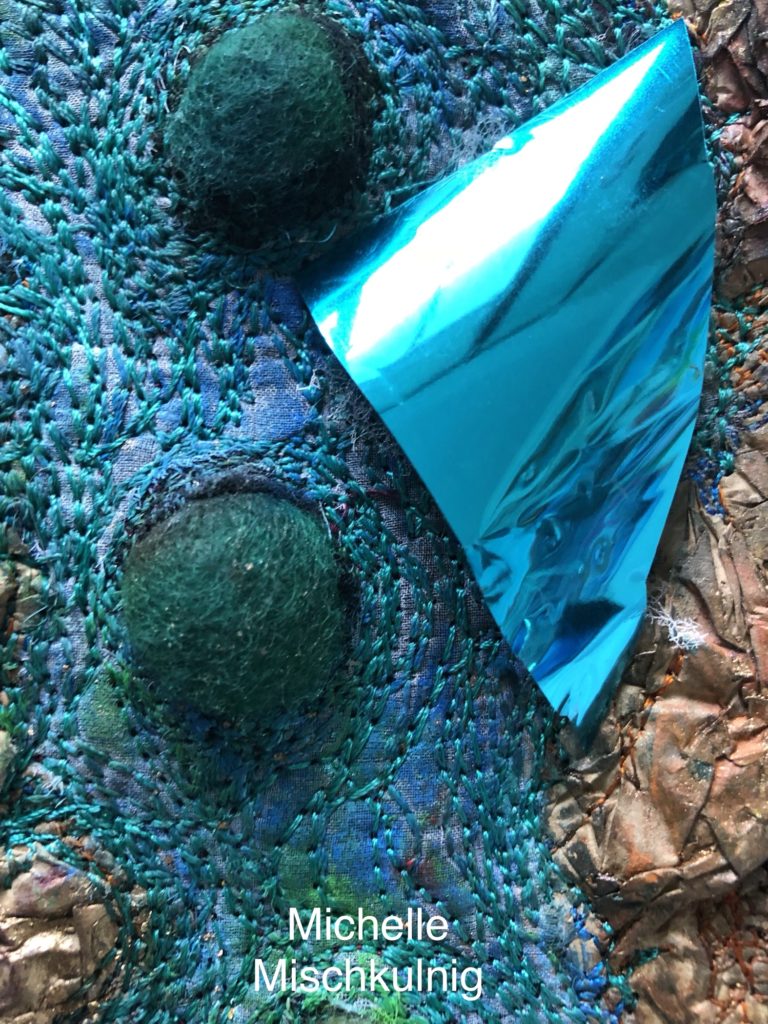
A little metallic sheen is added with some foil.
To add foil use small pieces of fusible web place these randomly on the surface of your ocean lay small pieces of foil colour up on top and iron hot. When there is a change in the surface colour of the foil peel off leaving the shimmer behind.
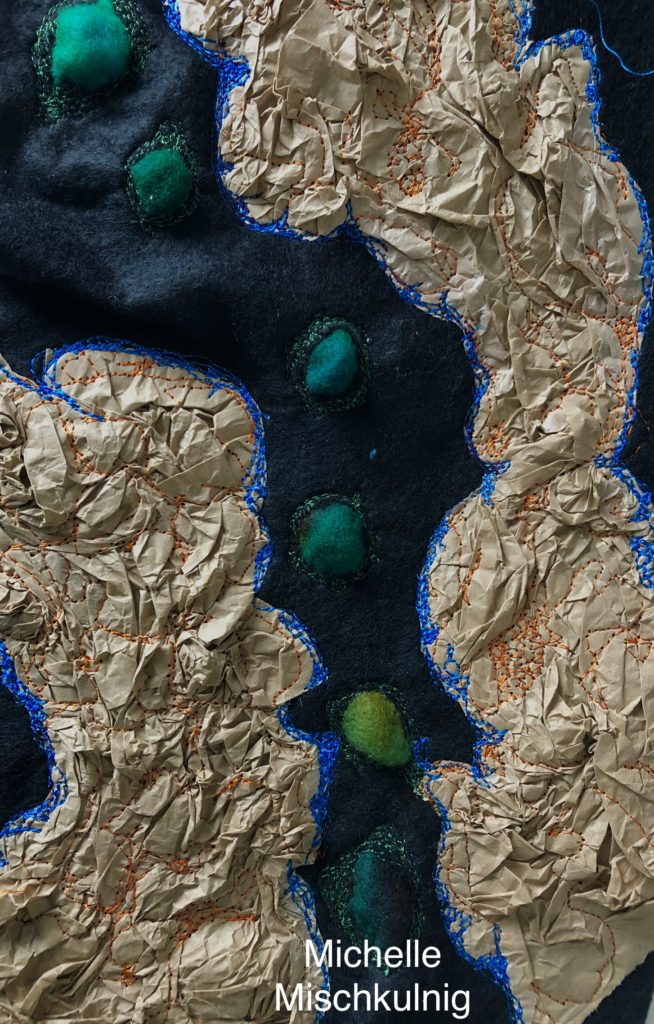
Defining the coast line with small amounts of brown fabric and white free motion stitching and then black thread.The black thread is also used over the paper bag area to add definition of highs and lows.
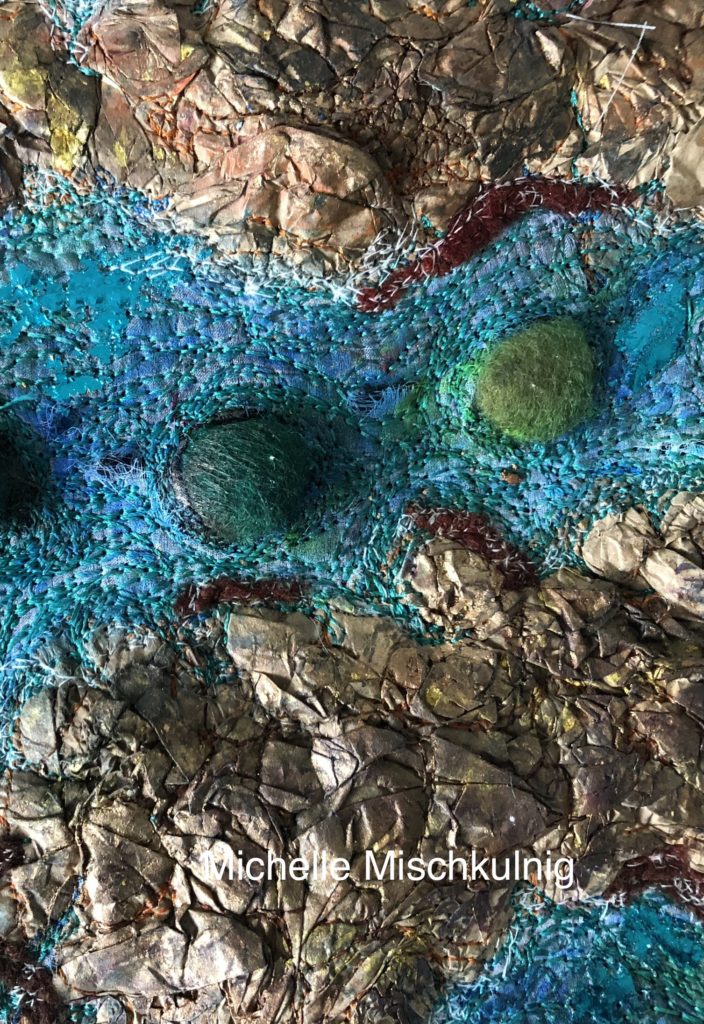
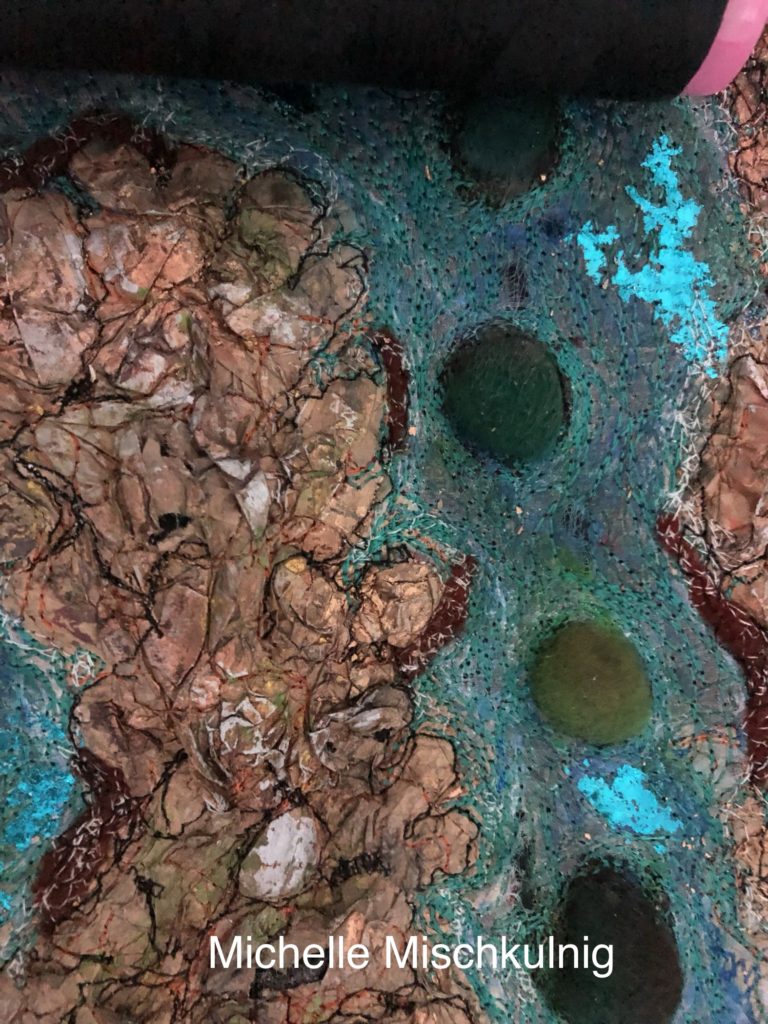
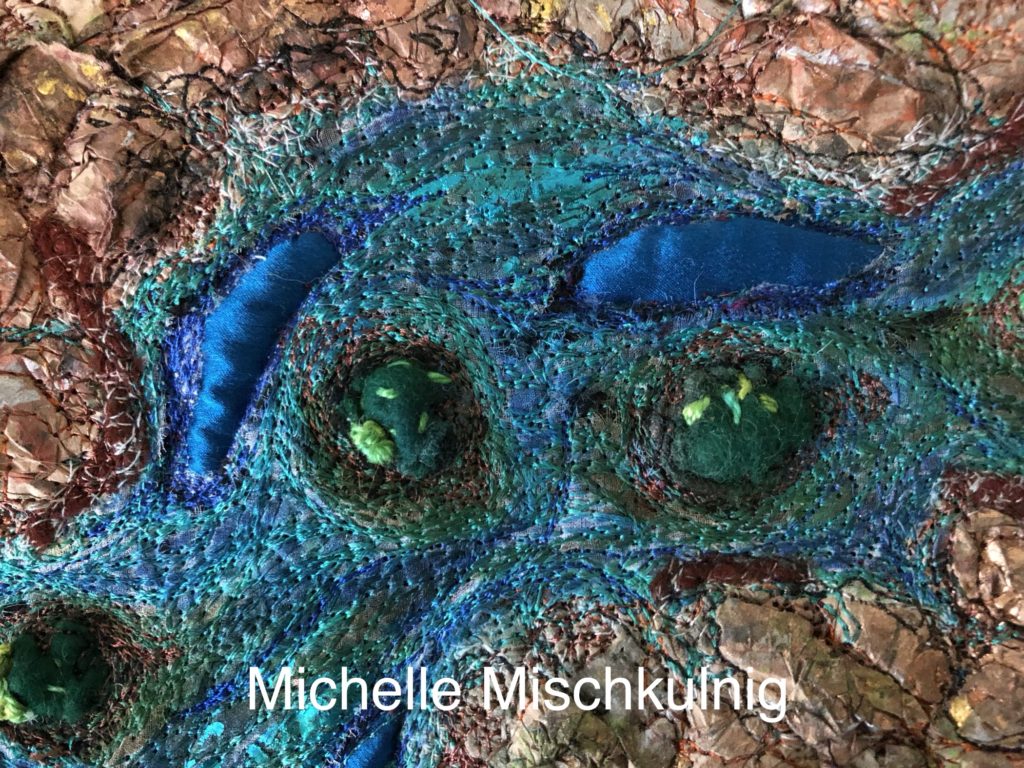
Get those pointy end scissors out and cut some holes in the ocean this will add flow and movement.
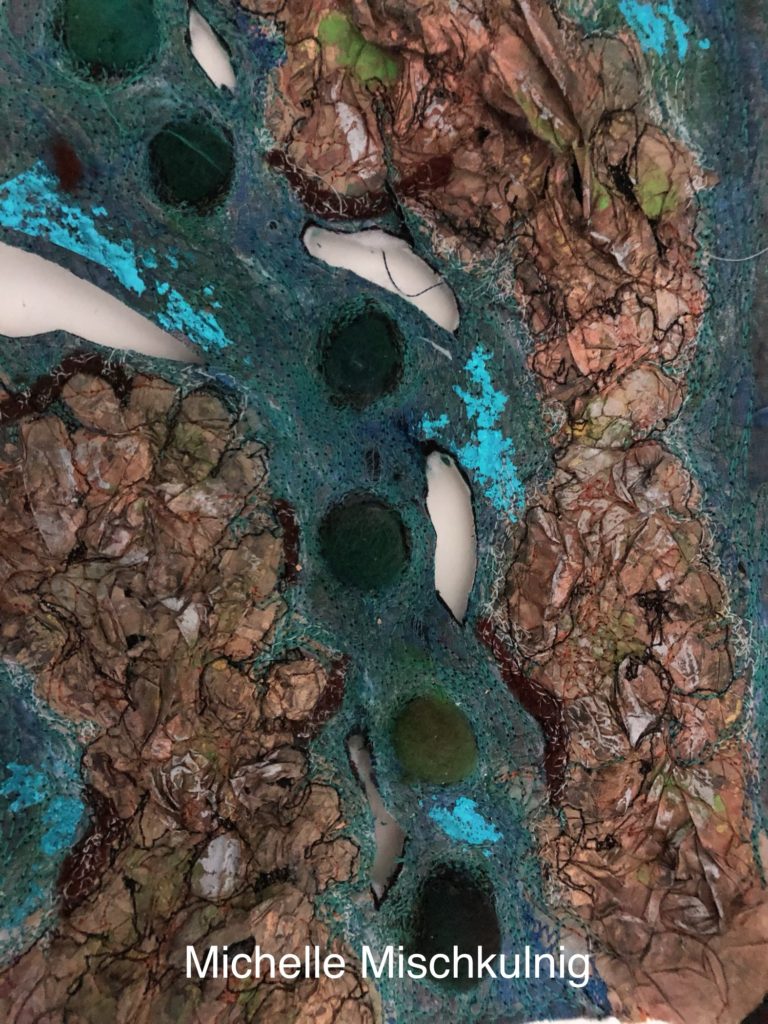
Put your blue silk behind the holes and a second piece of wadding behind the silk pin and stitch .
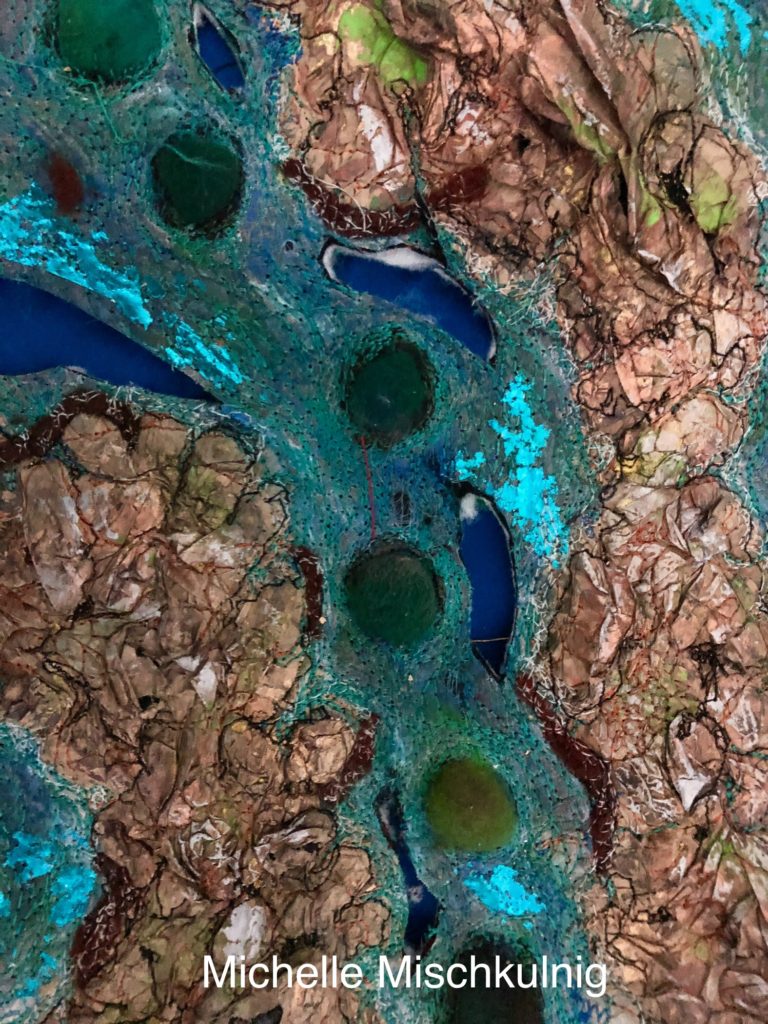
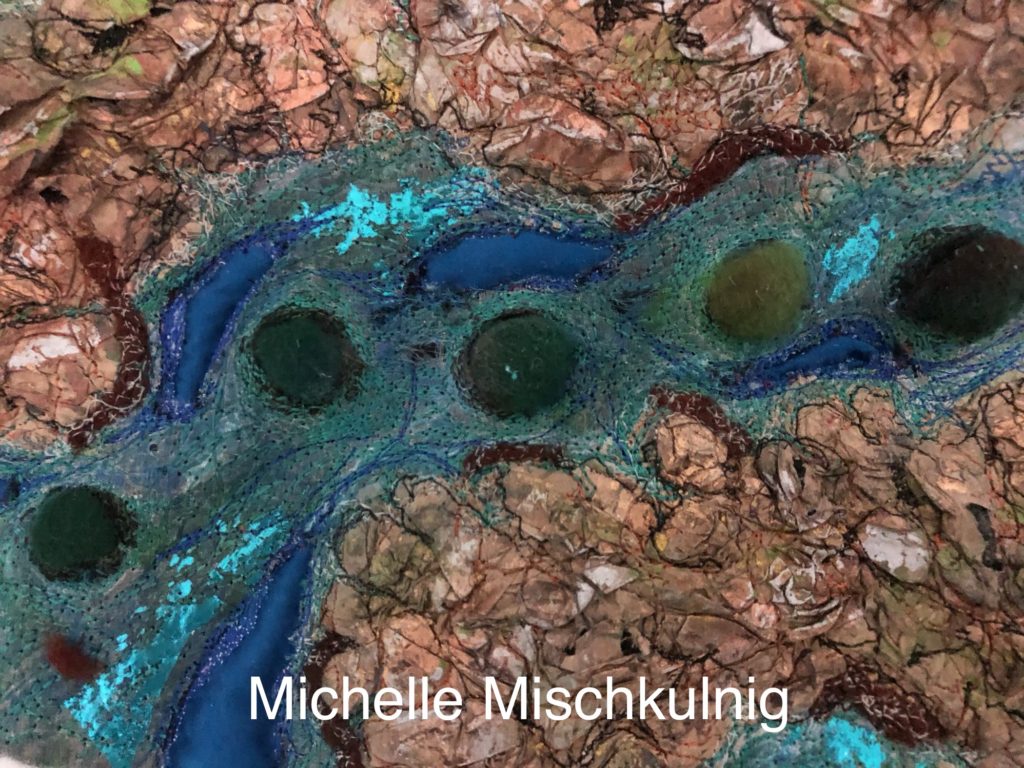
Using a brown or similar thread outline your coast line and Islands, carrying your stitching onto the land mass.The brown stitching around the Islands can be used change their shape so as they are no longer round but have interesting coast lines .
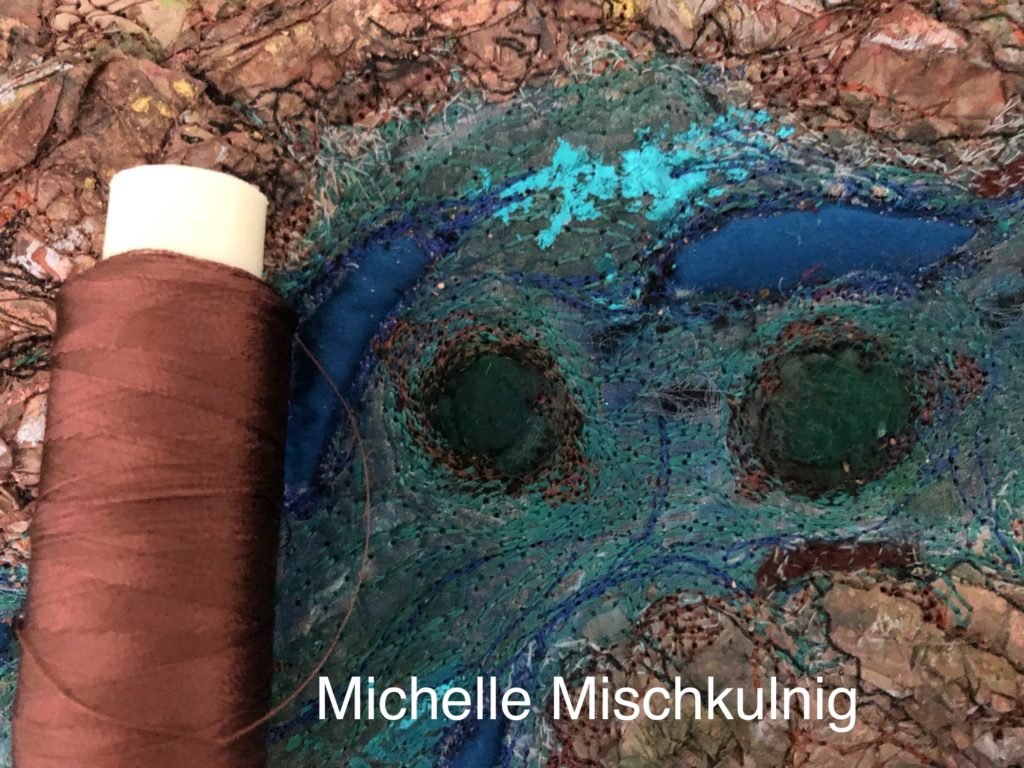
A little hand stitching on the islands to give them some interest and some colour into the sea with fabric pens
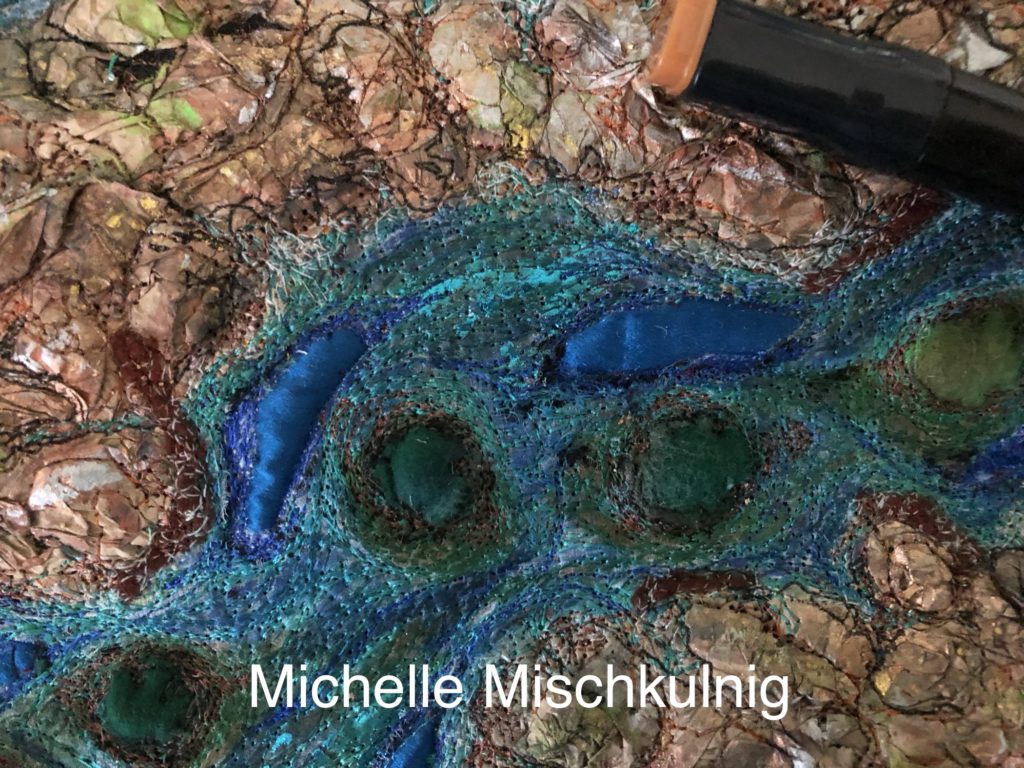
The last step is to paint the paper bag with metallic copper and gold paint, I am using Lumiers and I just gently brush across the surface to catch the raised areas. 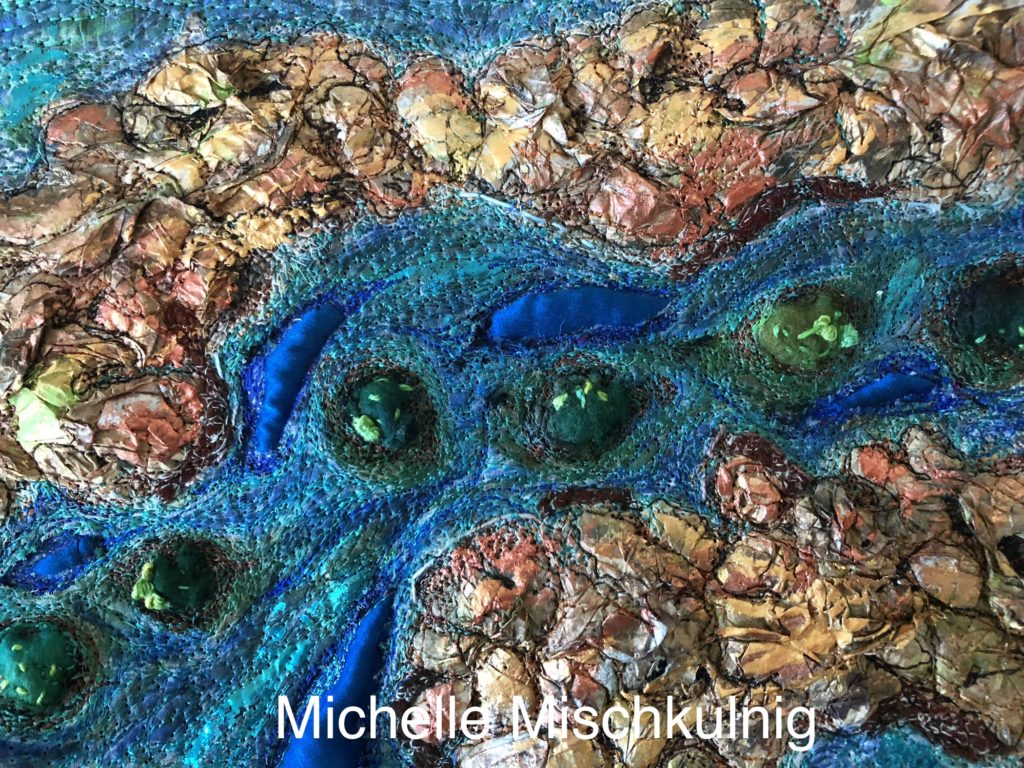
I think it is there loss I understand there is rules and I always acknowledge them but some where I went wrong. Before they banned me I tried to find some where to message them to ask what I could post but alas there was no where. Life is too short not to take a risk LOL its really funny , thanks for your support as always you creative soul.
Michelle, love this! I am sorry about the FB page. I just got my first warning also. No worries though I would follow all your beautiful work. Great tutorial and some day I am going to try this! Thank you for sharing your process.
Thanks Wendy paper bags have infinite possibilities.
Thank you so much for sharing this wonderful technique. I will never look at a paper bag the same again. Yum.
Thanks Claire have fun if you try it and do share what you come up with
Michelle, I love, love this piece. Thank you for a great tutorial. So easy to understand. ?. Fabulous texture and composition.