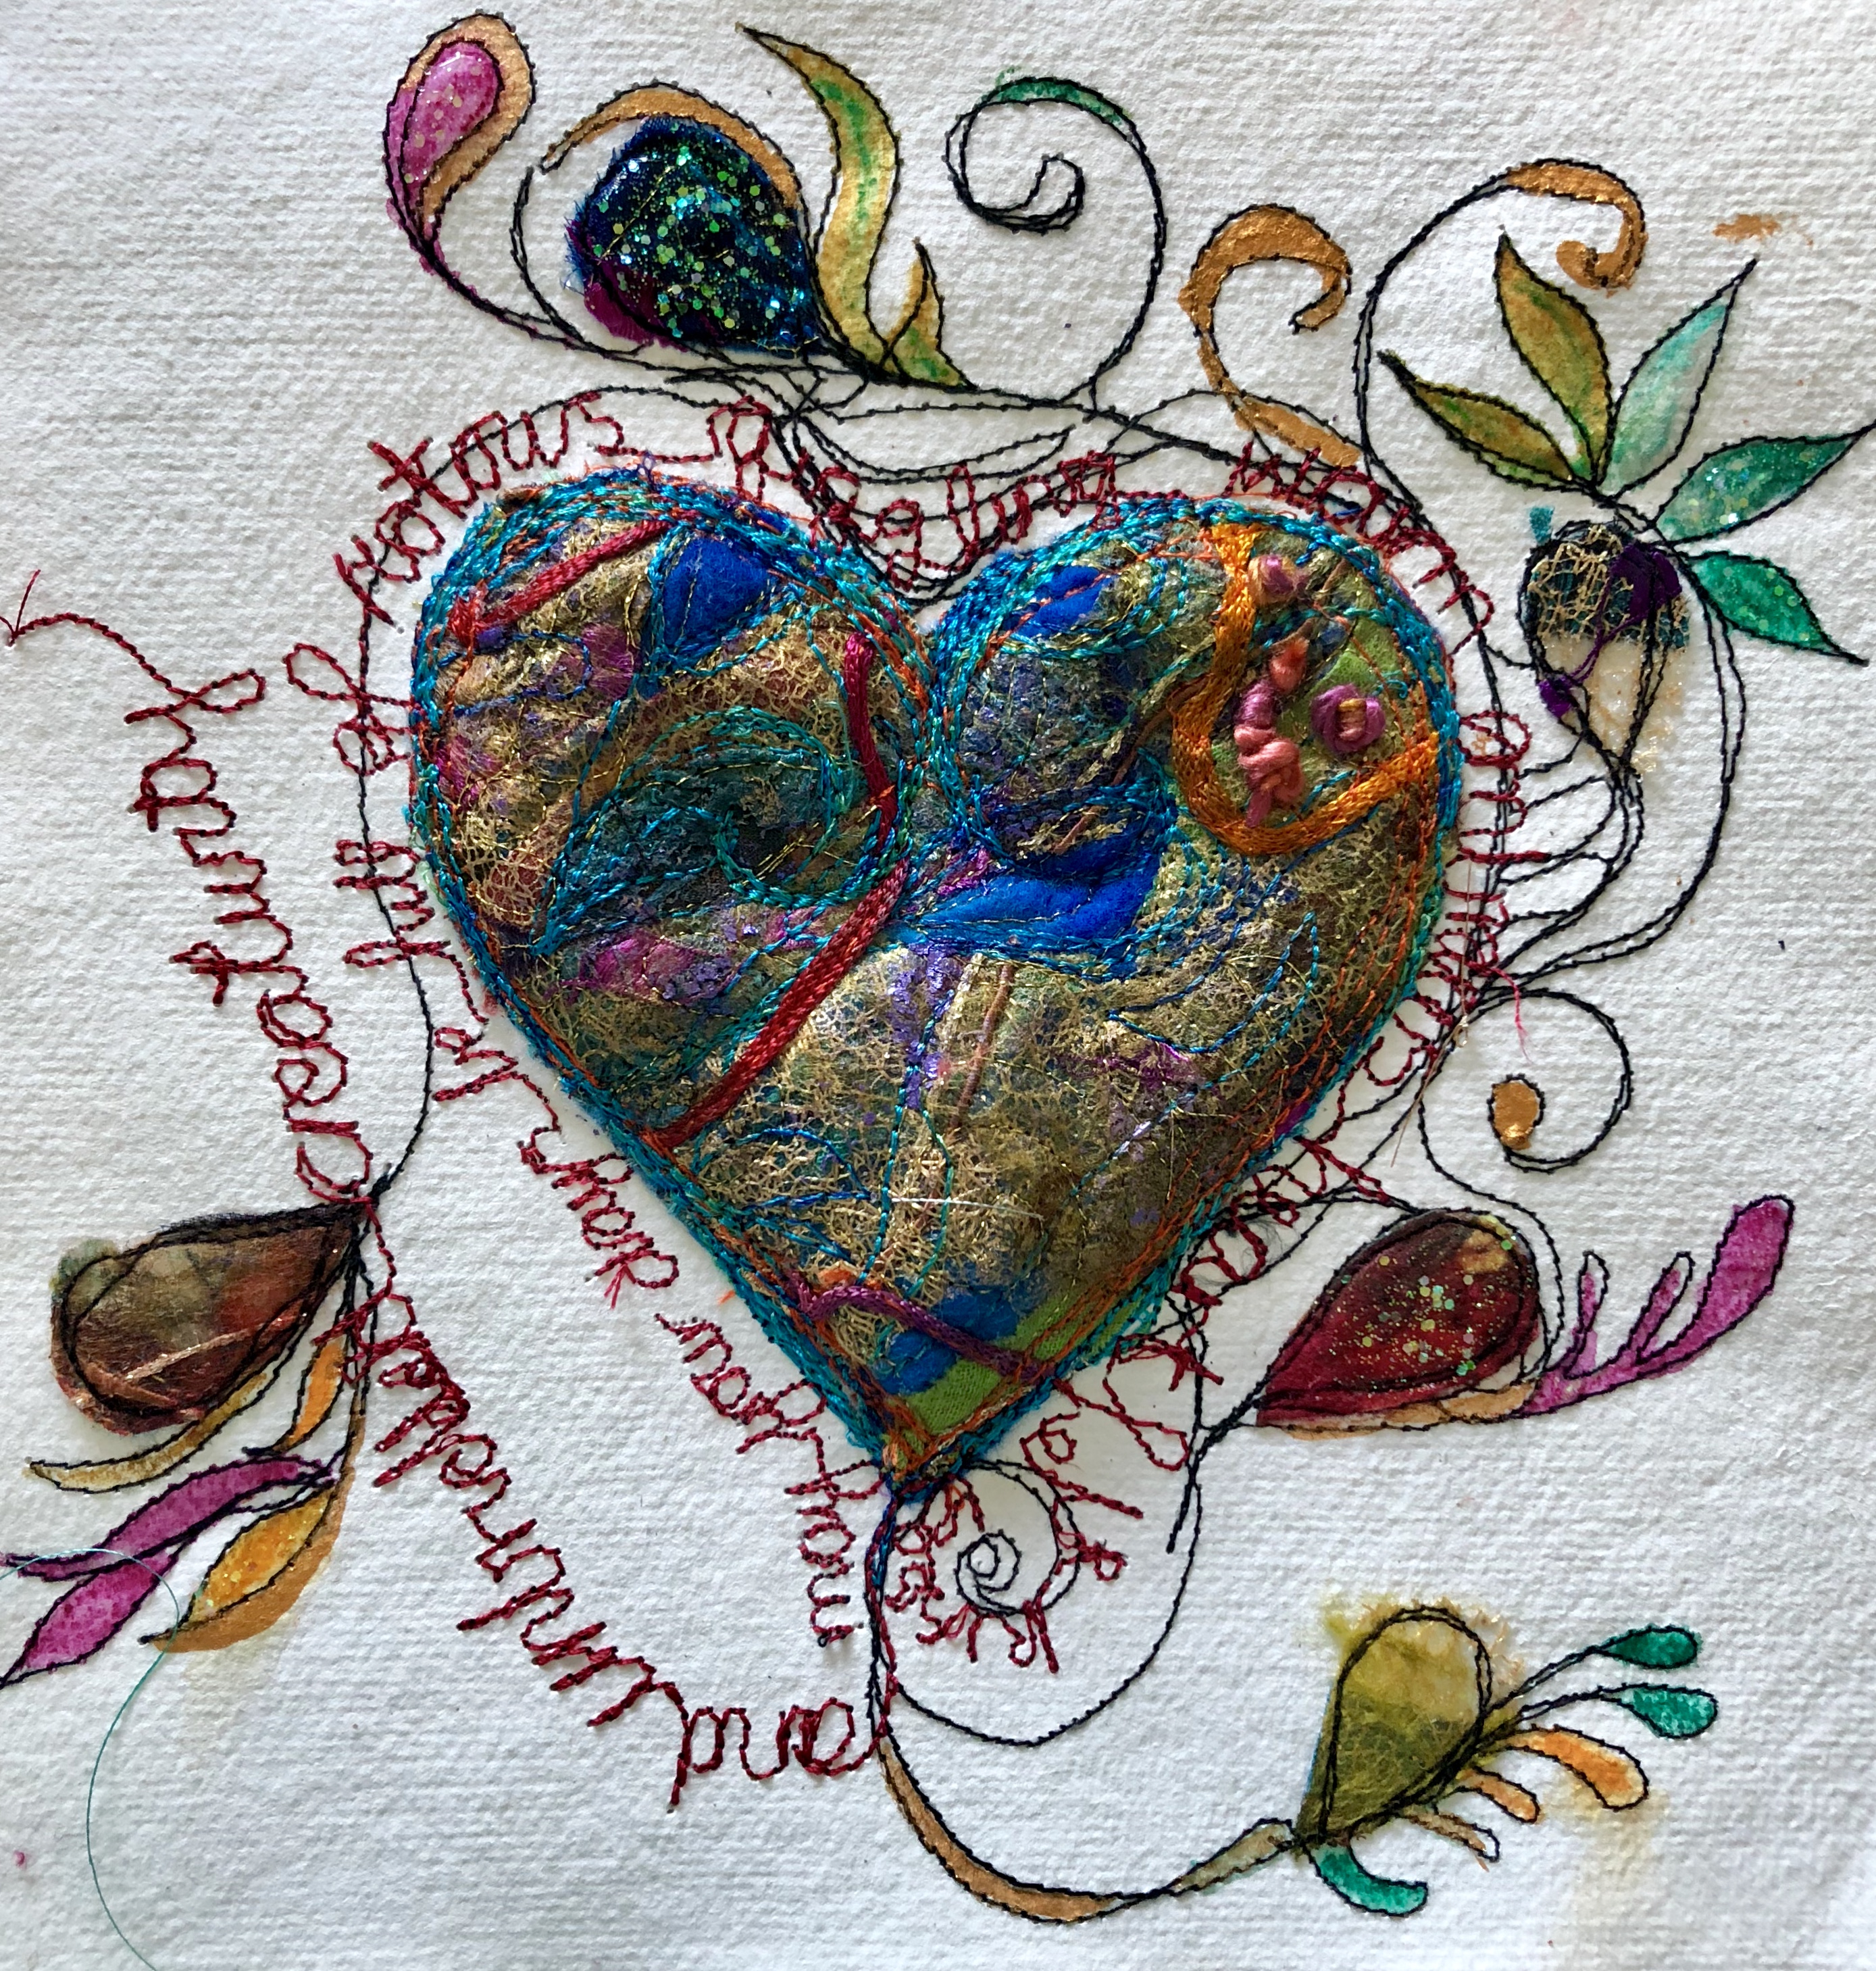
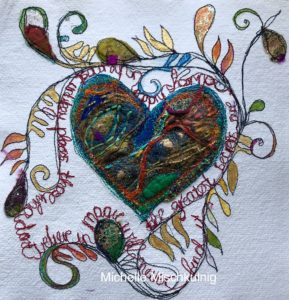
Heart felt
Creativity doesn’t wait for its one perfect moment. It fashions its own perfect moments out of ordinary ones – Bruce Garrabrandt
Welcome back ! and hello, I have been away from my blog for a long time filling my days and hours with much creativity, seeing beautiful places and meeting wonderful creatives.
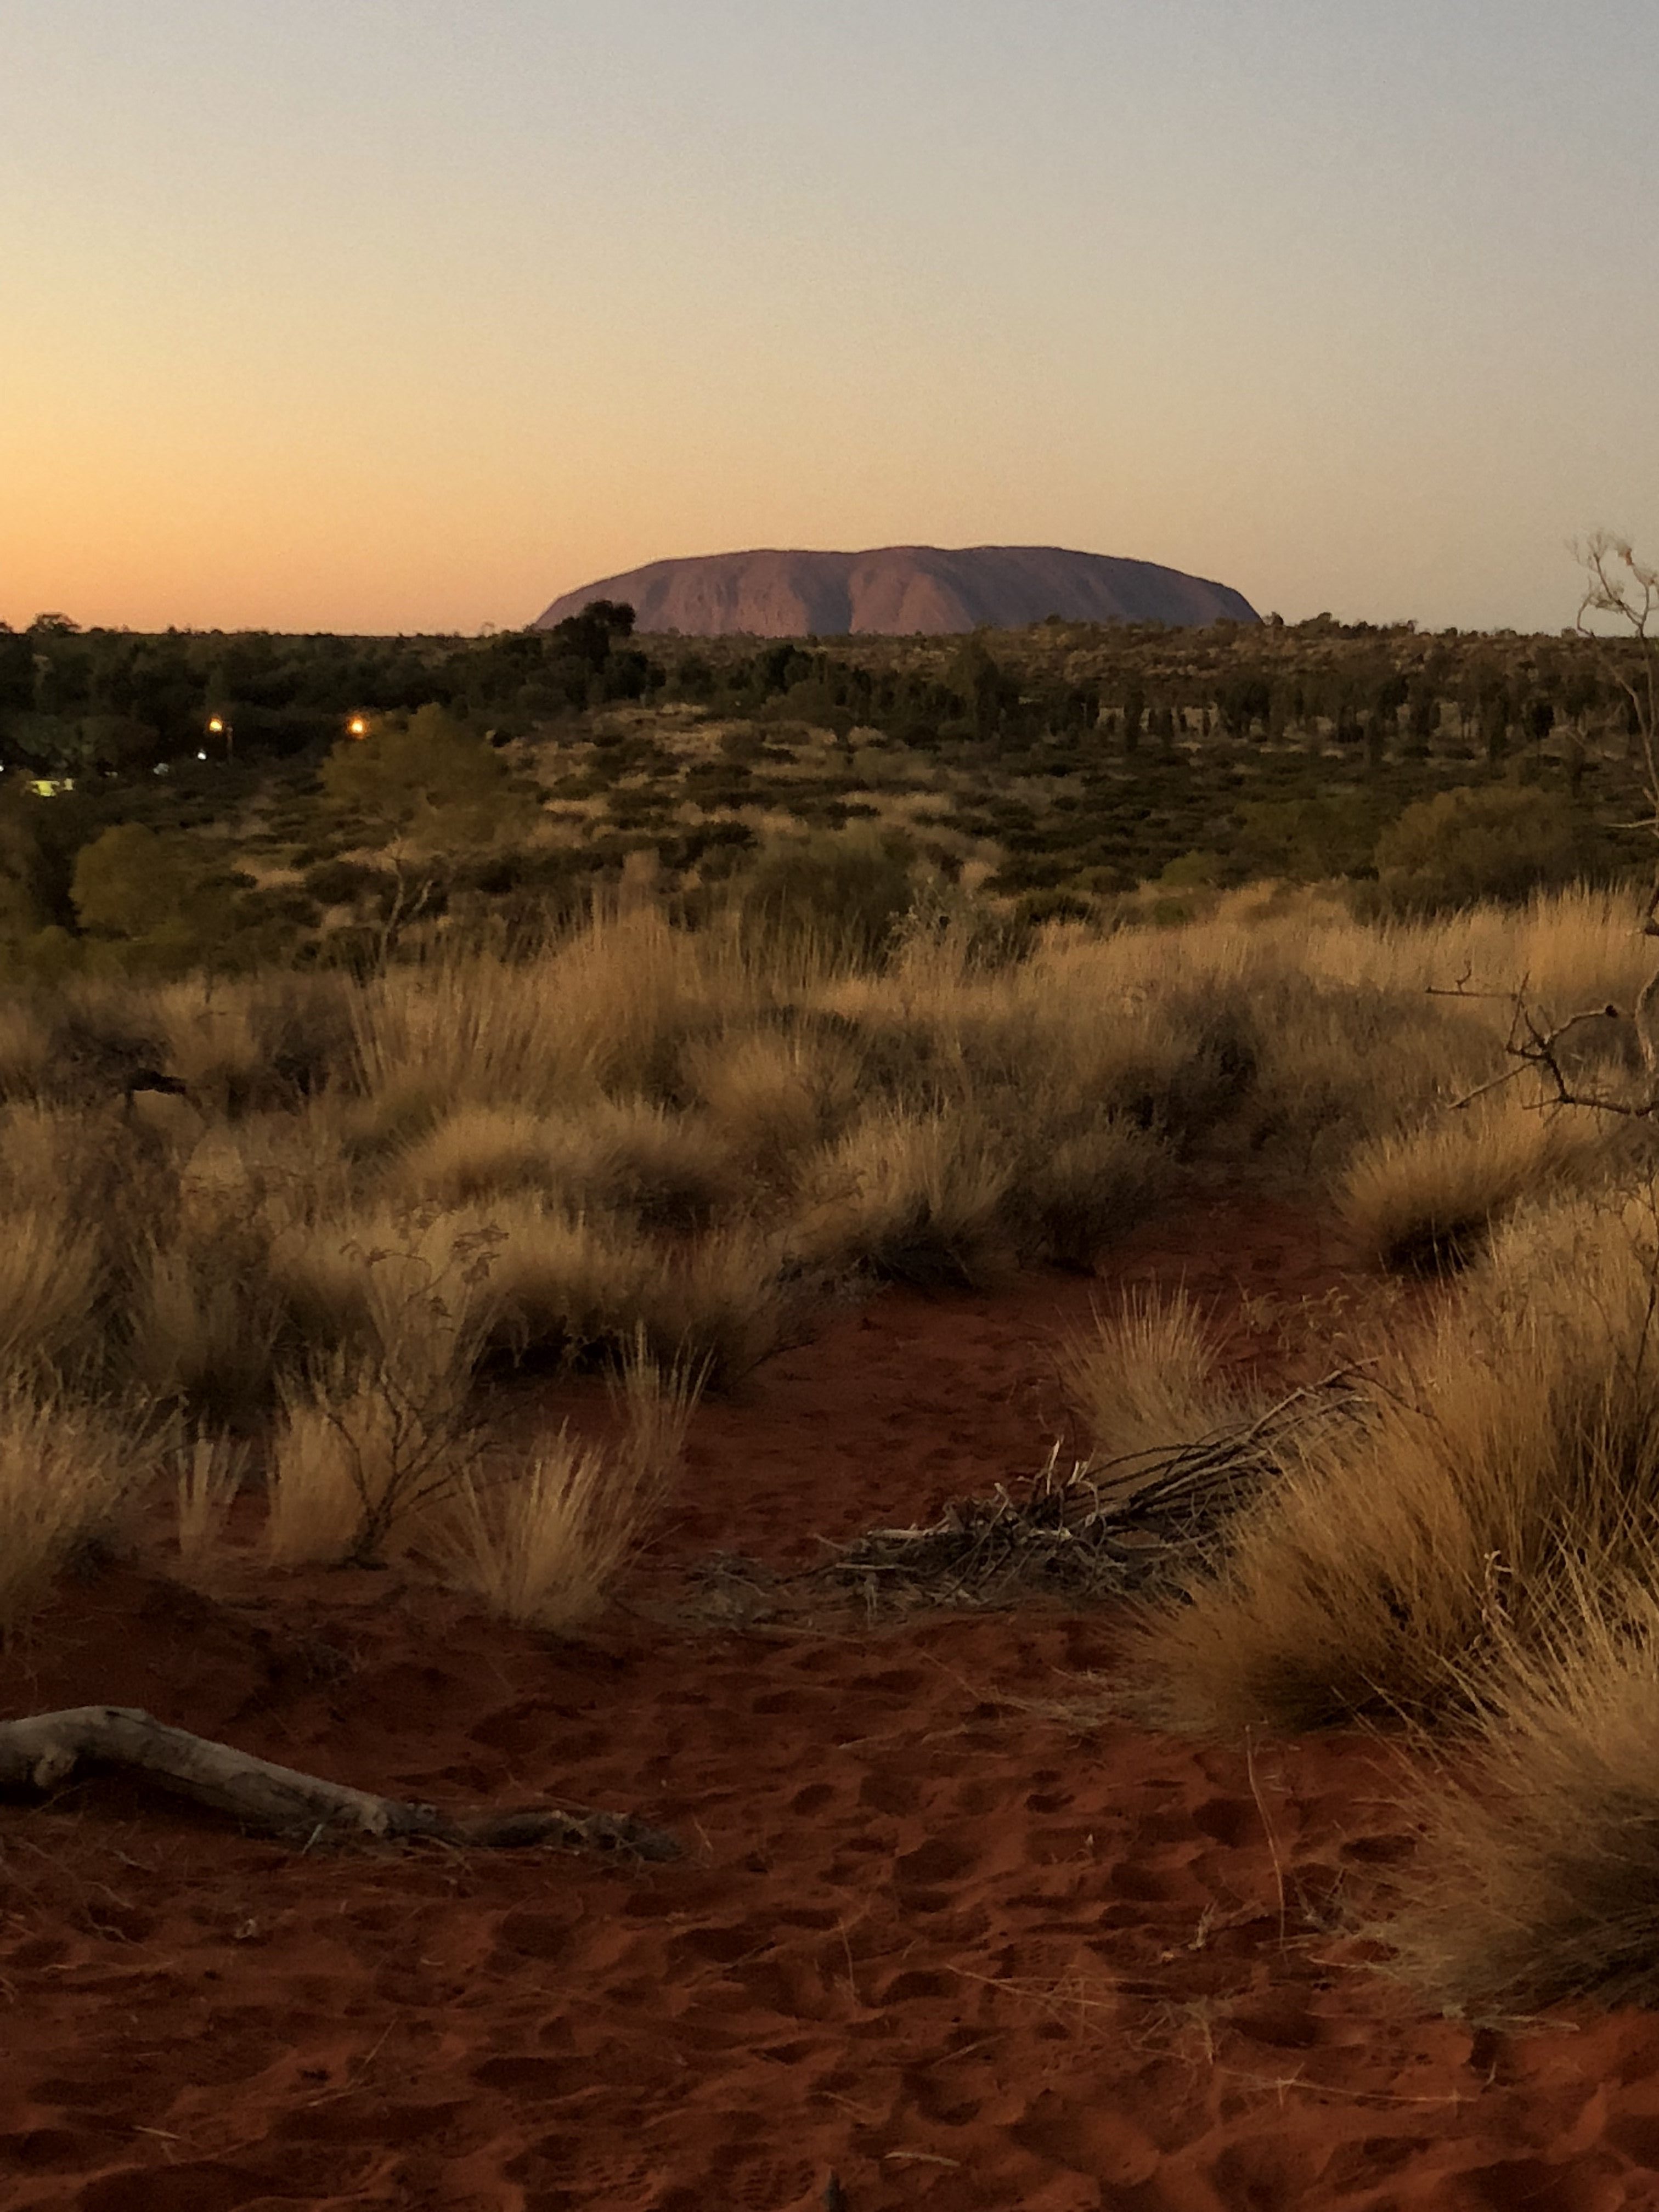
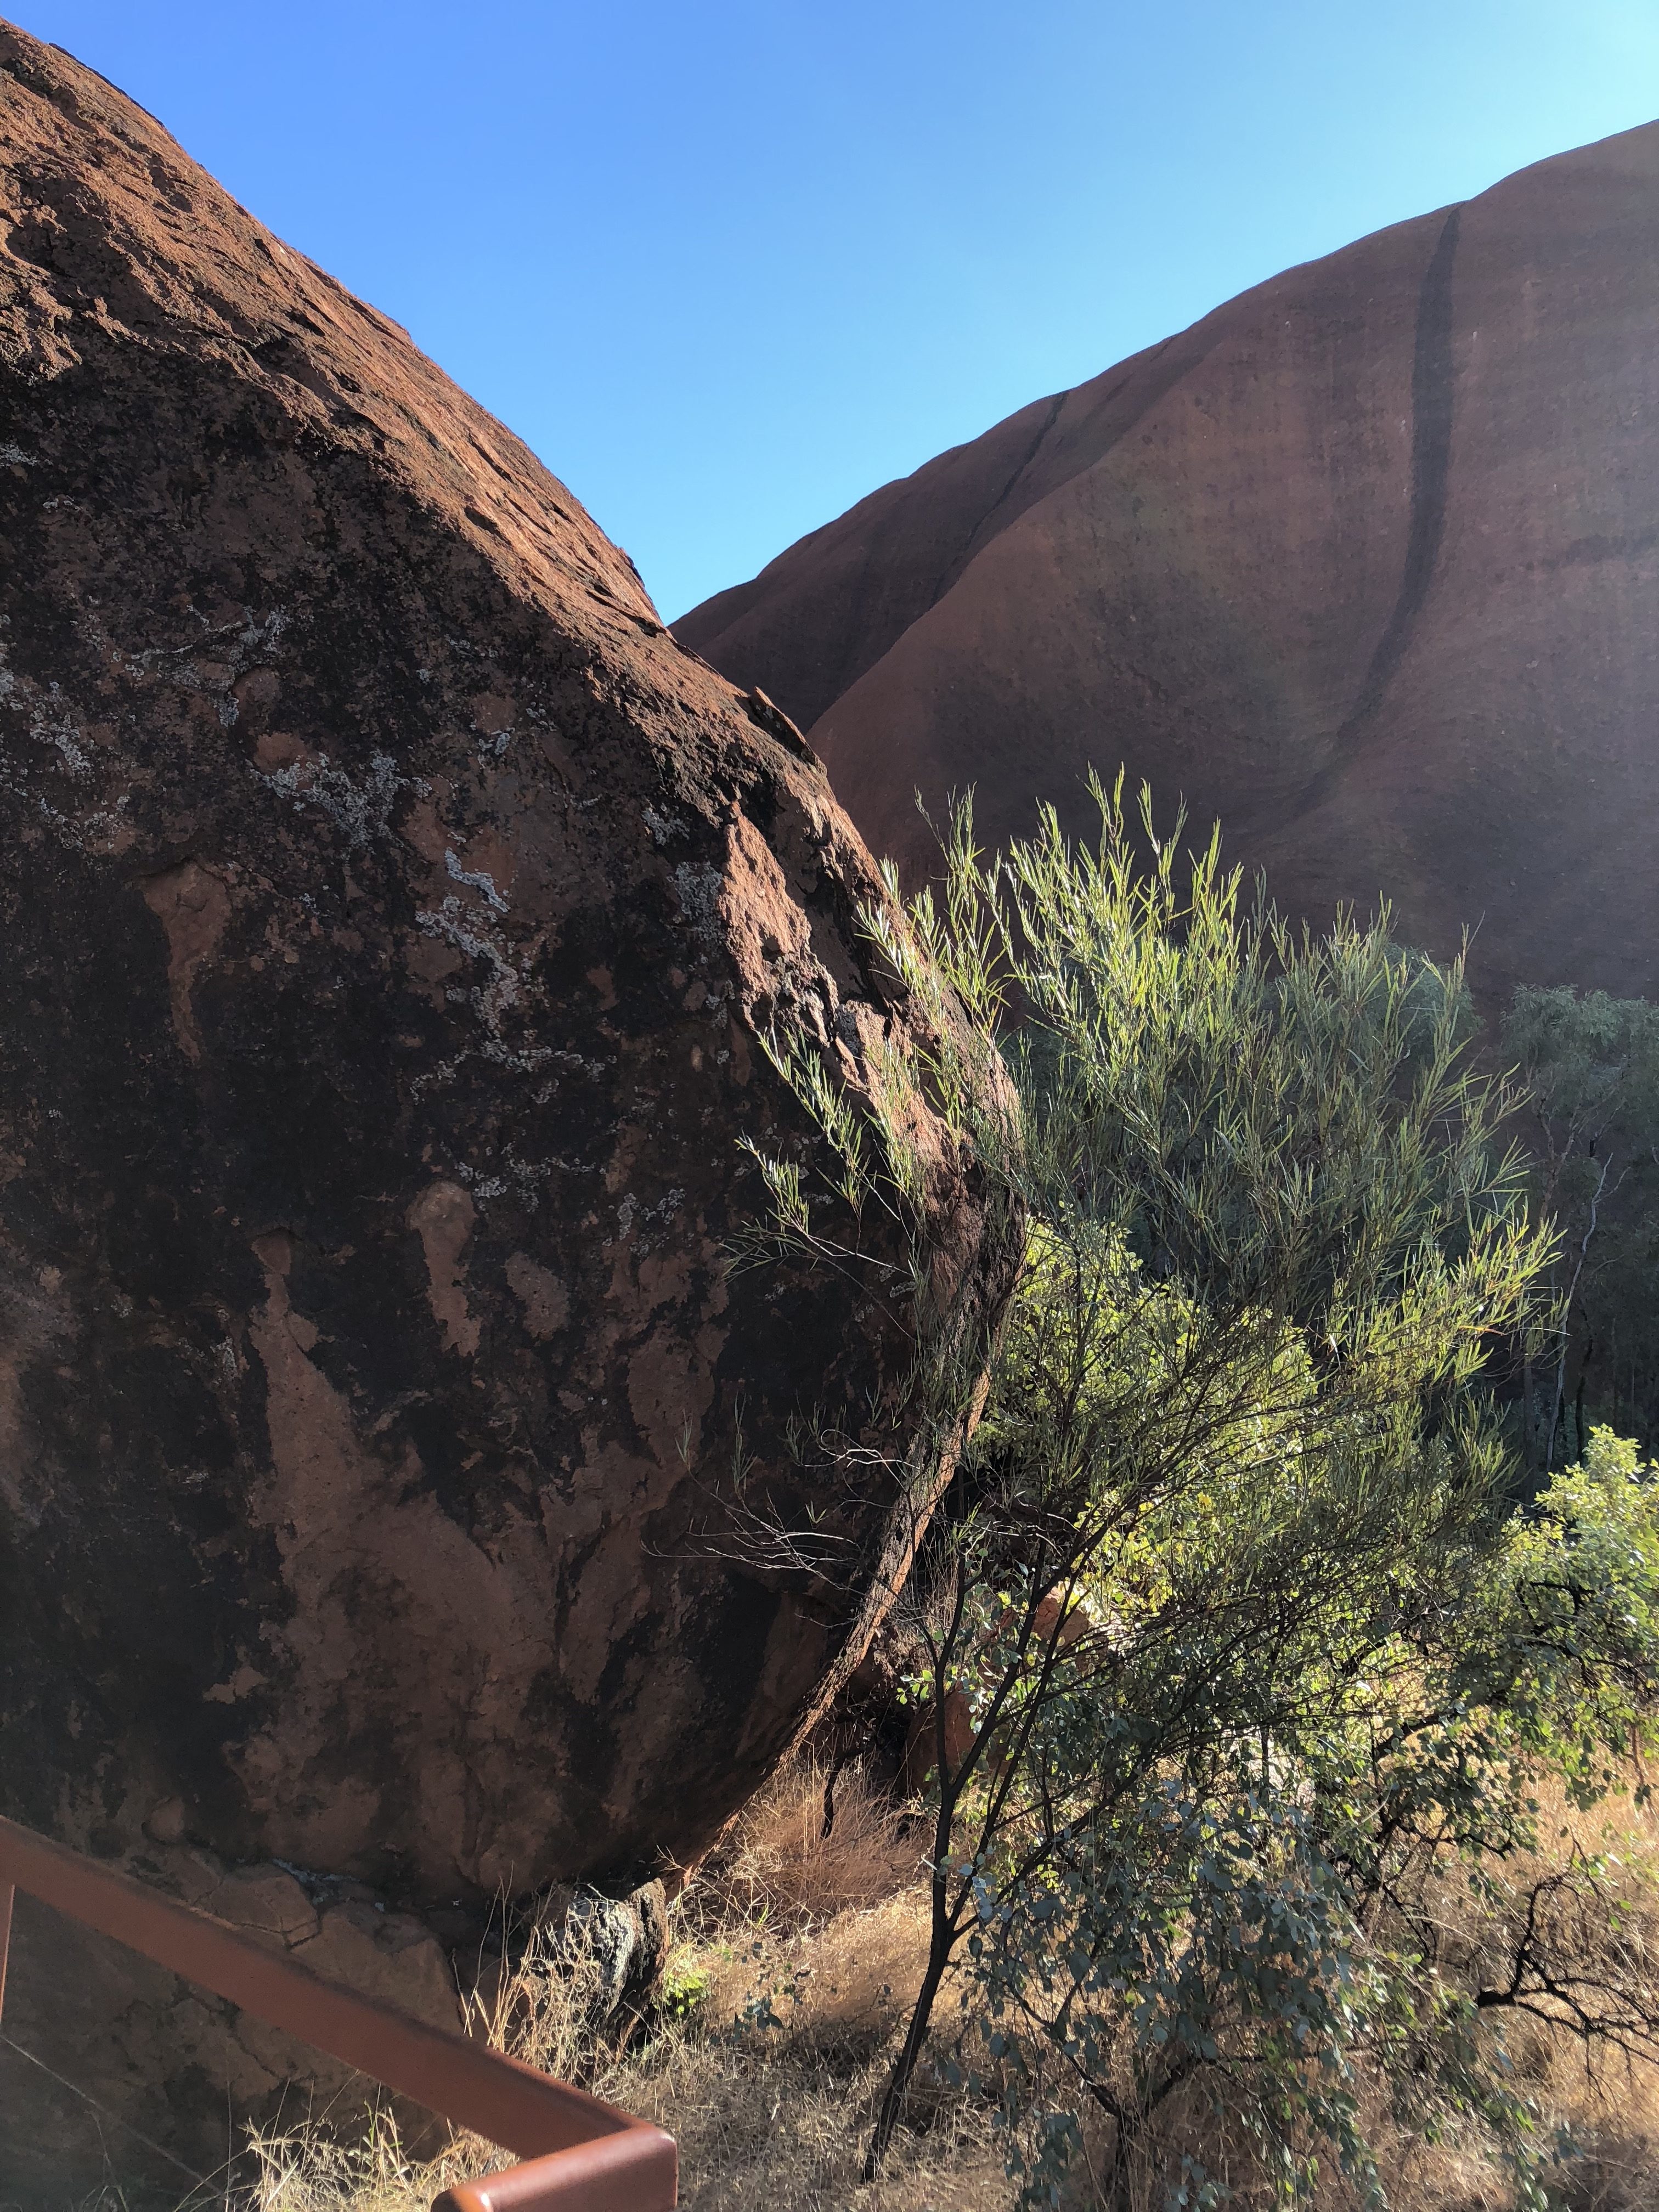
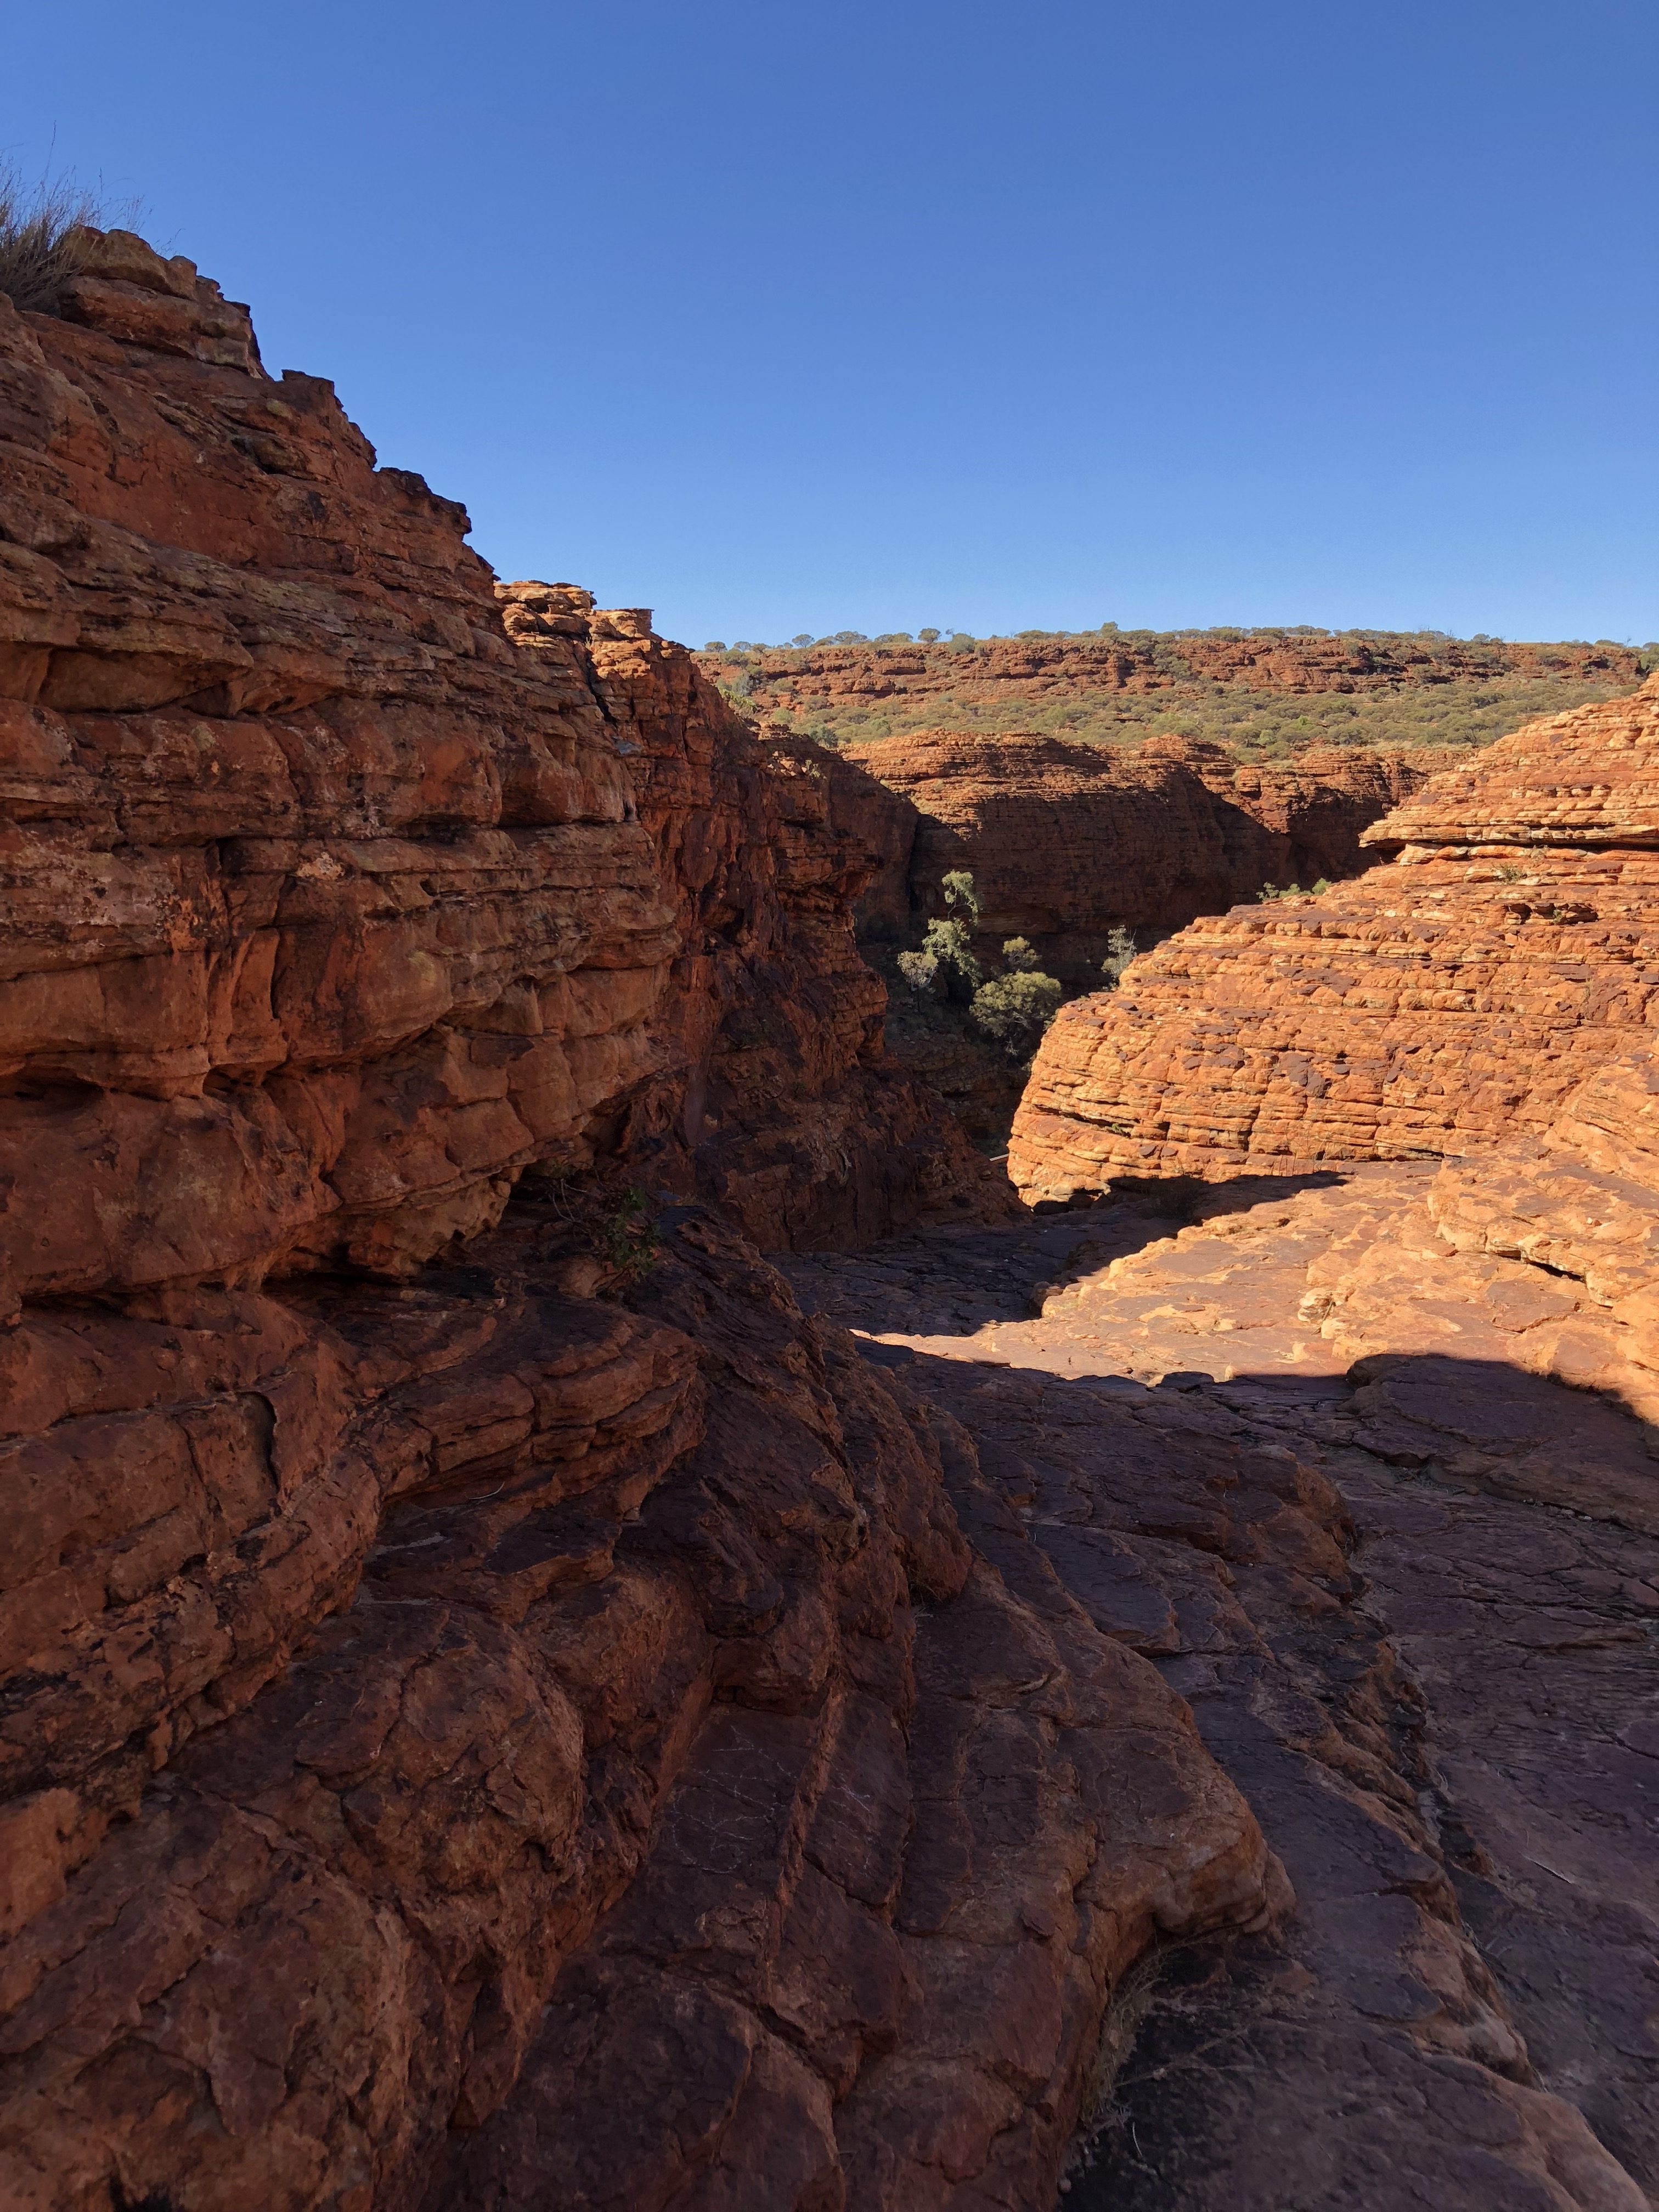
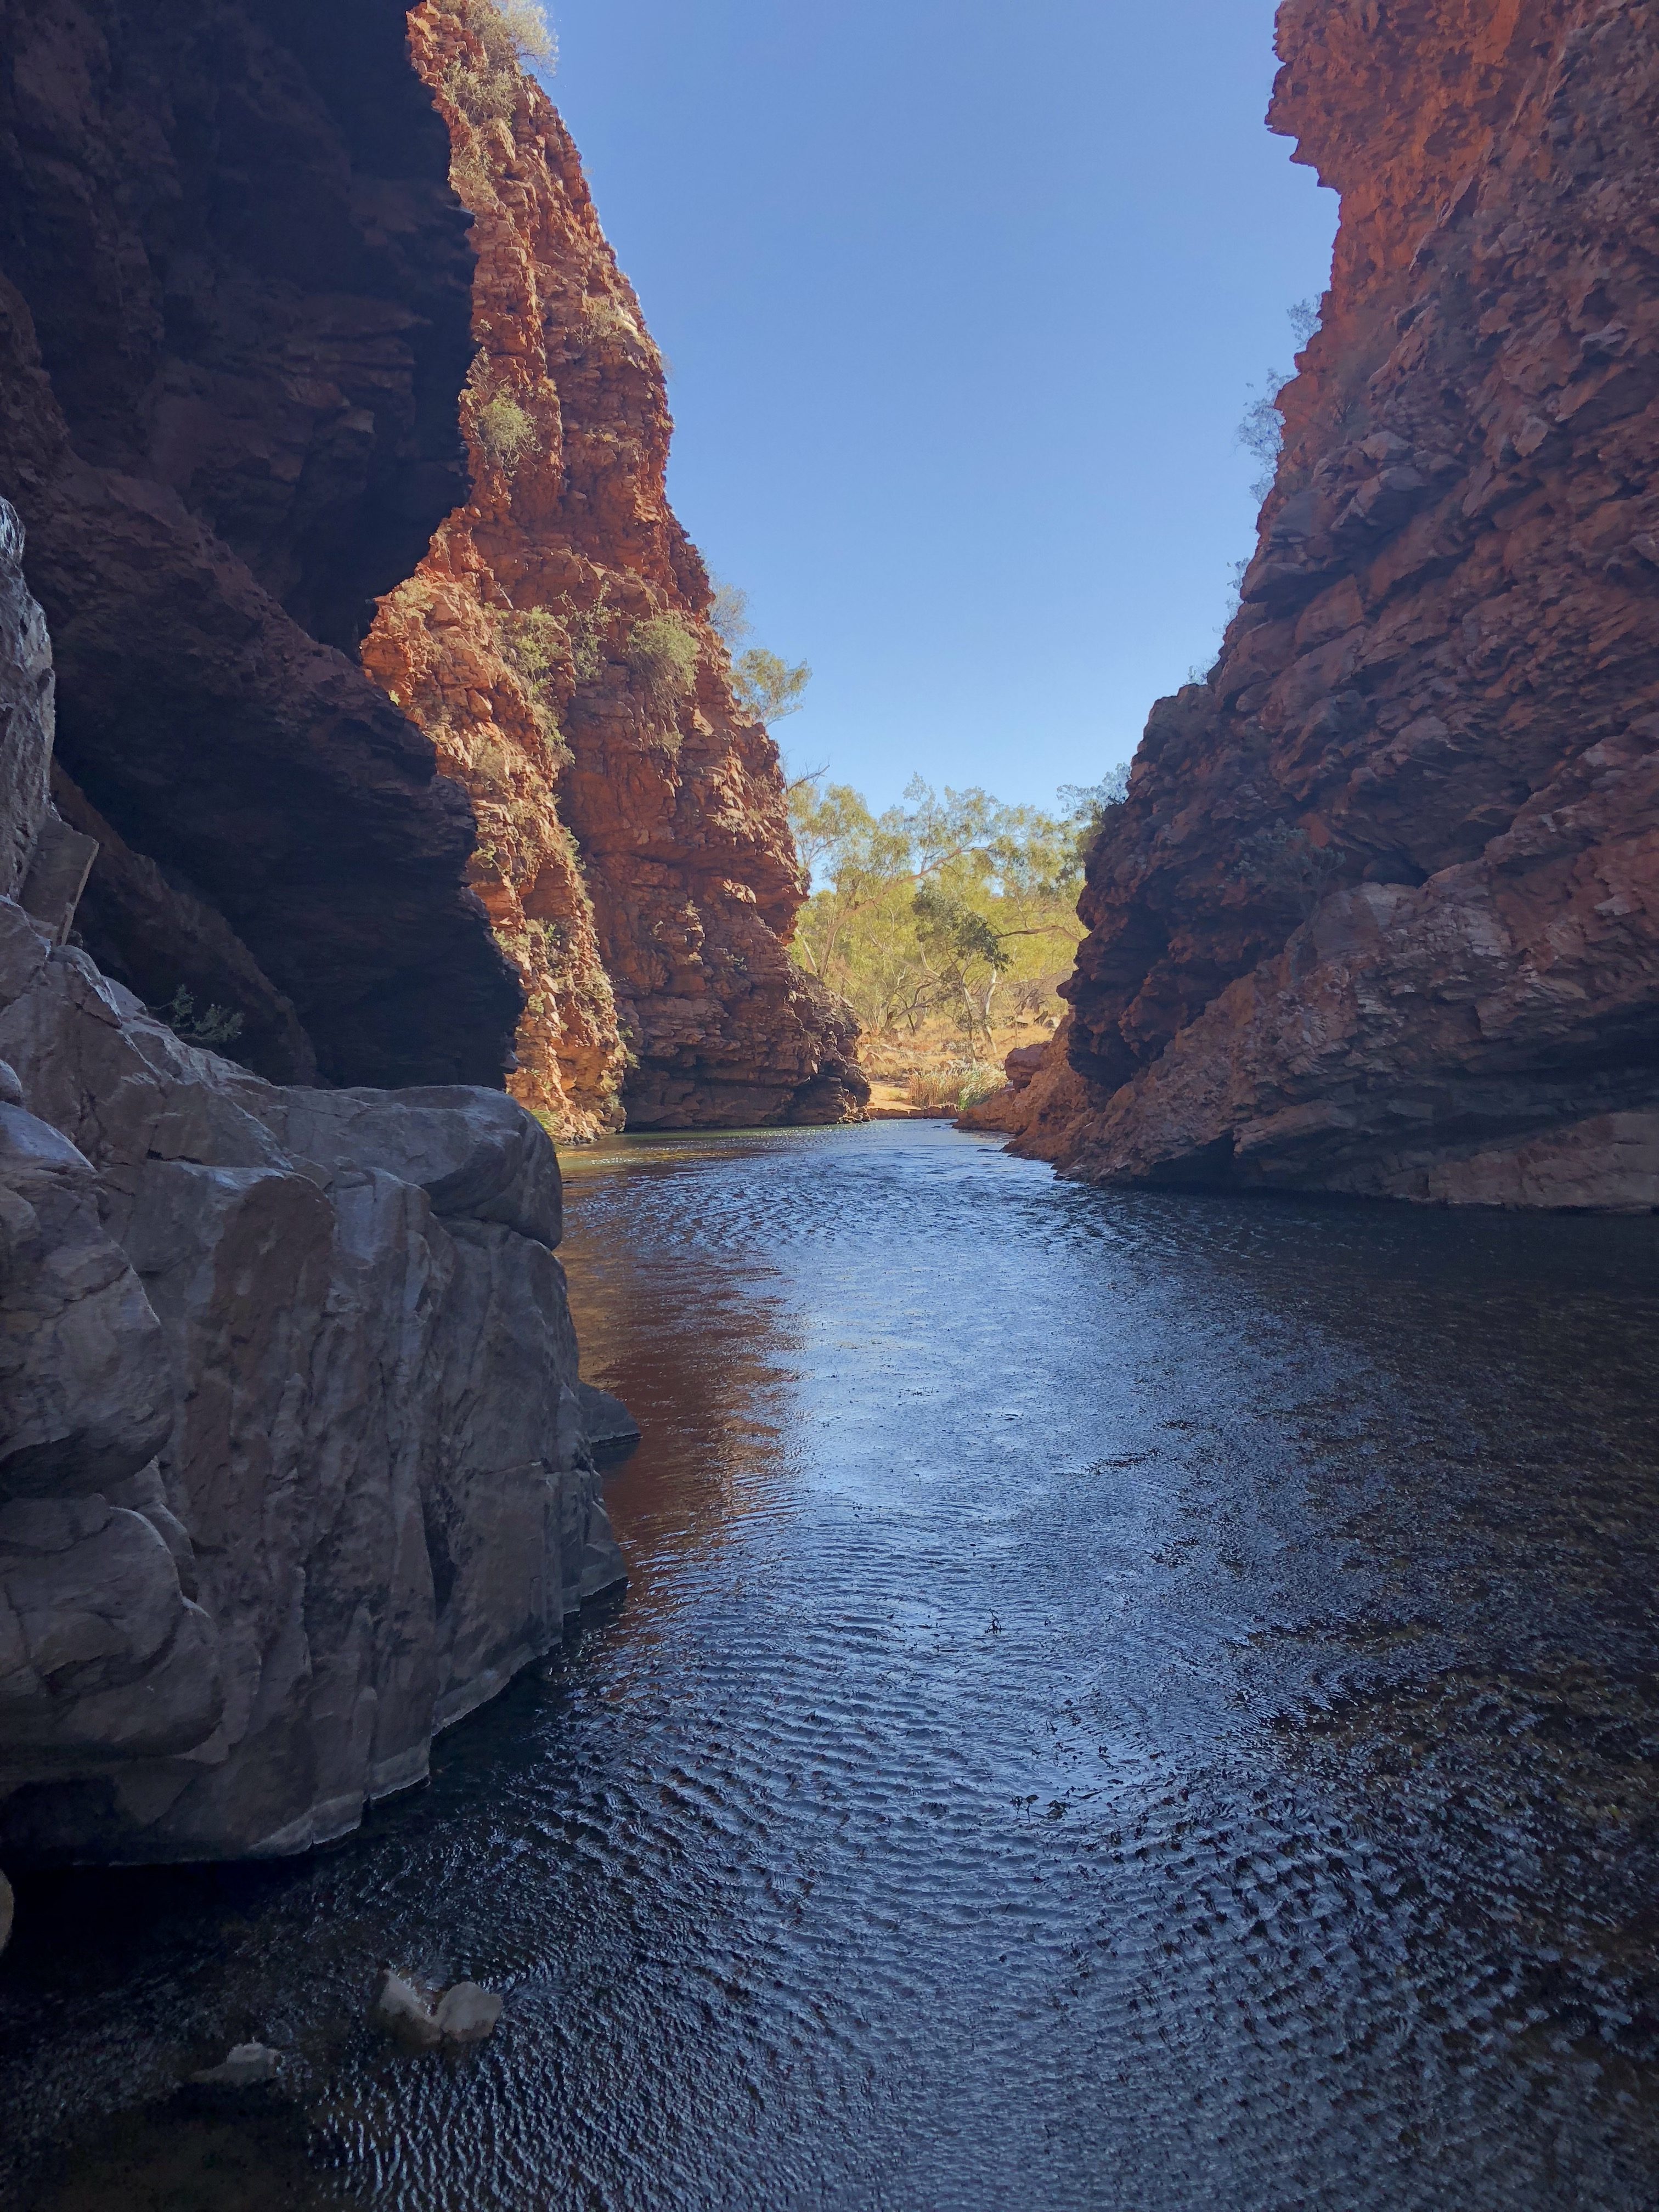
I was very privileged to be a tutor at Uluru “Sewing up a Desert Storm” this was an amazing experience. The retreat was fantabulos, great food, great classrooms and experiences beyond the classroom. I am including some images for you of the landscapes which are breathtaking and incredibly inspiring ( future art works plans :-) ) This retreat is being planned again for 2020 I am not sure who the tutors will be but if you are interested keep your eye on this page https://www.textileartworkshopsonline.com
Dont worry the instructions for the heart project are further down the blog ;-)
Uluru and Northern Territory


I have taught at Threads and Tangles, Langwarrin Victoria and I have been representing Bernina at some of the Craft and Quilt fairs around Australia. I will be at the Brisbane Craft and Quilt Fair this week on the Bernina stand https://www.google.com/search?client=safari&rls=en&q=brisbane+craft+and+quilt+fair+2018&ie=UTF-8&oe=UTF-8
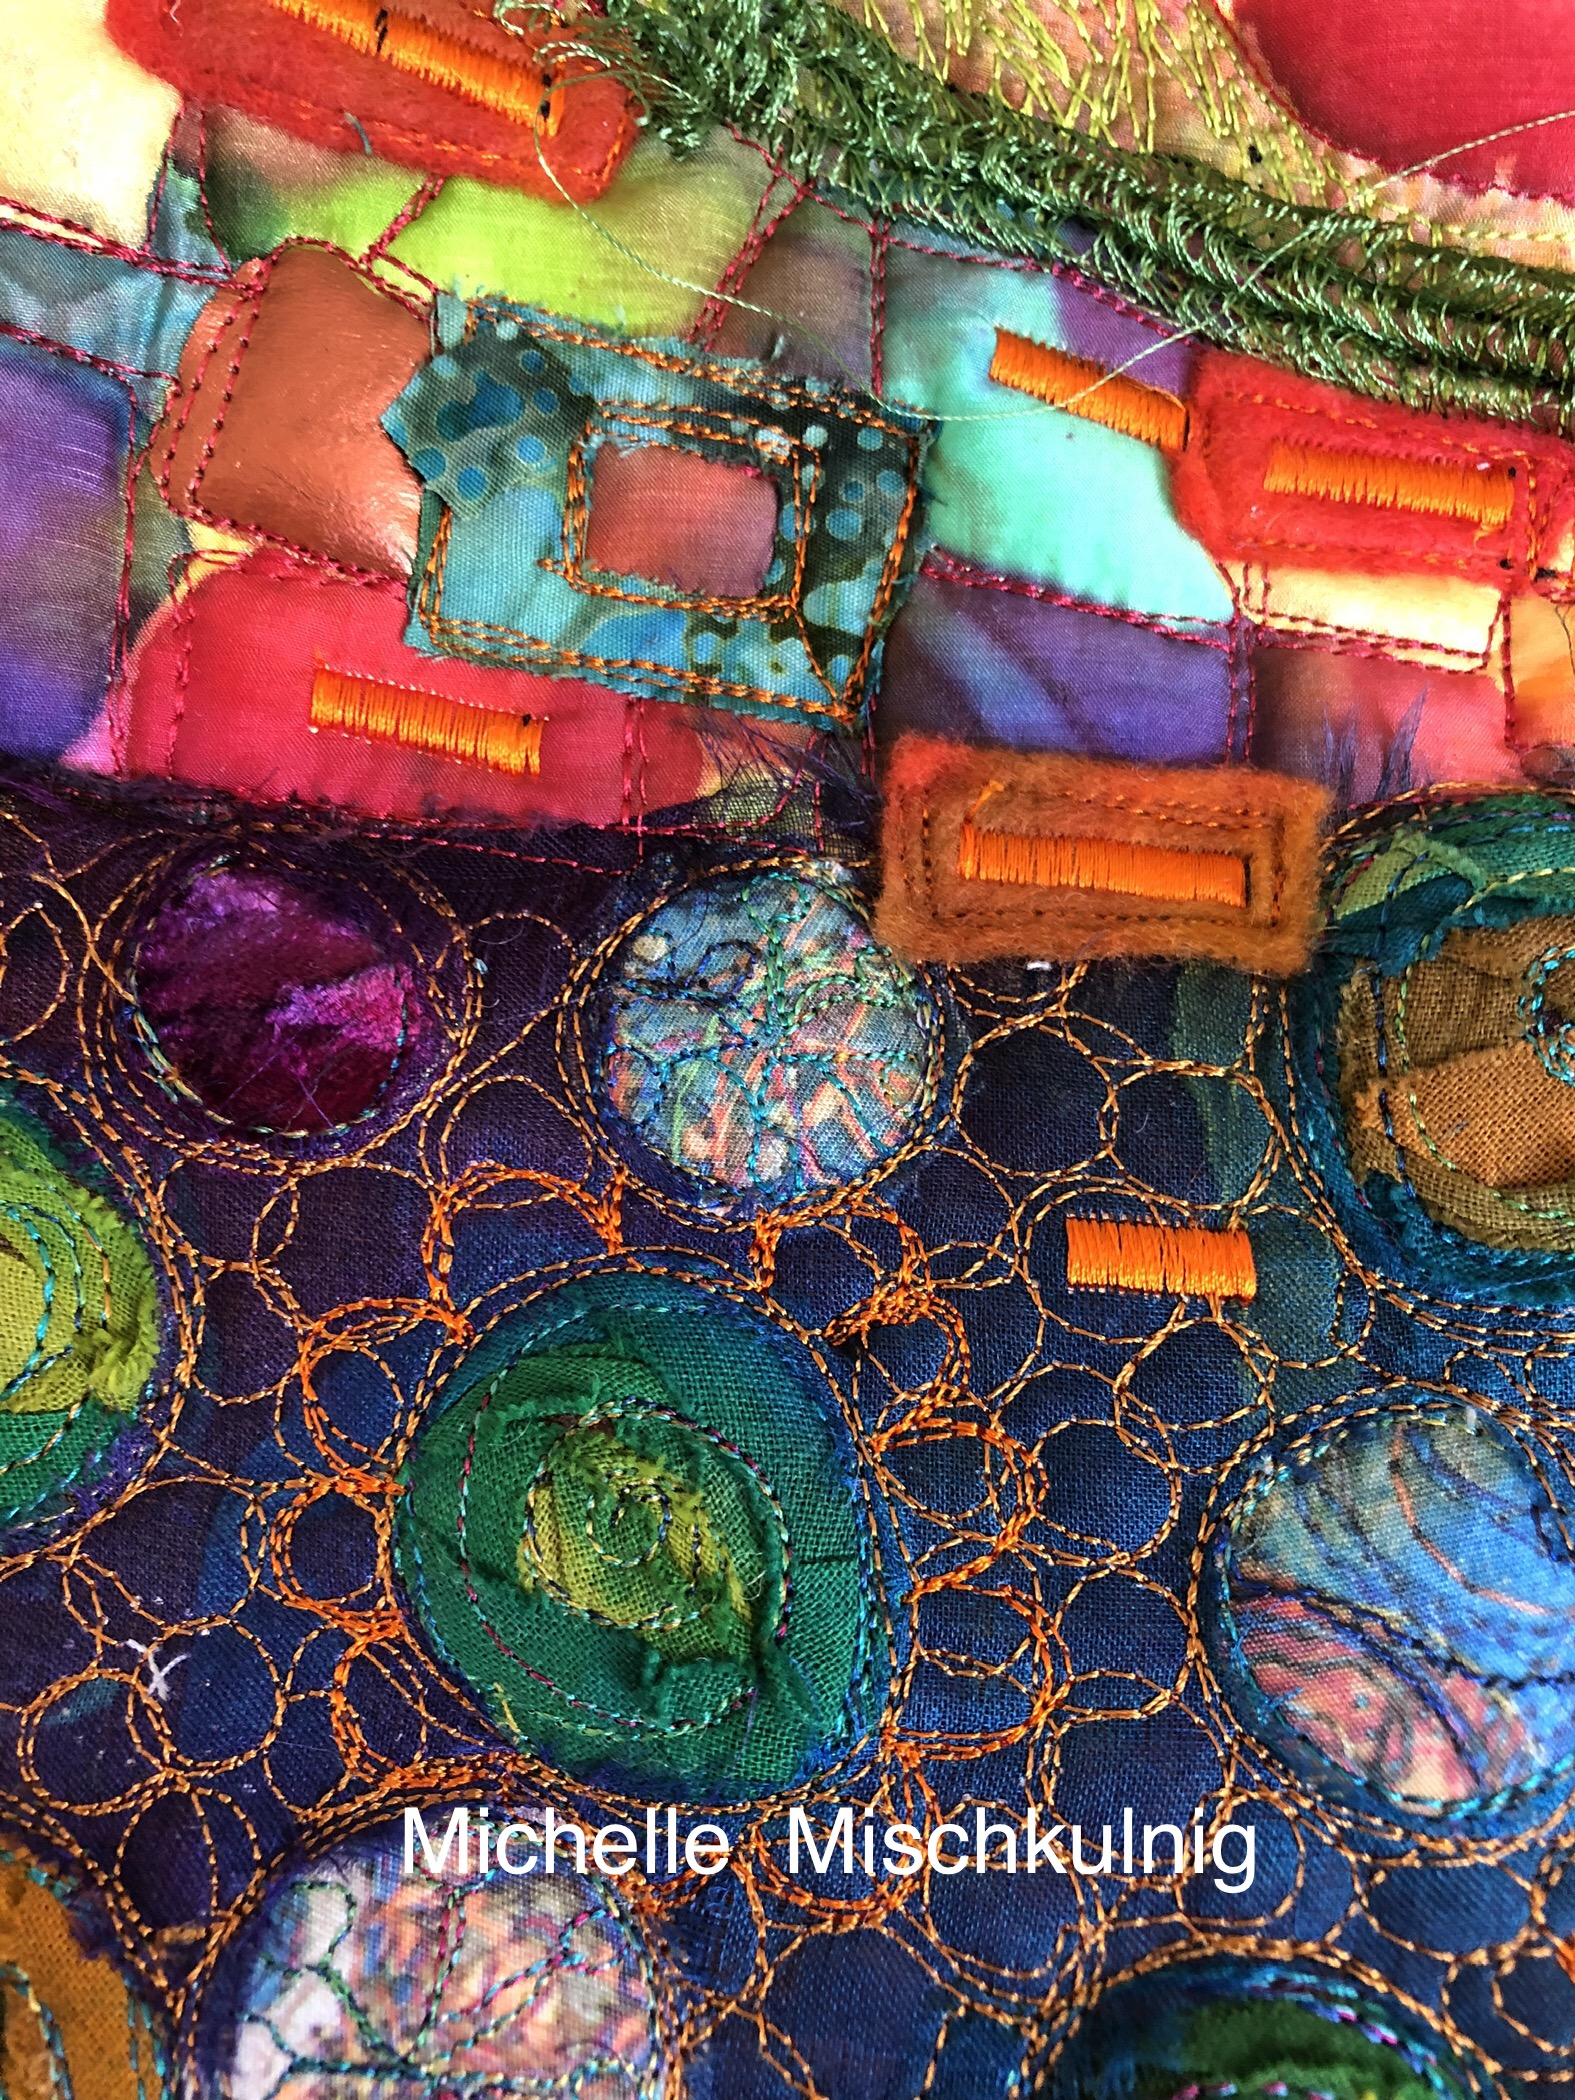
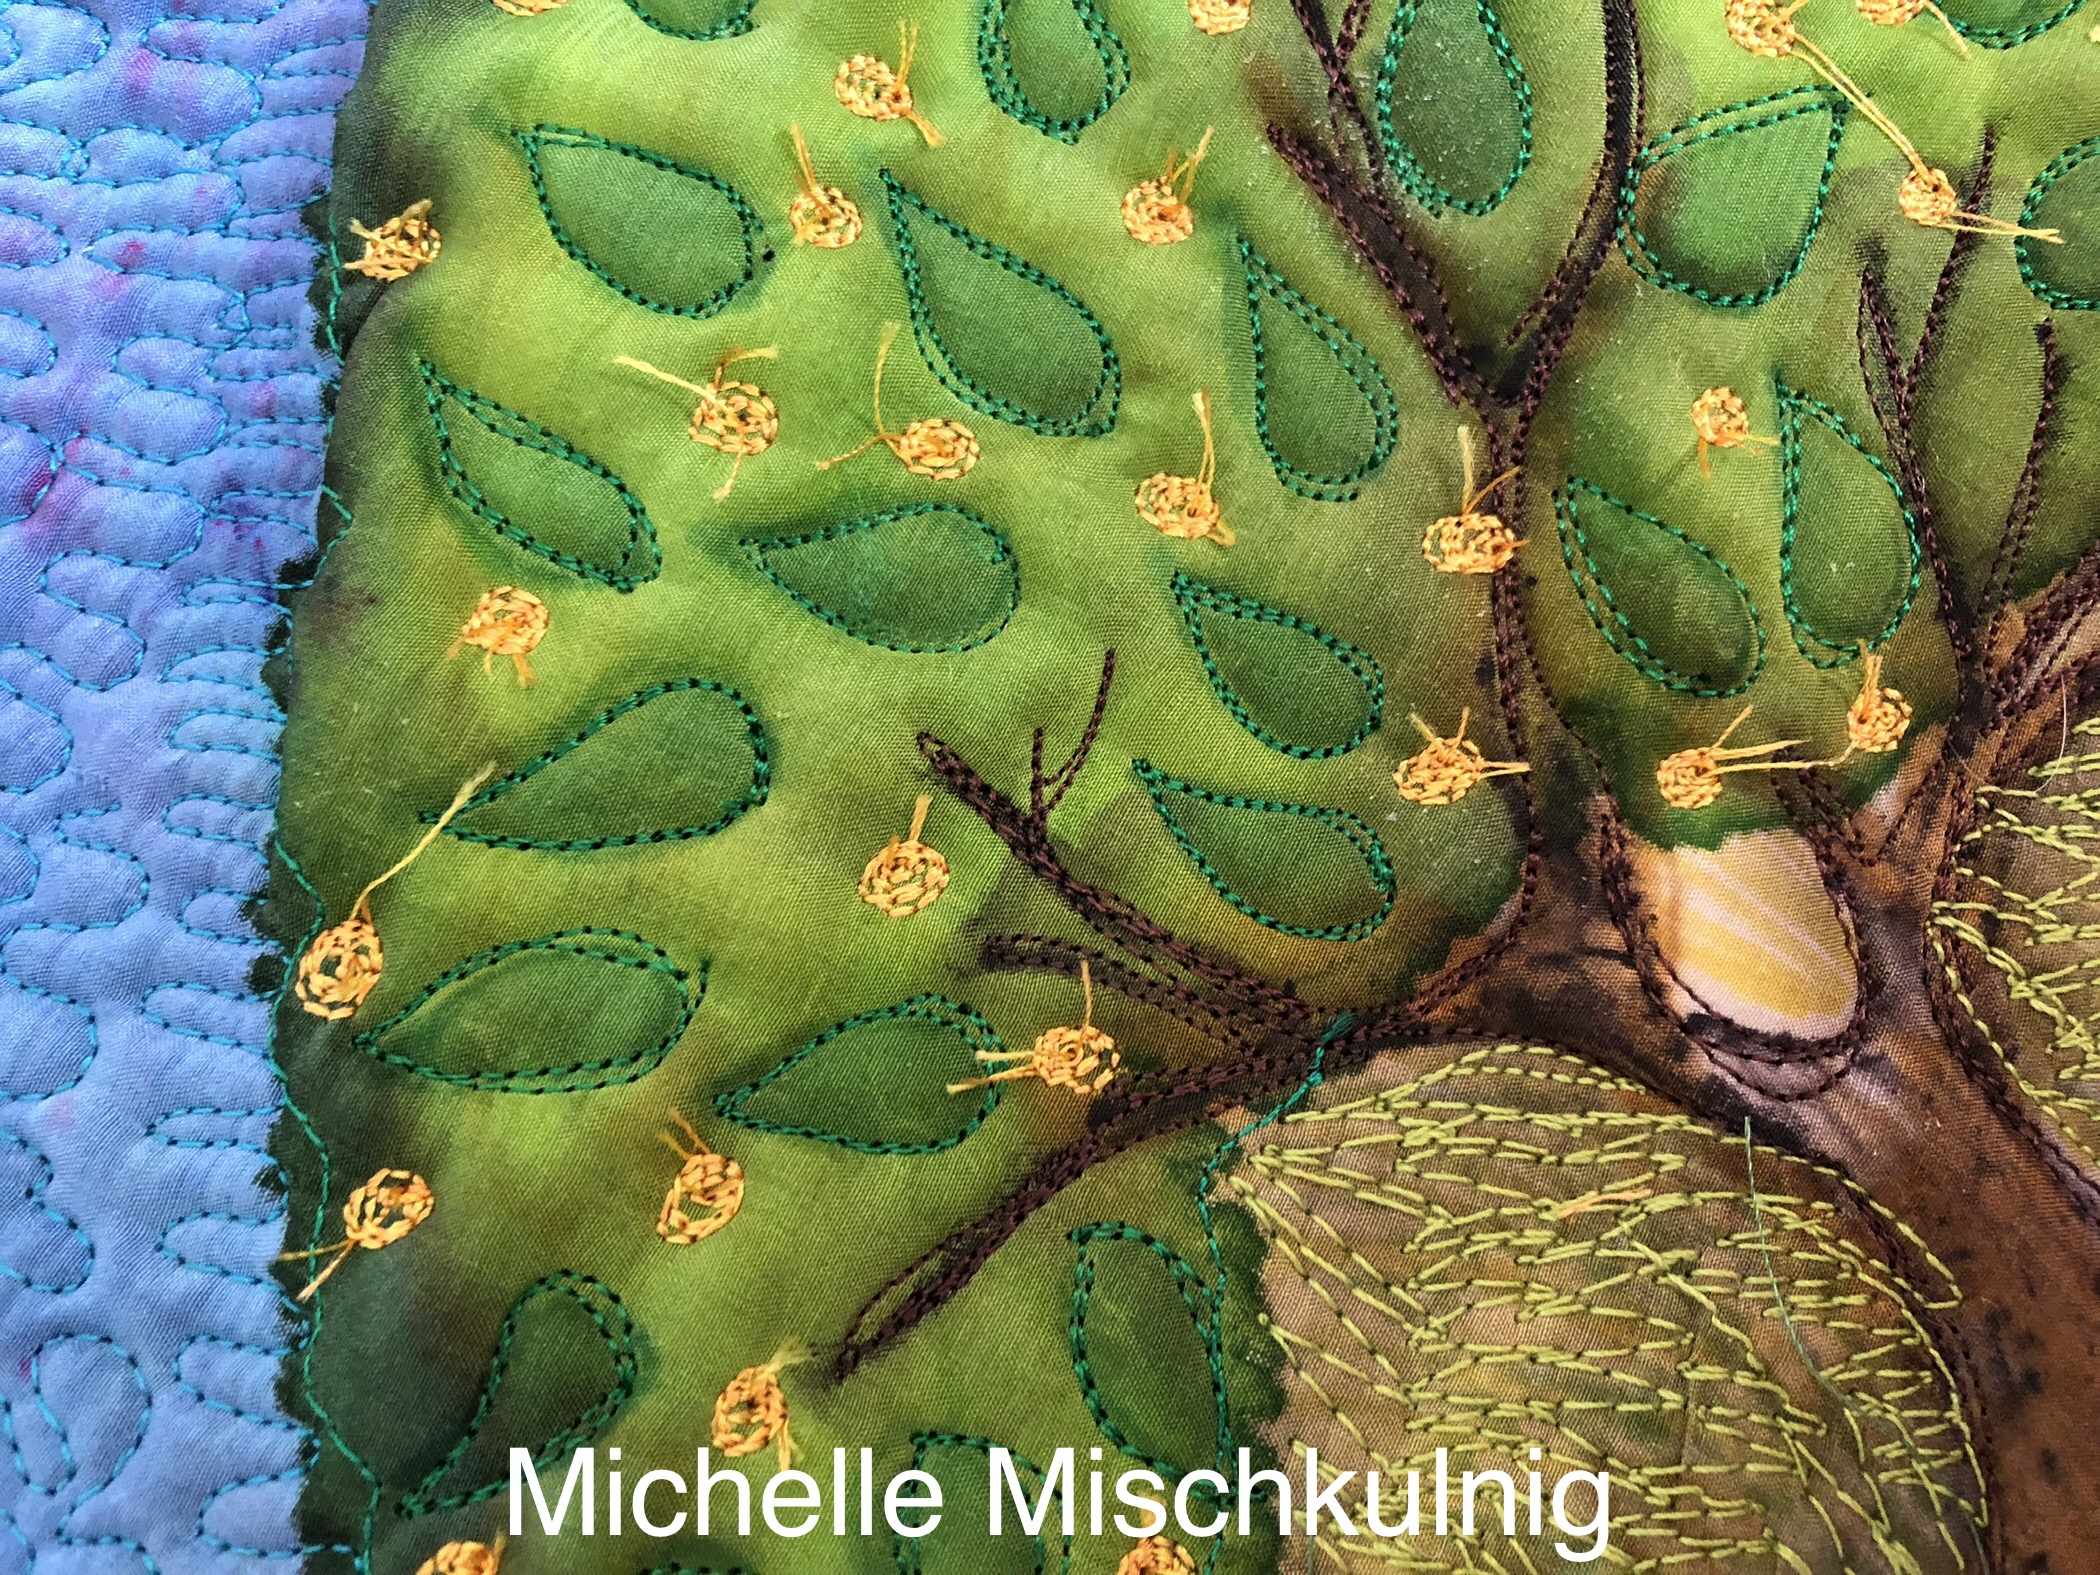
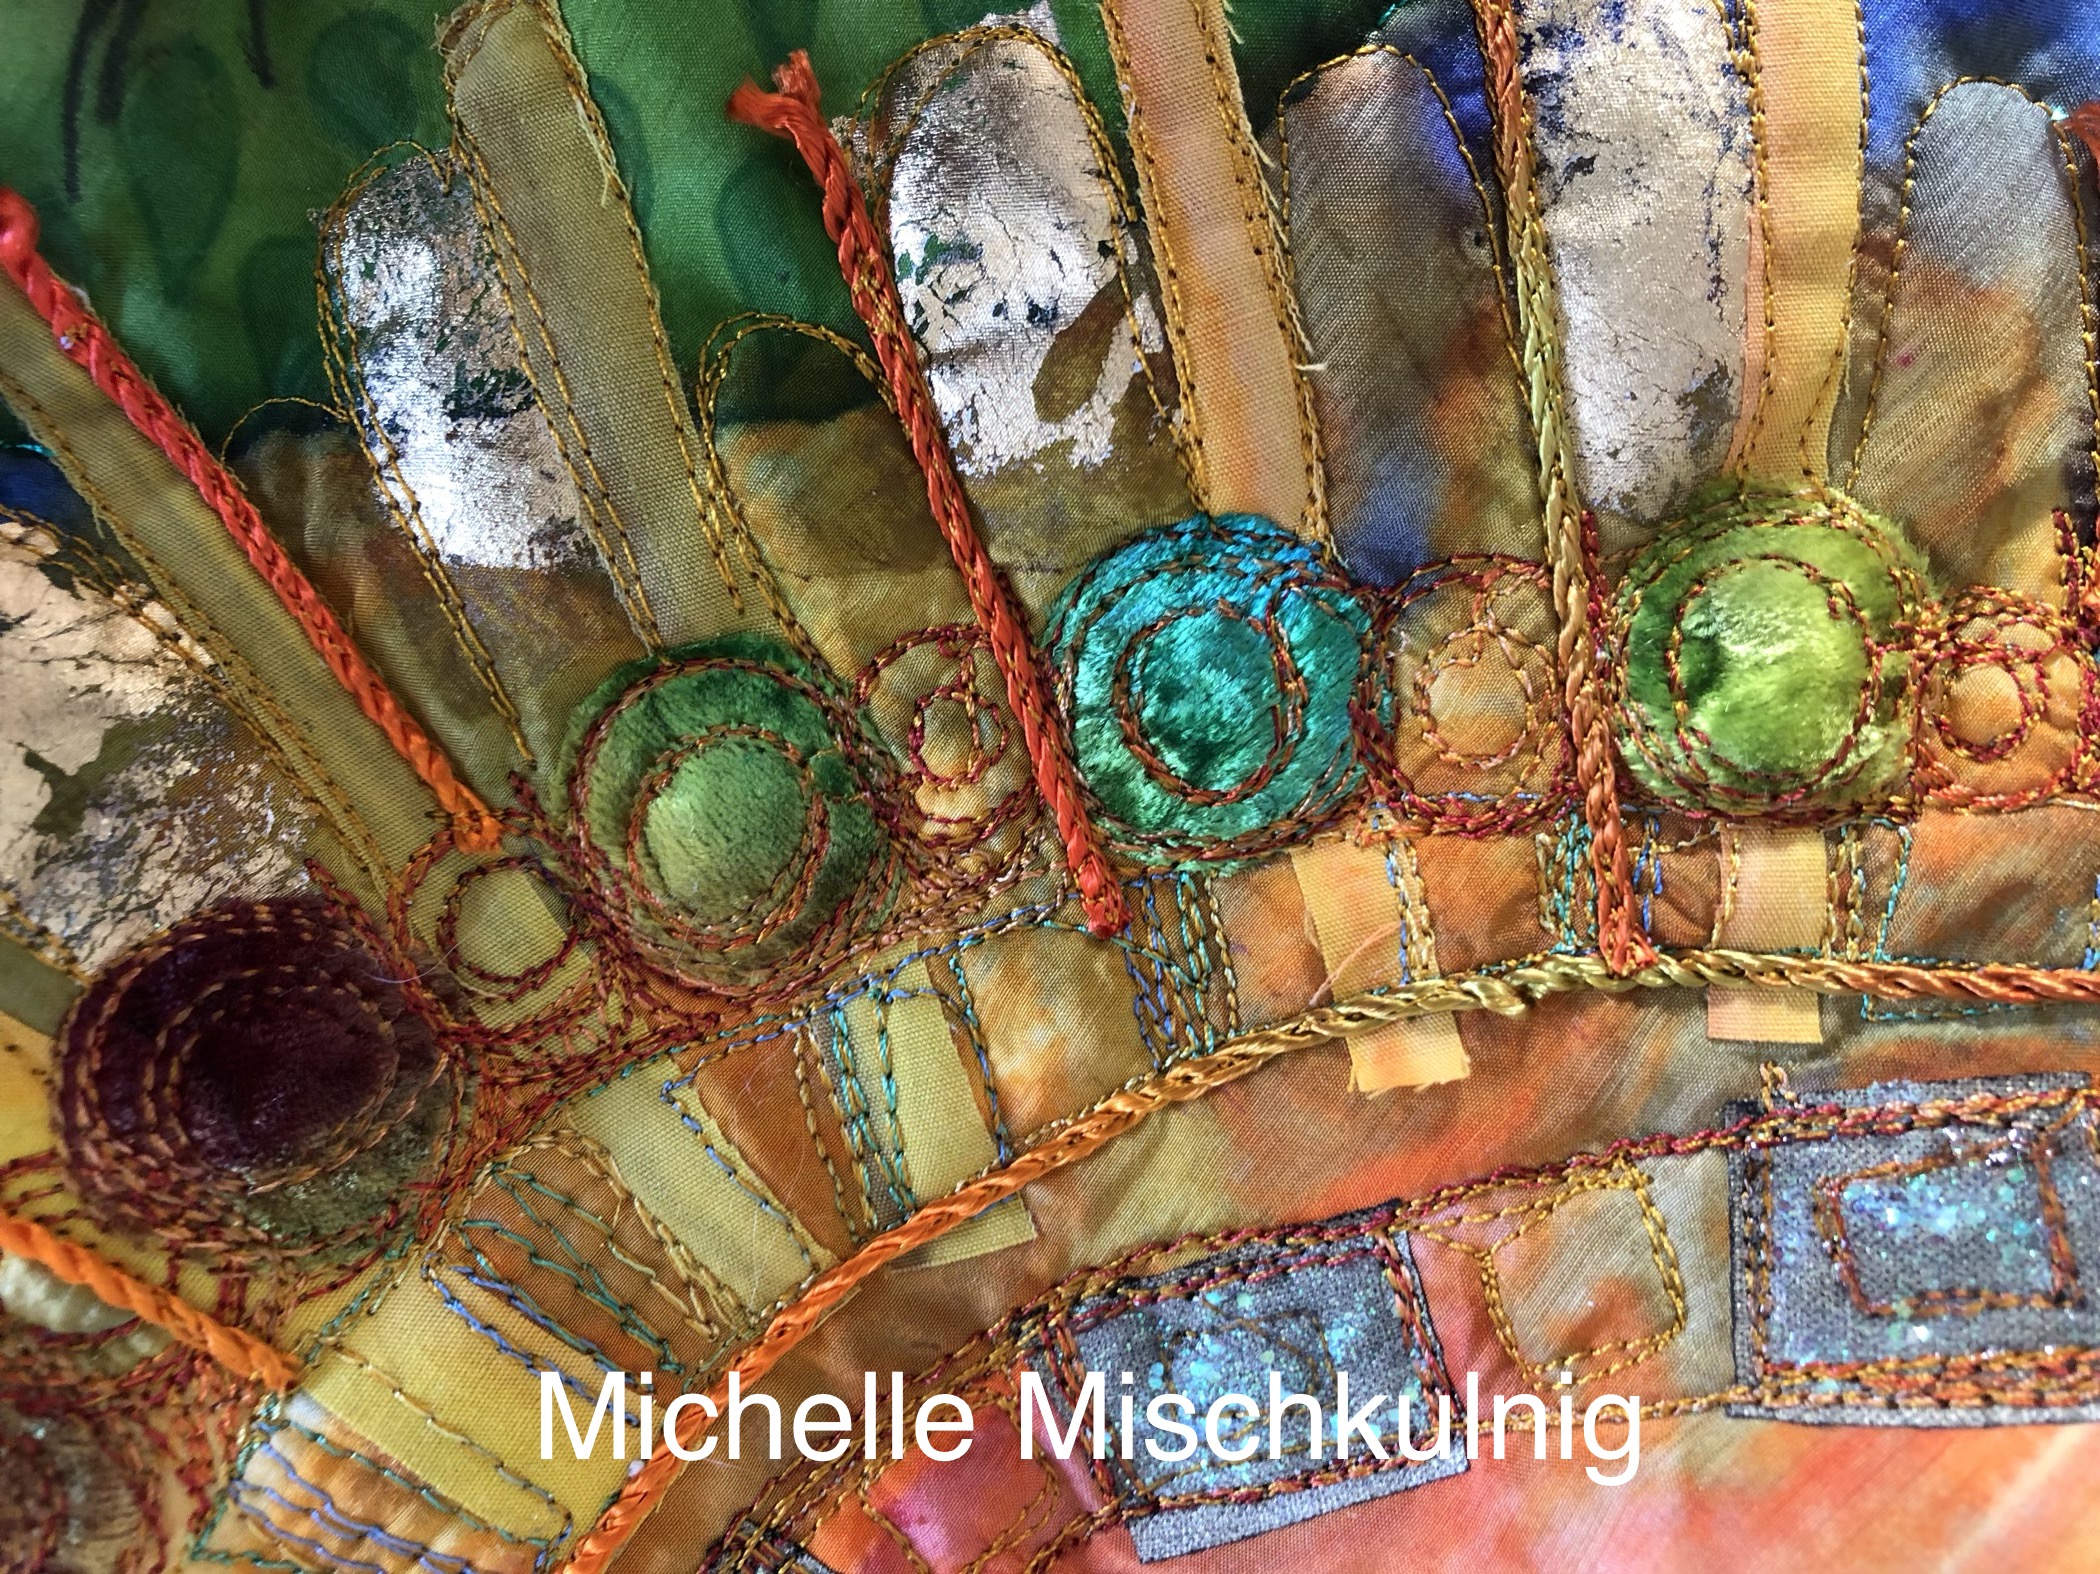
The piece of textile art work I am working on at the Bernina stand at Brisbane is

Very soon I will be leaving to teach in Bali with Craftours http://www.crafttours.com/trips/?page=bali_michelle_101
When I return form Bali I will share some images and then I will be concentrating on my textile art work for exhibit in San Diego next year
Now to get down and get creative with heart
Yay !
Materials
Khadi cotton rag paper or any hand made paper approx. size 20 cm sq.
Fusible web approx. 4 pieces 20 cm sq each.
Scraps of fabrics sheer or fine fabric work best but experiment with others .
Ribbons or chords .
Small piece of batting for heart shape.
Inktense pencils or water colours.
Metallic paint
Closed toe free motion embroidery foot .
Backing fabric such as felt I use a hand dyed pre felt you could use satin, velvet etc http://www.thethreadstudio.com/catalogue/fab/fab2.htm
Machine embroidery threads of your choice .
Optional – Jo Sonjas opal dust for a little glitter
Optional -hand embroidery threads.
Optional – hand dyed silk fibre/silk hankie
Optional -metallic buff this is the one I like it is called creative expressions gilding polish https://www.scrapdragon.com.au/?rf=kw&kw=gilding++polish+
Grey lead pencil and eraser.
Baking paper.
A quote that your heart desires.
Step 1
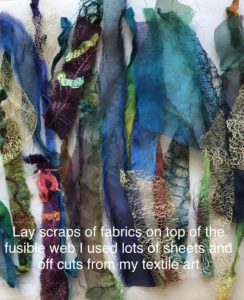
Lay your first piece of fusible web onto of a sheet of baking paper, please make sure you have peeled your fusible web away from its backing paper and it must be laid on the top of the baking paper.
Once you have positioned your fusible web add strips of either torn or cut fabrics I have used sheer fabrics and scraps form my art textile work .

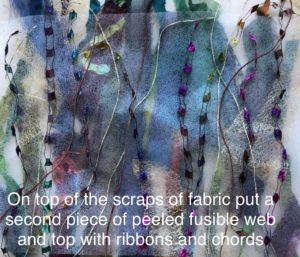
When you have finished laying your fabric on the fusible web place your second piece of peeled fusible web on the surface of the fabric and position few chords, ribbons , yarns or lace.
Step 2
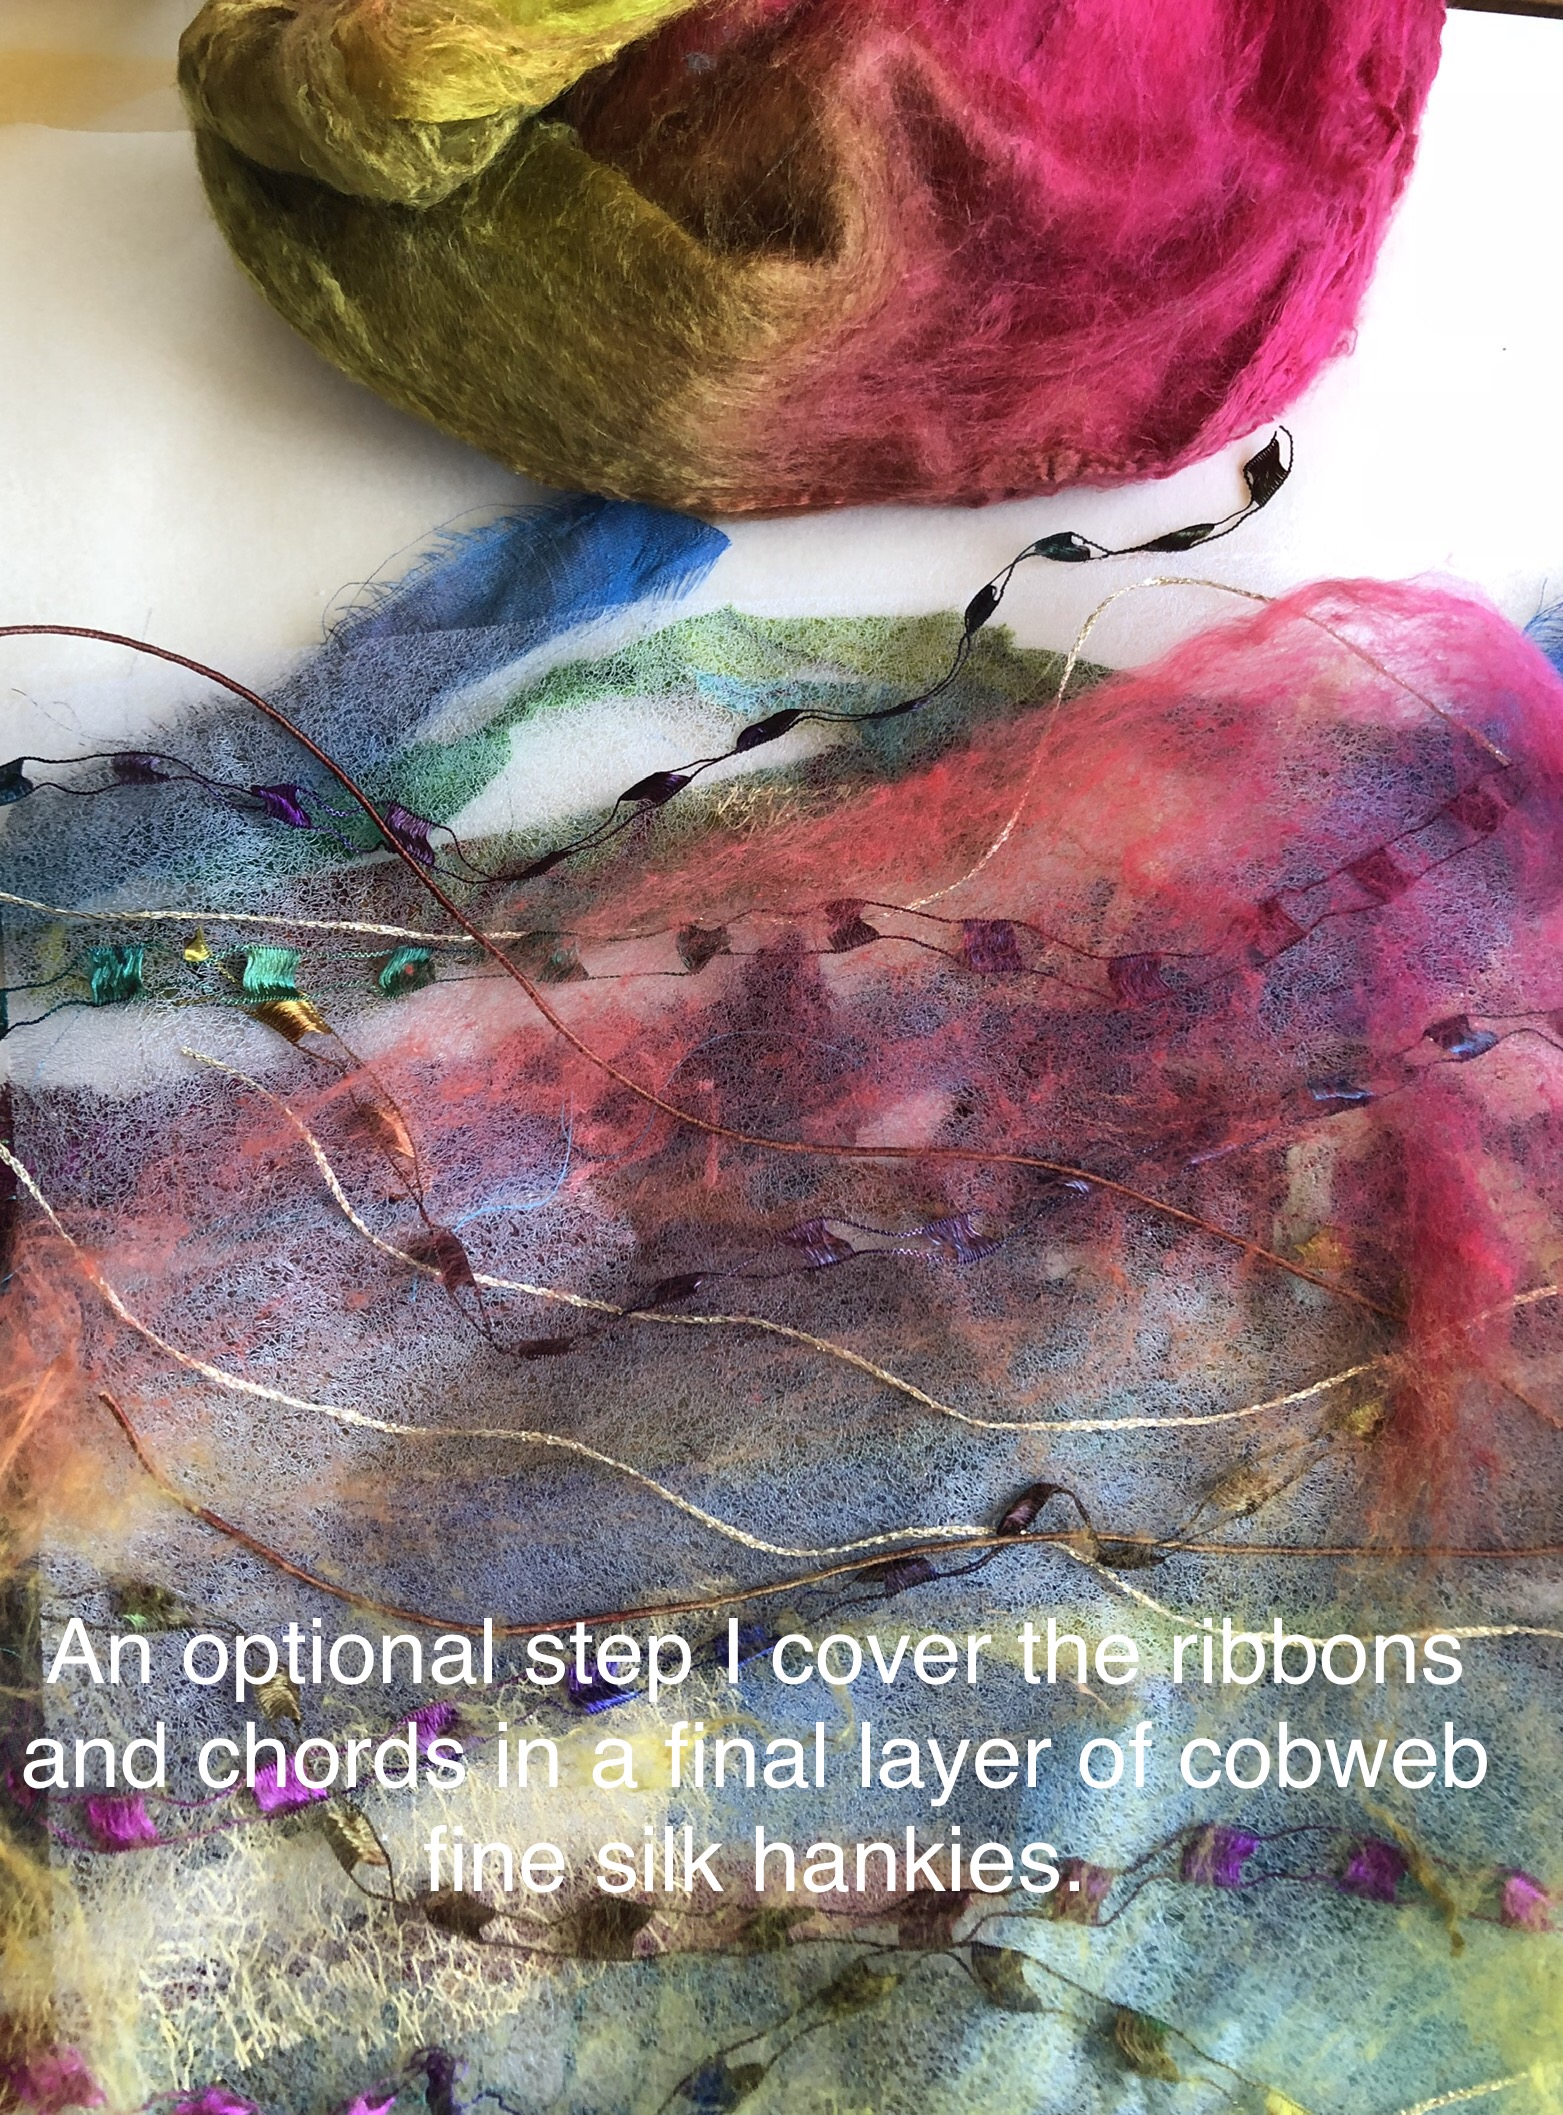
Optional – I have used a very fine layer of silk fibre- silk hankie to cover the ribbon layer.
Step 3
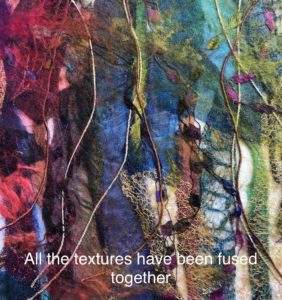
Cover your completed surface with a piece of baking paper which will protect both the fused fabric and your iron. Fuse all the layers with a dry hot iron.
Step 4
Carefully lift your fused fabric off the baking paper and check if it needs more ironing to melt the fusible web and if it does lay it flat again cover and press.
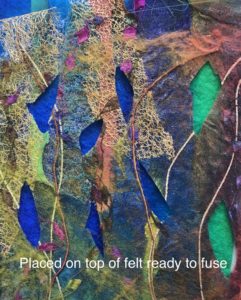
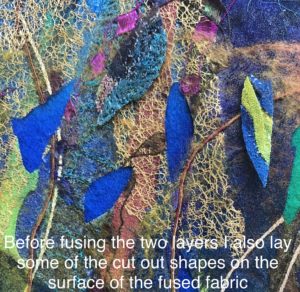
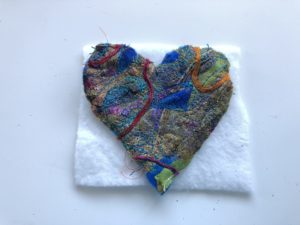
Cut a piece of felt or such to back the fused fabric on, you will be seeing the backing fabric through the sheerness and holes in your fused fabric.I have used hand dyed pre felt or felt flimsie http://www.thethreadstudio.com/catalogue/fab/fab2.htm
Then cut small shapes out of your fused fabric and place the fused fabric on top of the felt, you may like to add your cut outs on the surface of the fused fabric as an interesting texture. Finally cover the whole of the fused/cut out fabric with a piece of baking paper and use a dry hot iron to fuse to the felt.

Step 5
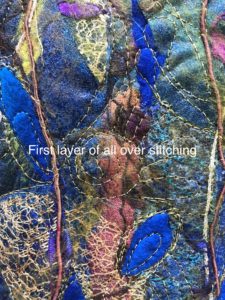
Set your sewing machine for free motion including attaching a closed toe free motion embroidery foot. I only ever use a closed toe foot because of all the texture on the surface.
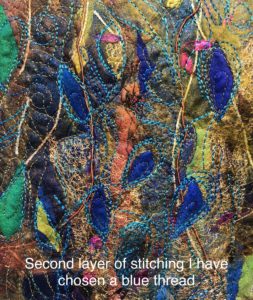
For my first layer of stitching I use a metallic threads and work organically around the shapes and forms that my fused fabric shows.The second layer of stitching I choose a coloured thread that will stand out against the background fused fabric.
Step 6
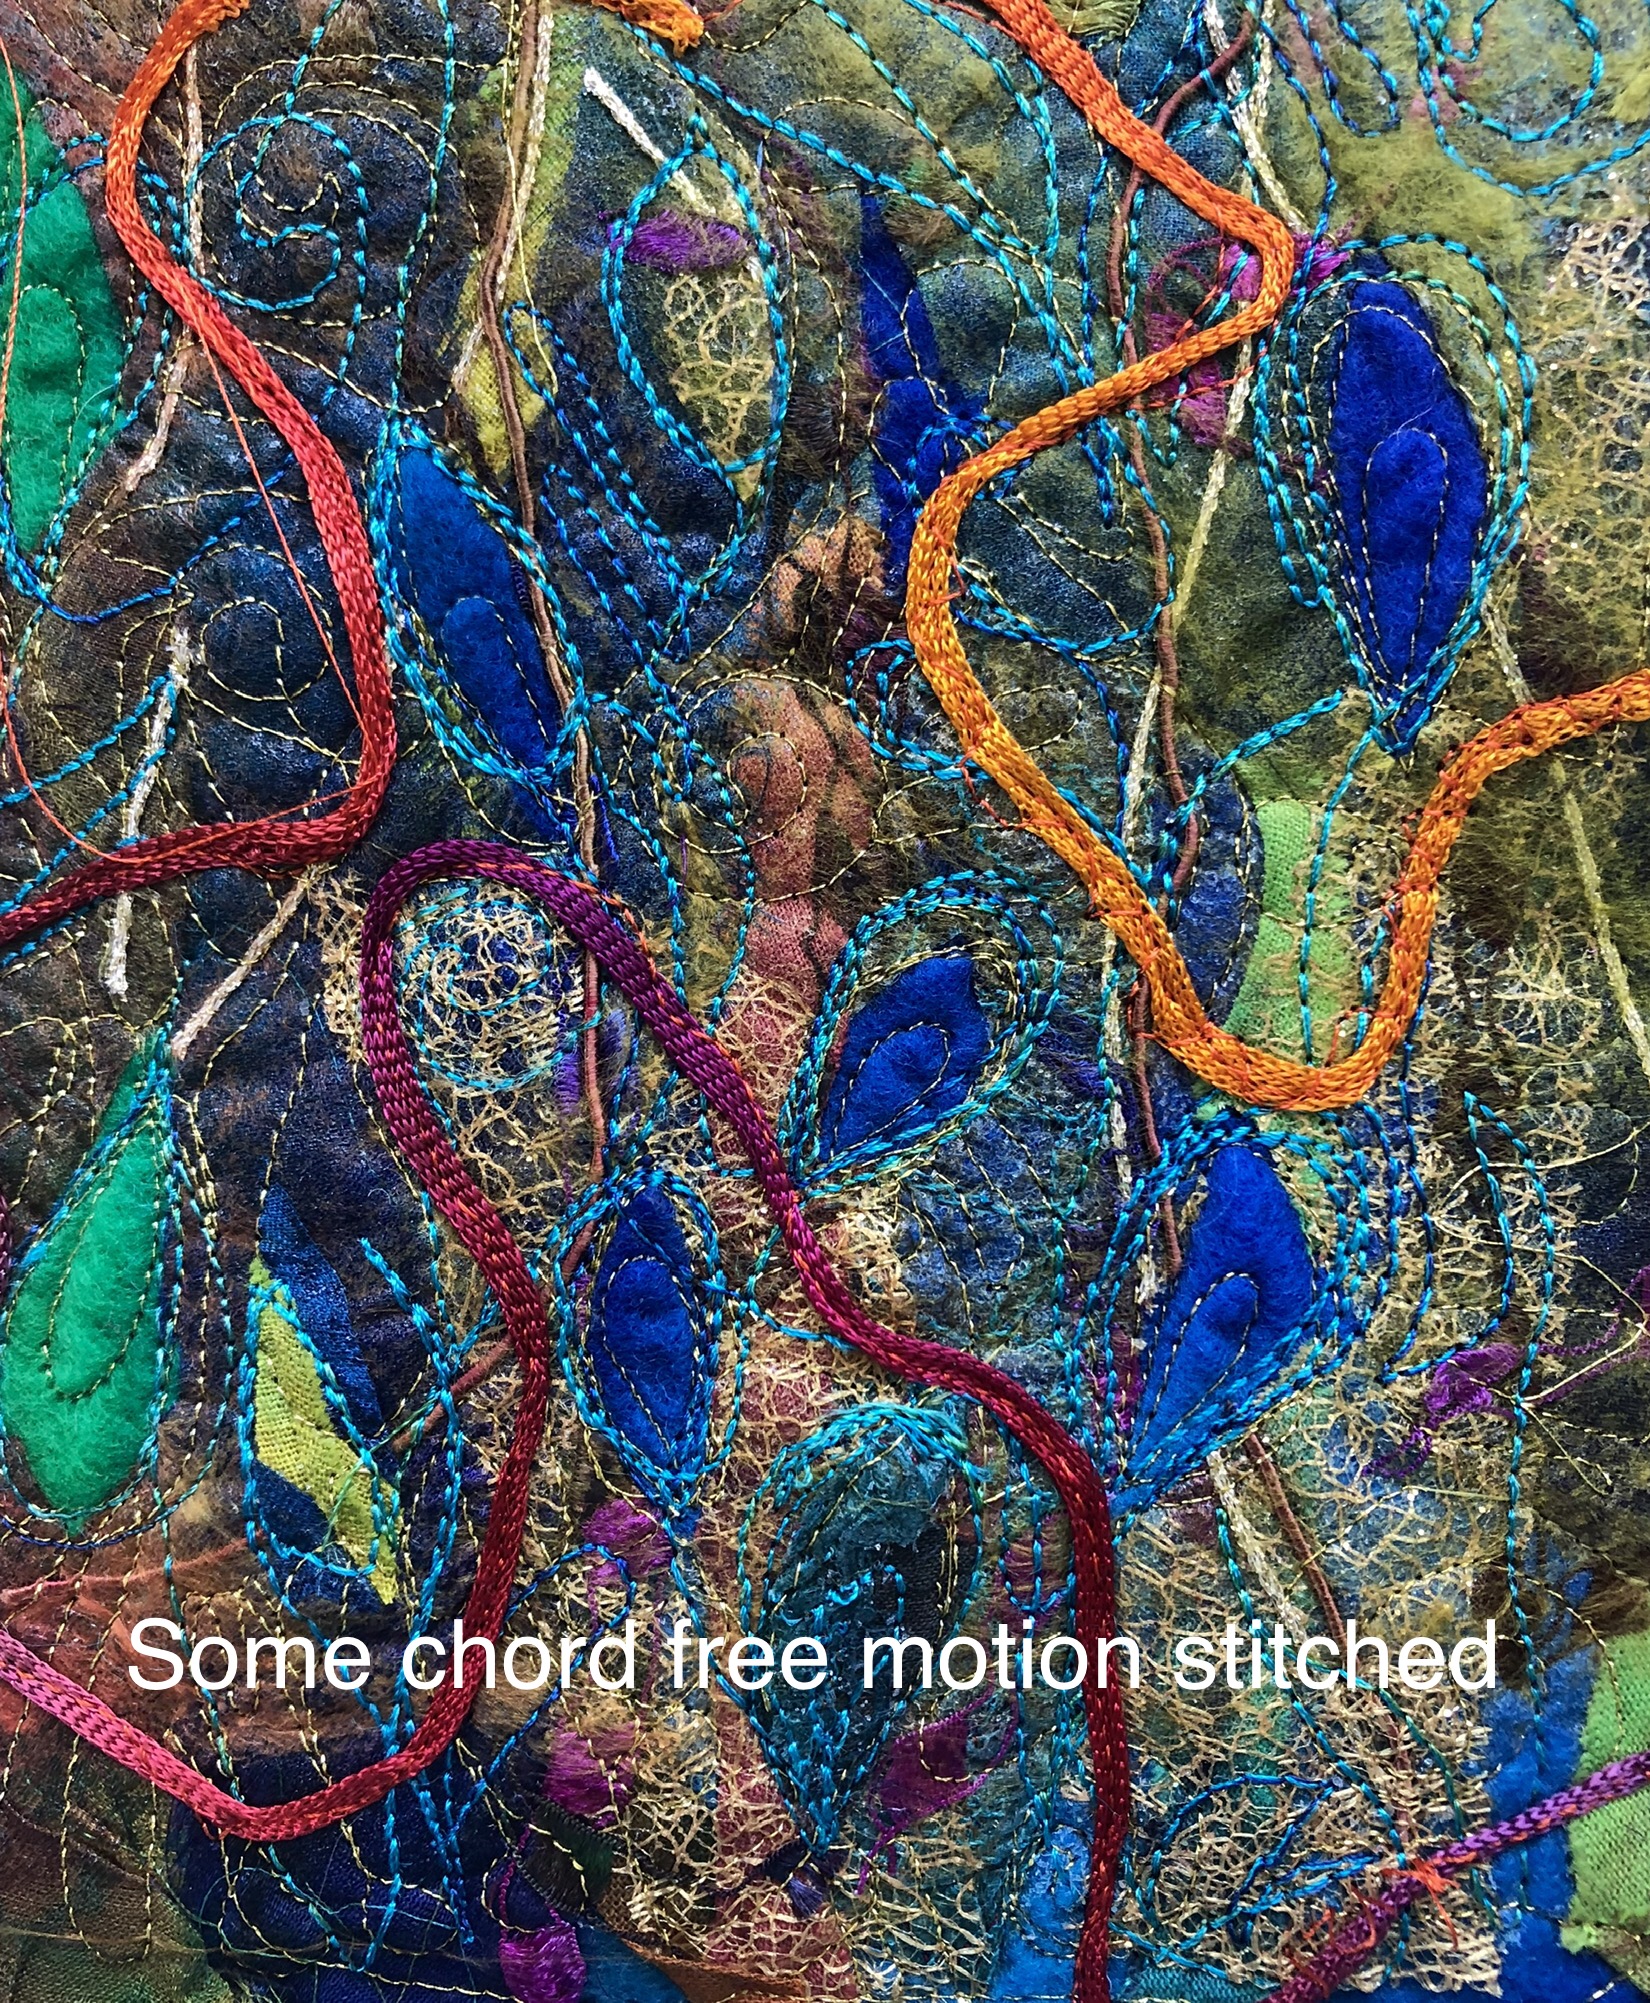
Optional step – I have added some chord to the top of the fused fabric.
Step 7
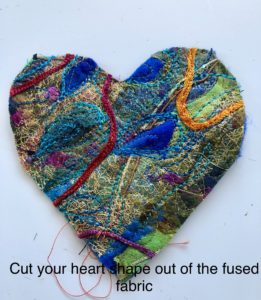
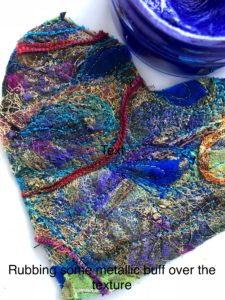
Cut out your heart shape to fit your paper size, the size of the heart needs to allow for script and feathery line work around the outside. I have added the gilding polish at this step

Step 8
In step 8 you will need to bare with me I am experimenting with videoing using my phone but still need to learn some skills. Also my Large new Bernina is being serviced so I have returned to my 37 year old golden oldie which just goes and goes hence its little noisier. :-) .
Stitch your heart to the batting and then cut back to the stitch line around the heart shape.
heart making blog from Michelle Mischkukulnig on Vimeo.
Step 9
I have added a little hand embroidery to the heart before I proceeded with step 9.
After you have finished the hand embroidery attach the heart to the Khadi paper. I suggest you back your khadi paper with some calico or such by fusing the two surfaces together with fusible web this helps protect against tearing.
Now that the Khadi paper position the heart and trace around the shape of the heart and mark your feathers.
Again I apologise for the quality of my video but I am on a learning curve.

Step 10
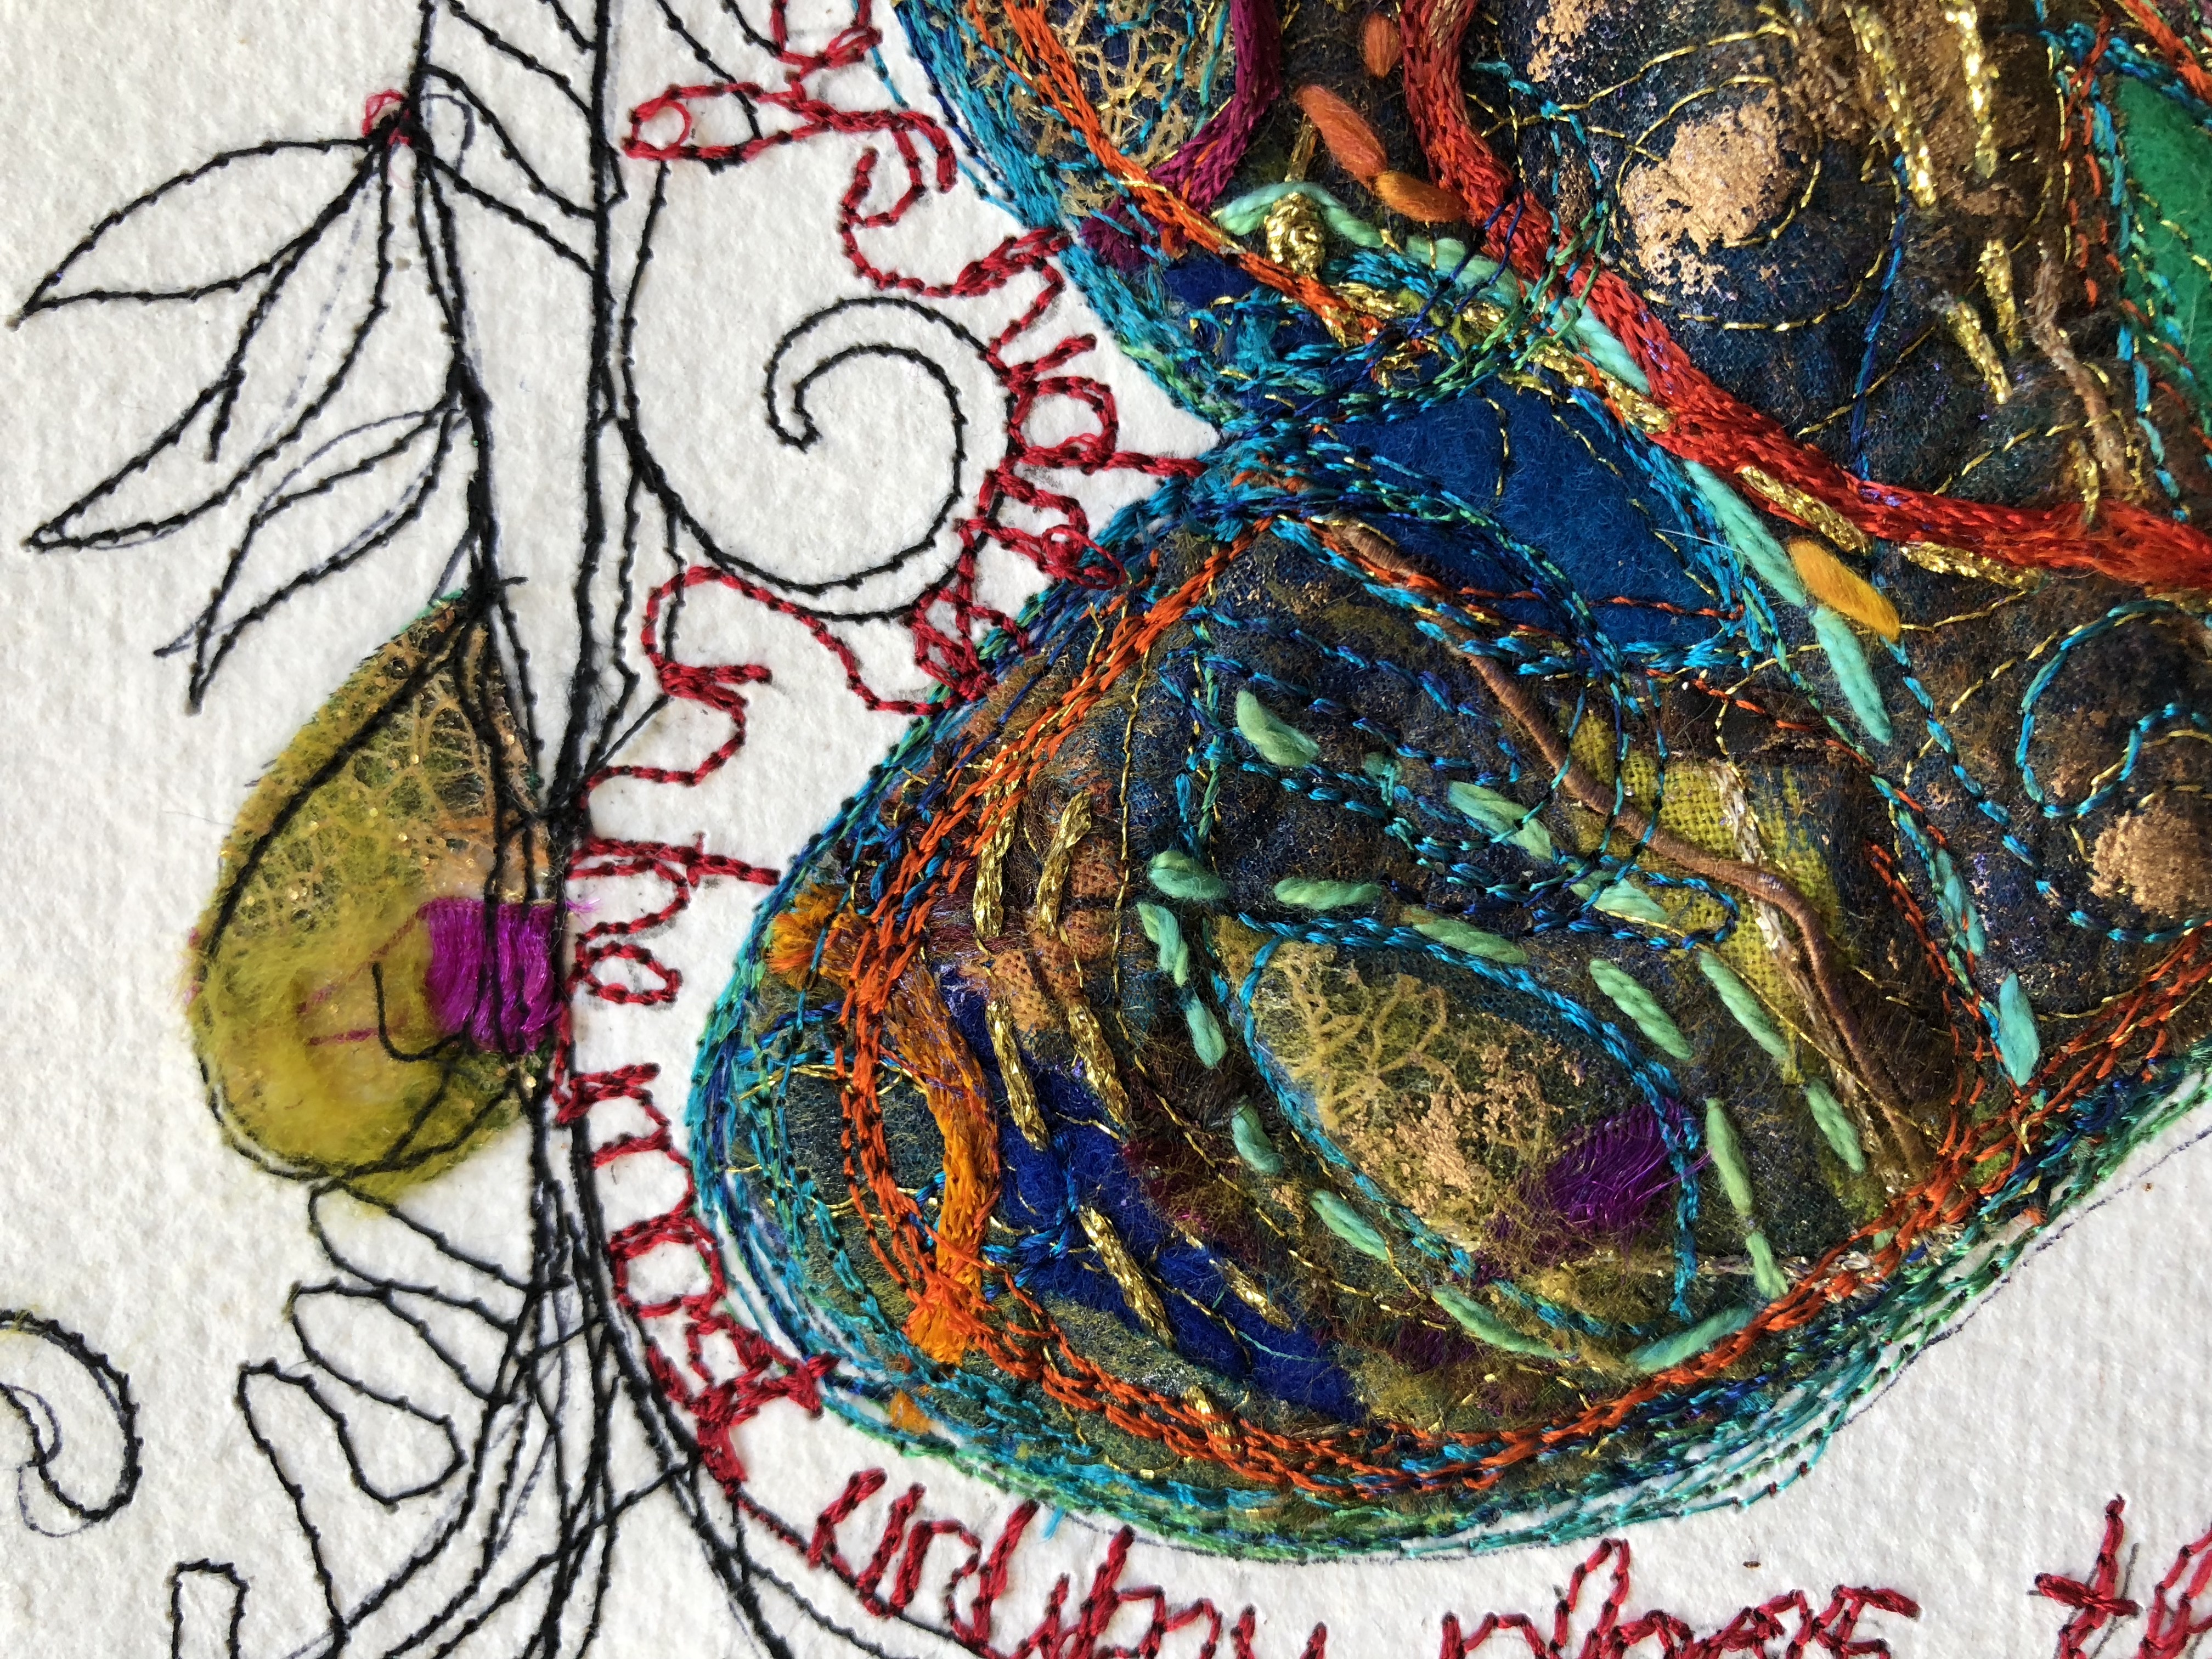
Stitch your black lines this is a very organic process, your pre drawn lines are just a guide and you will find you add more as you embrace the flow around your heart. I also stitch in small petal shapes cut from the scraps of fused fabric and stitch them into the black line design

Step 11
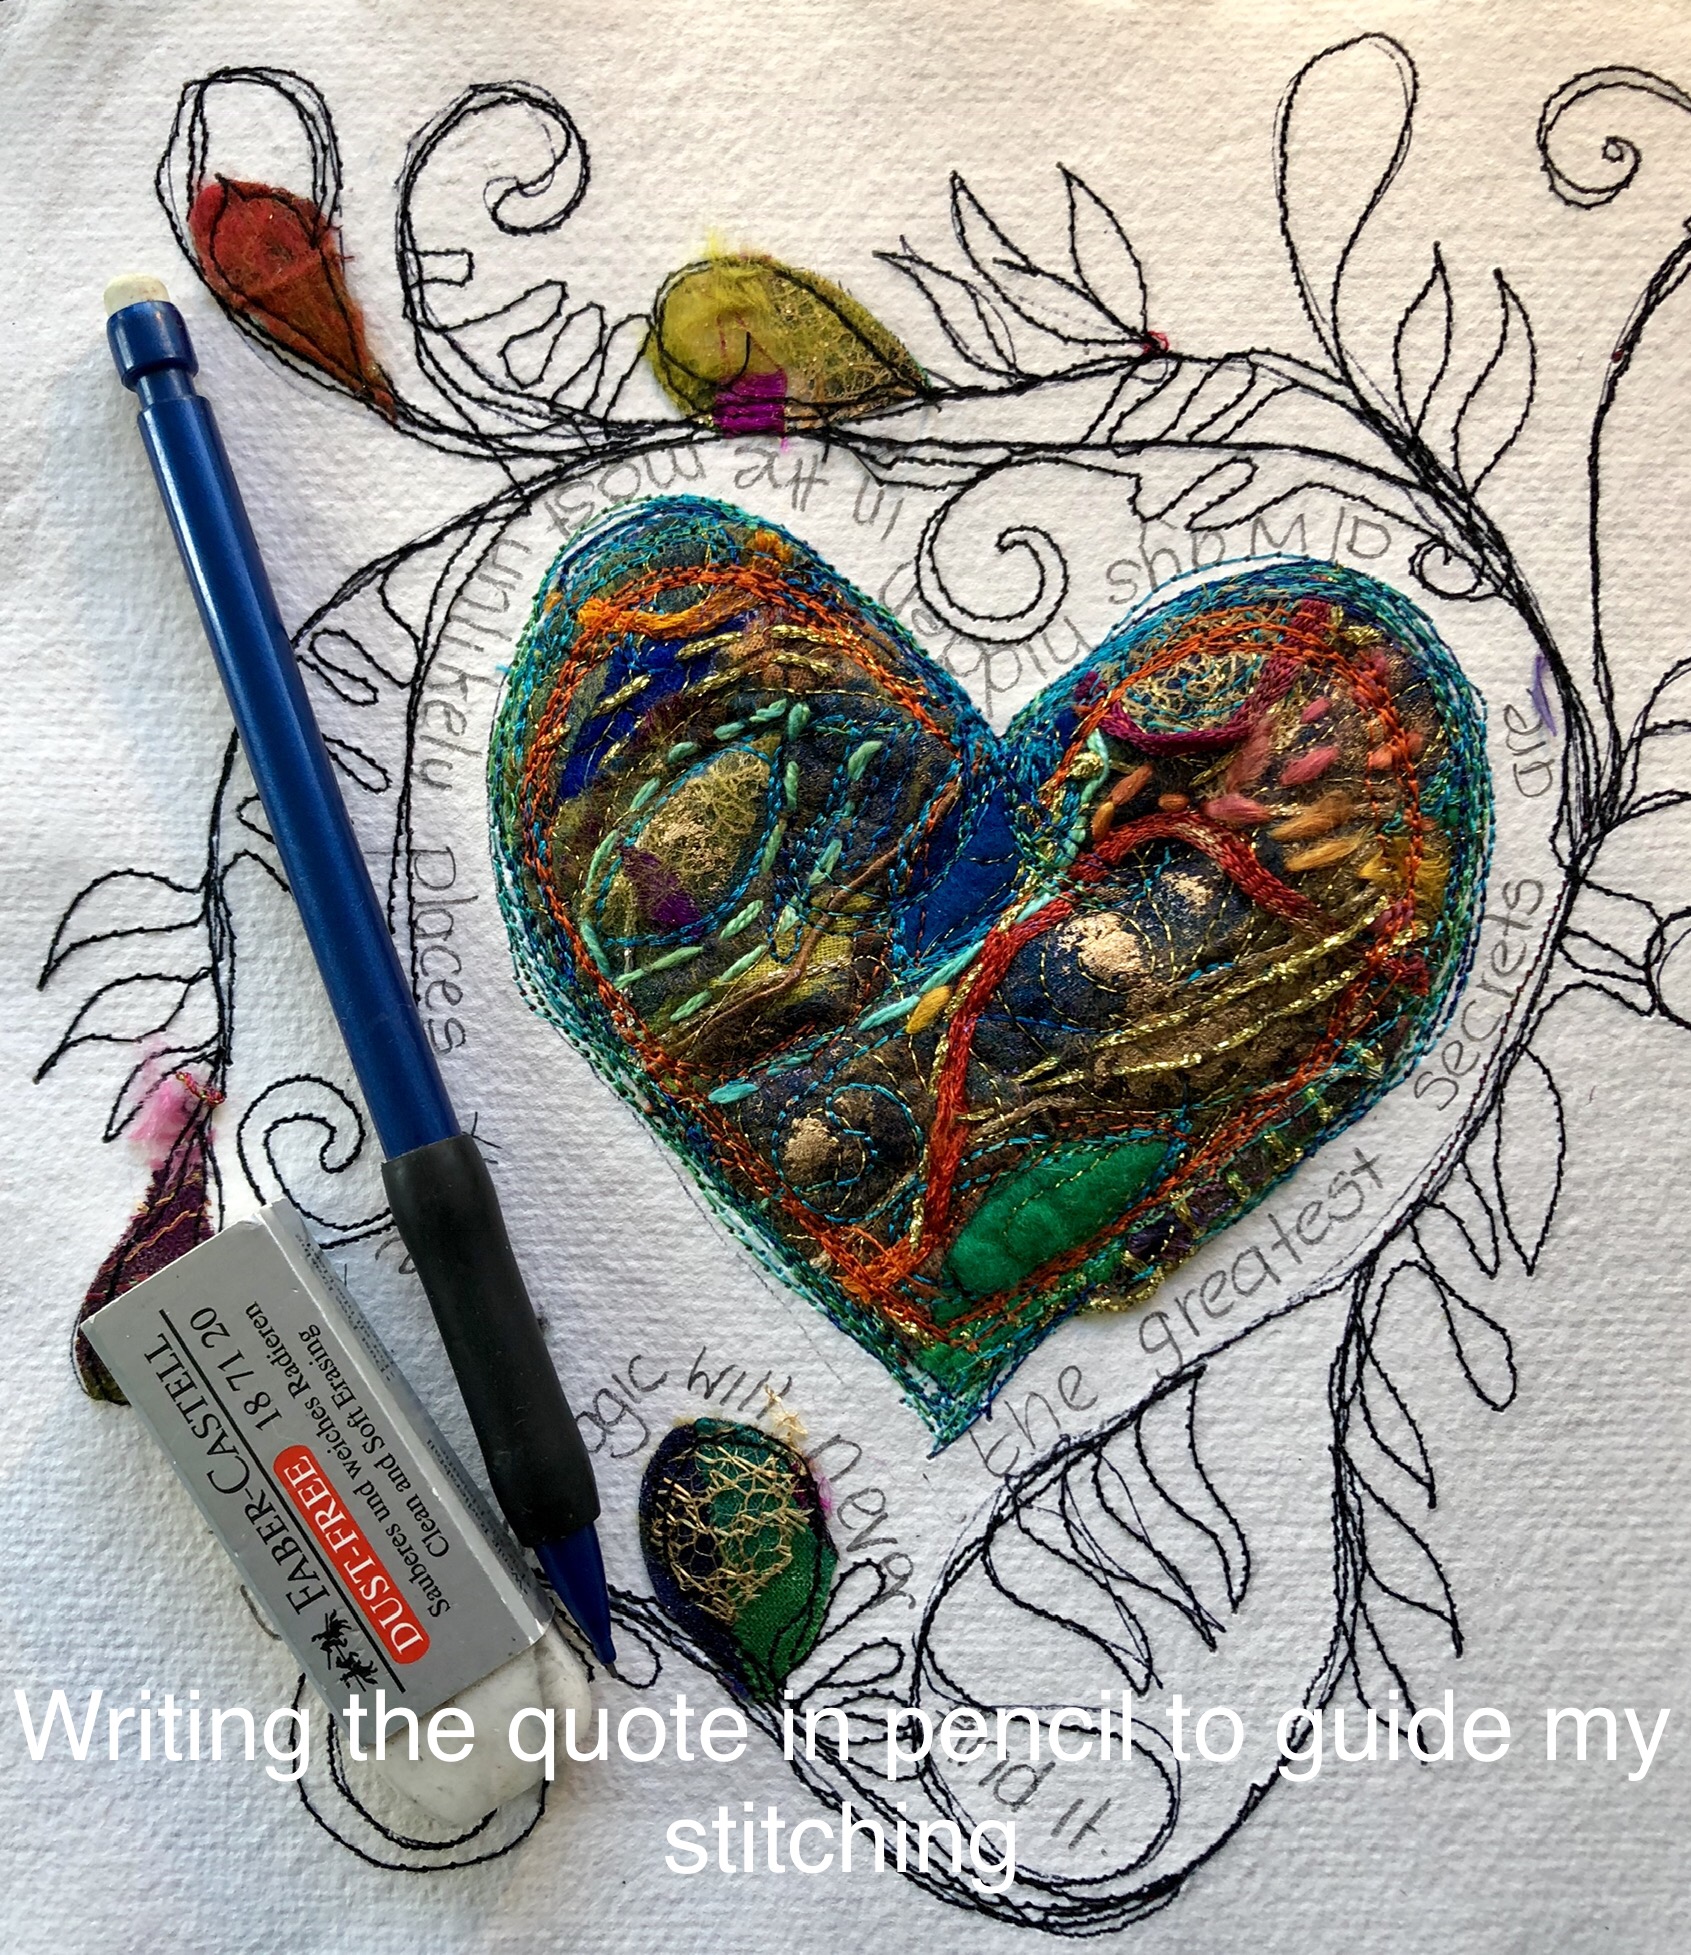
Optional – Adding a quote, write the quote in grey lead or erasable pencil, your quote should follow the flow of your heart shape and use your black lines to dictate the positioning of the words this is in preparation for stitching.
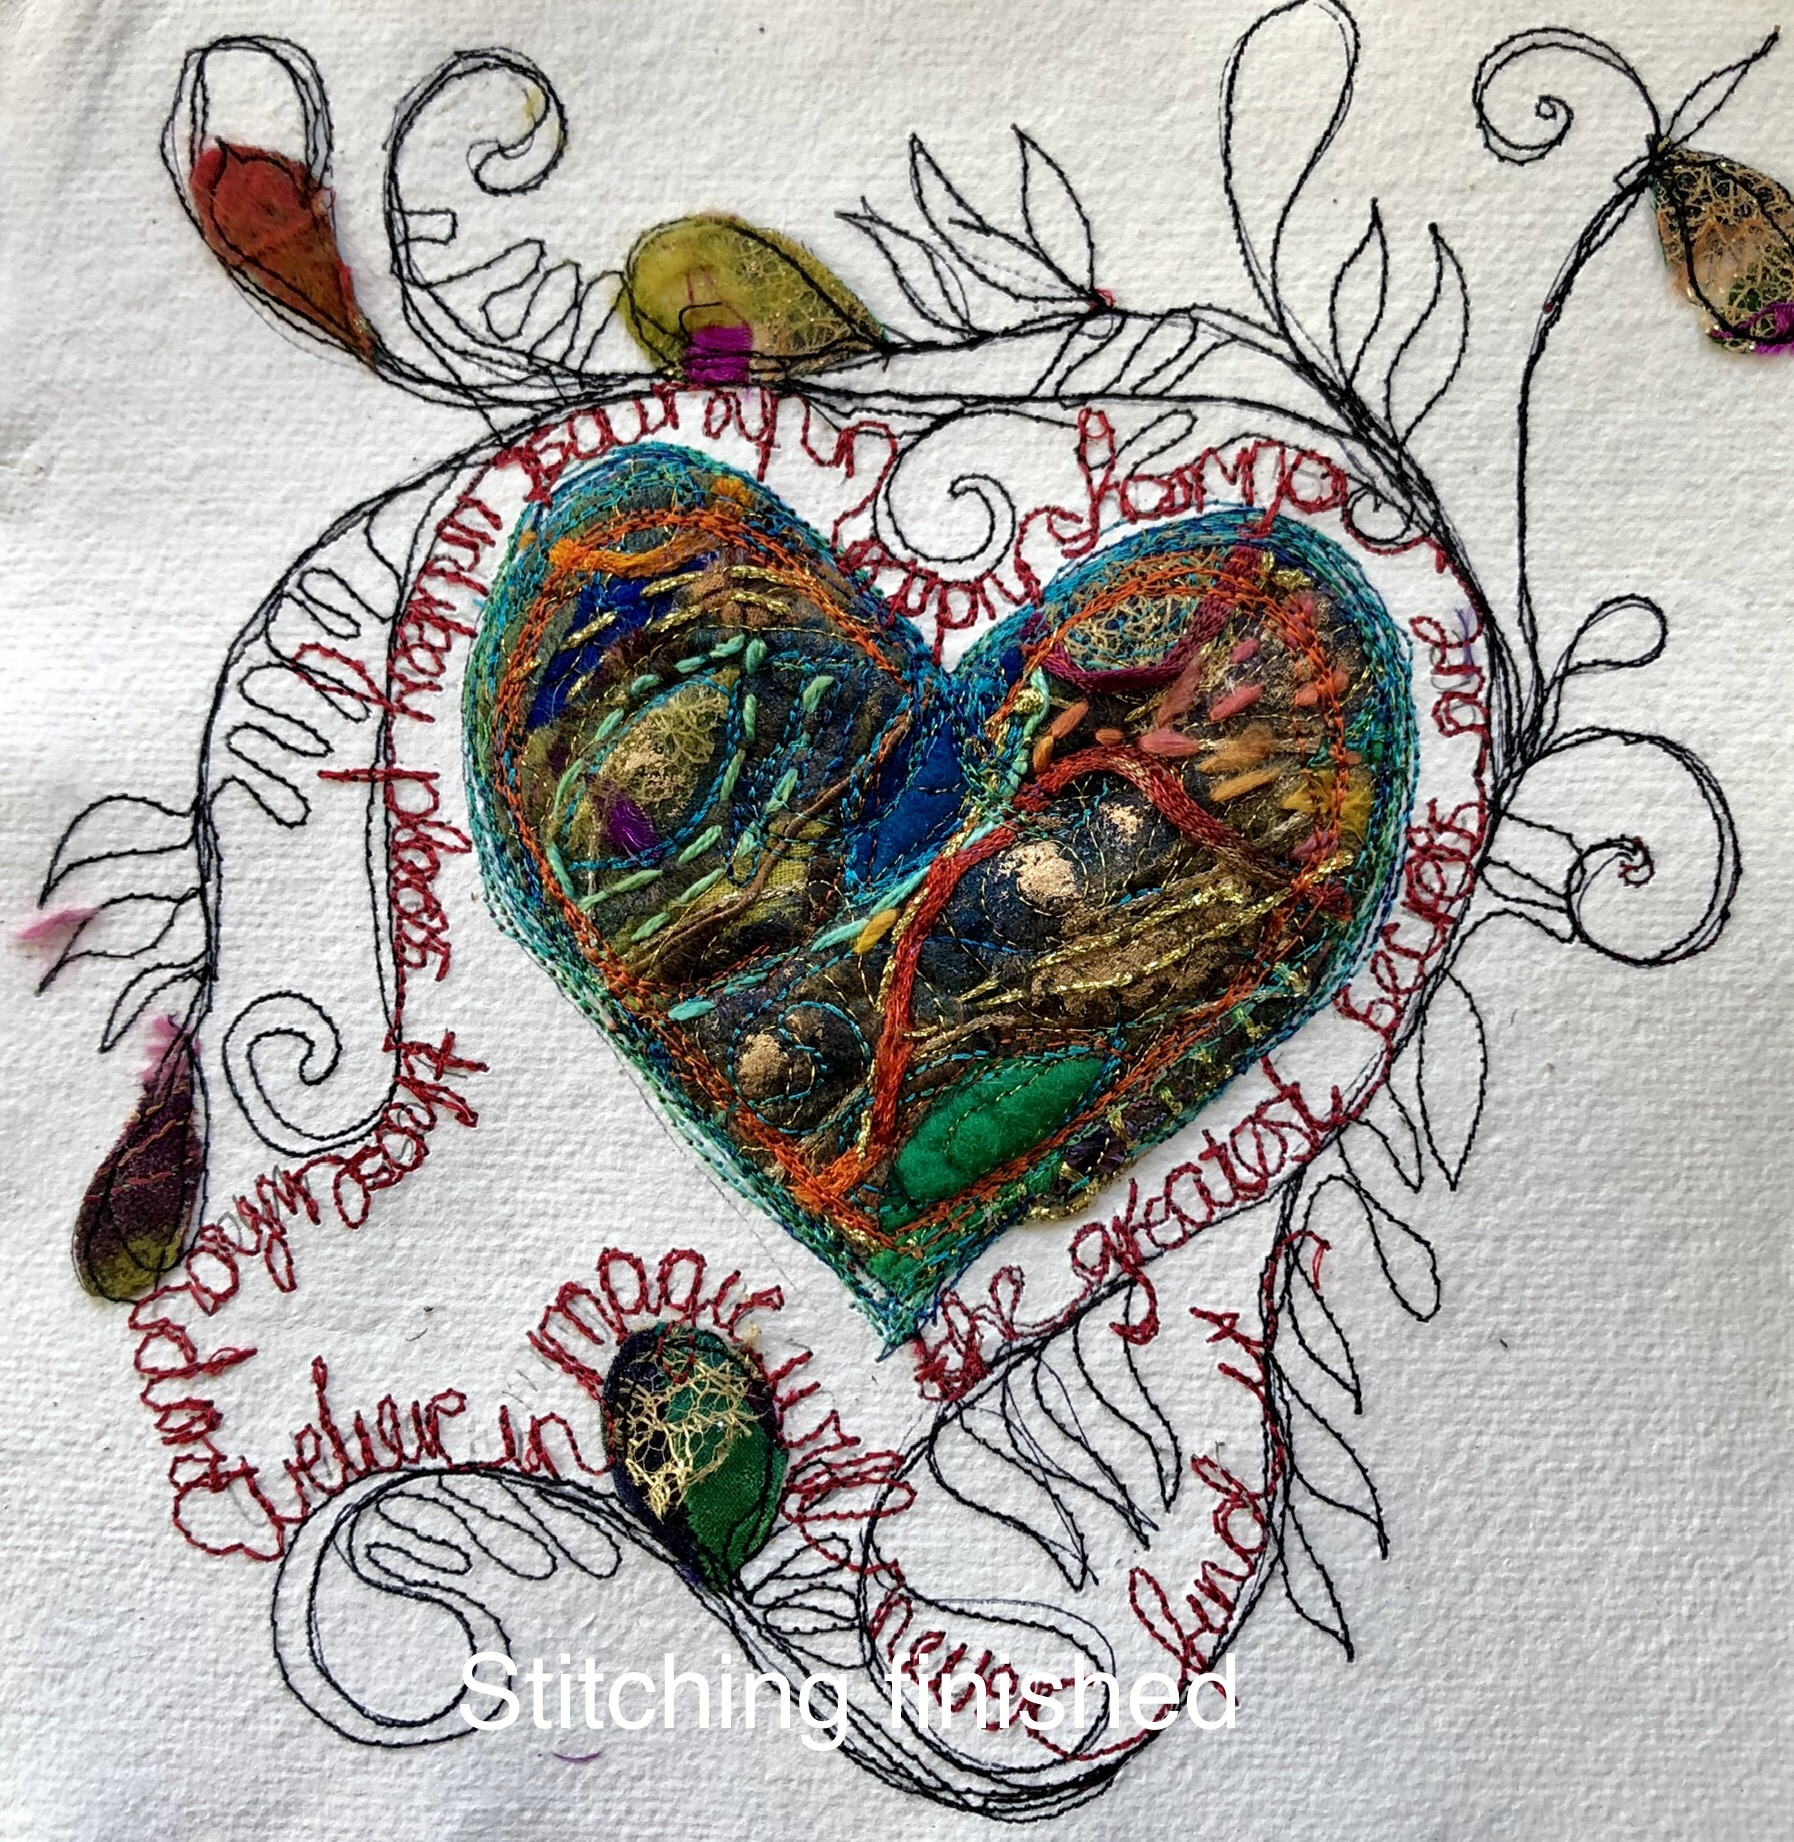
You will need a level of confidence to free motion stitch these words, I have used two threads in the one needle ( you may need to loosen the upper tension a little to do this ) and then I stitch around my written words following the drawn guideline for each letter. At the end of each word I continue the stitch line along the bottom of the words to the next one or you can finish each word cut your threads and start next word.
If you do not want to stitch this think about a metallic pen /marker or painting the words.
Step 12
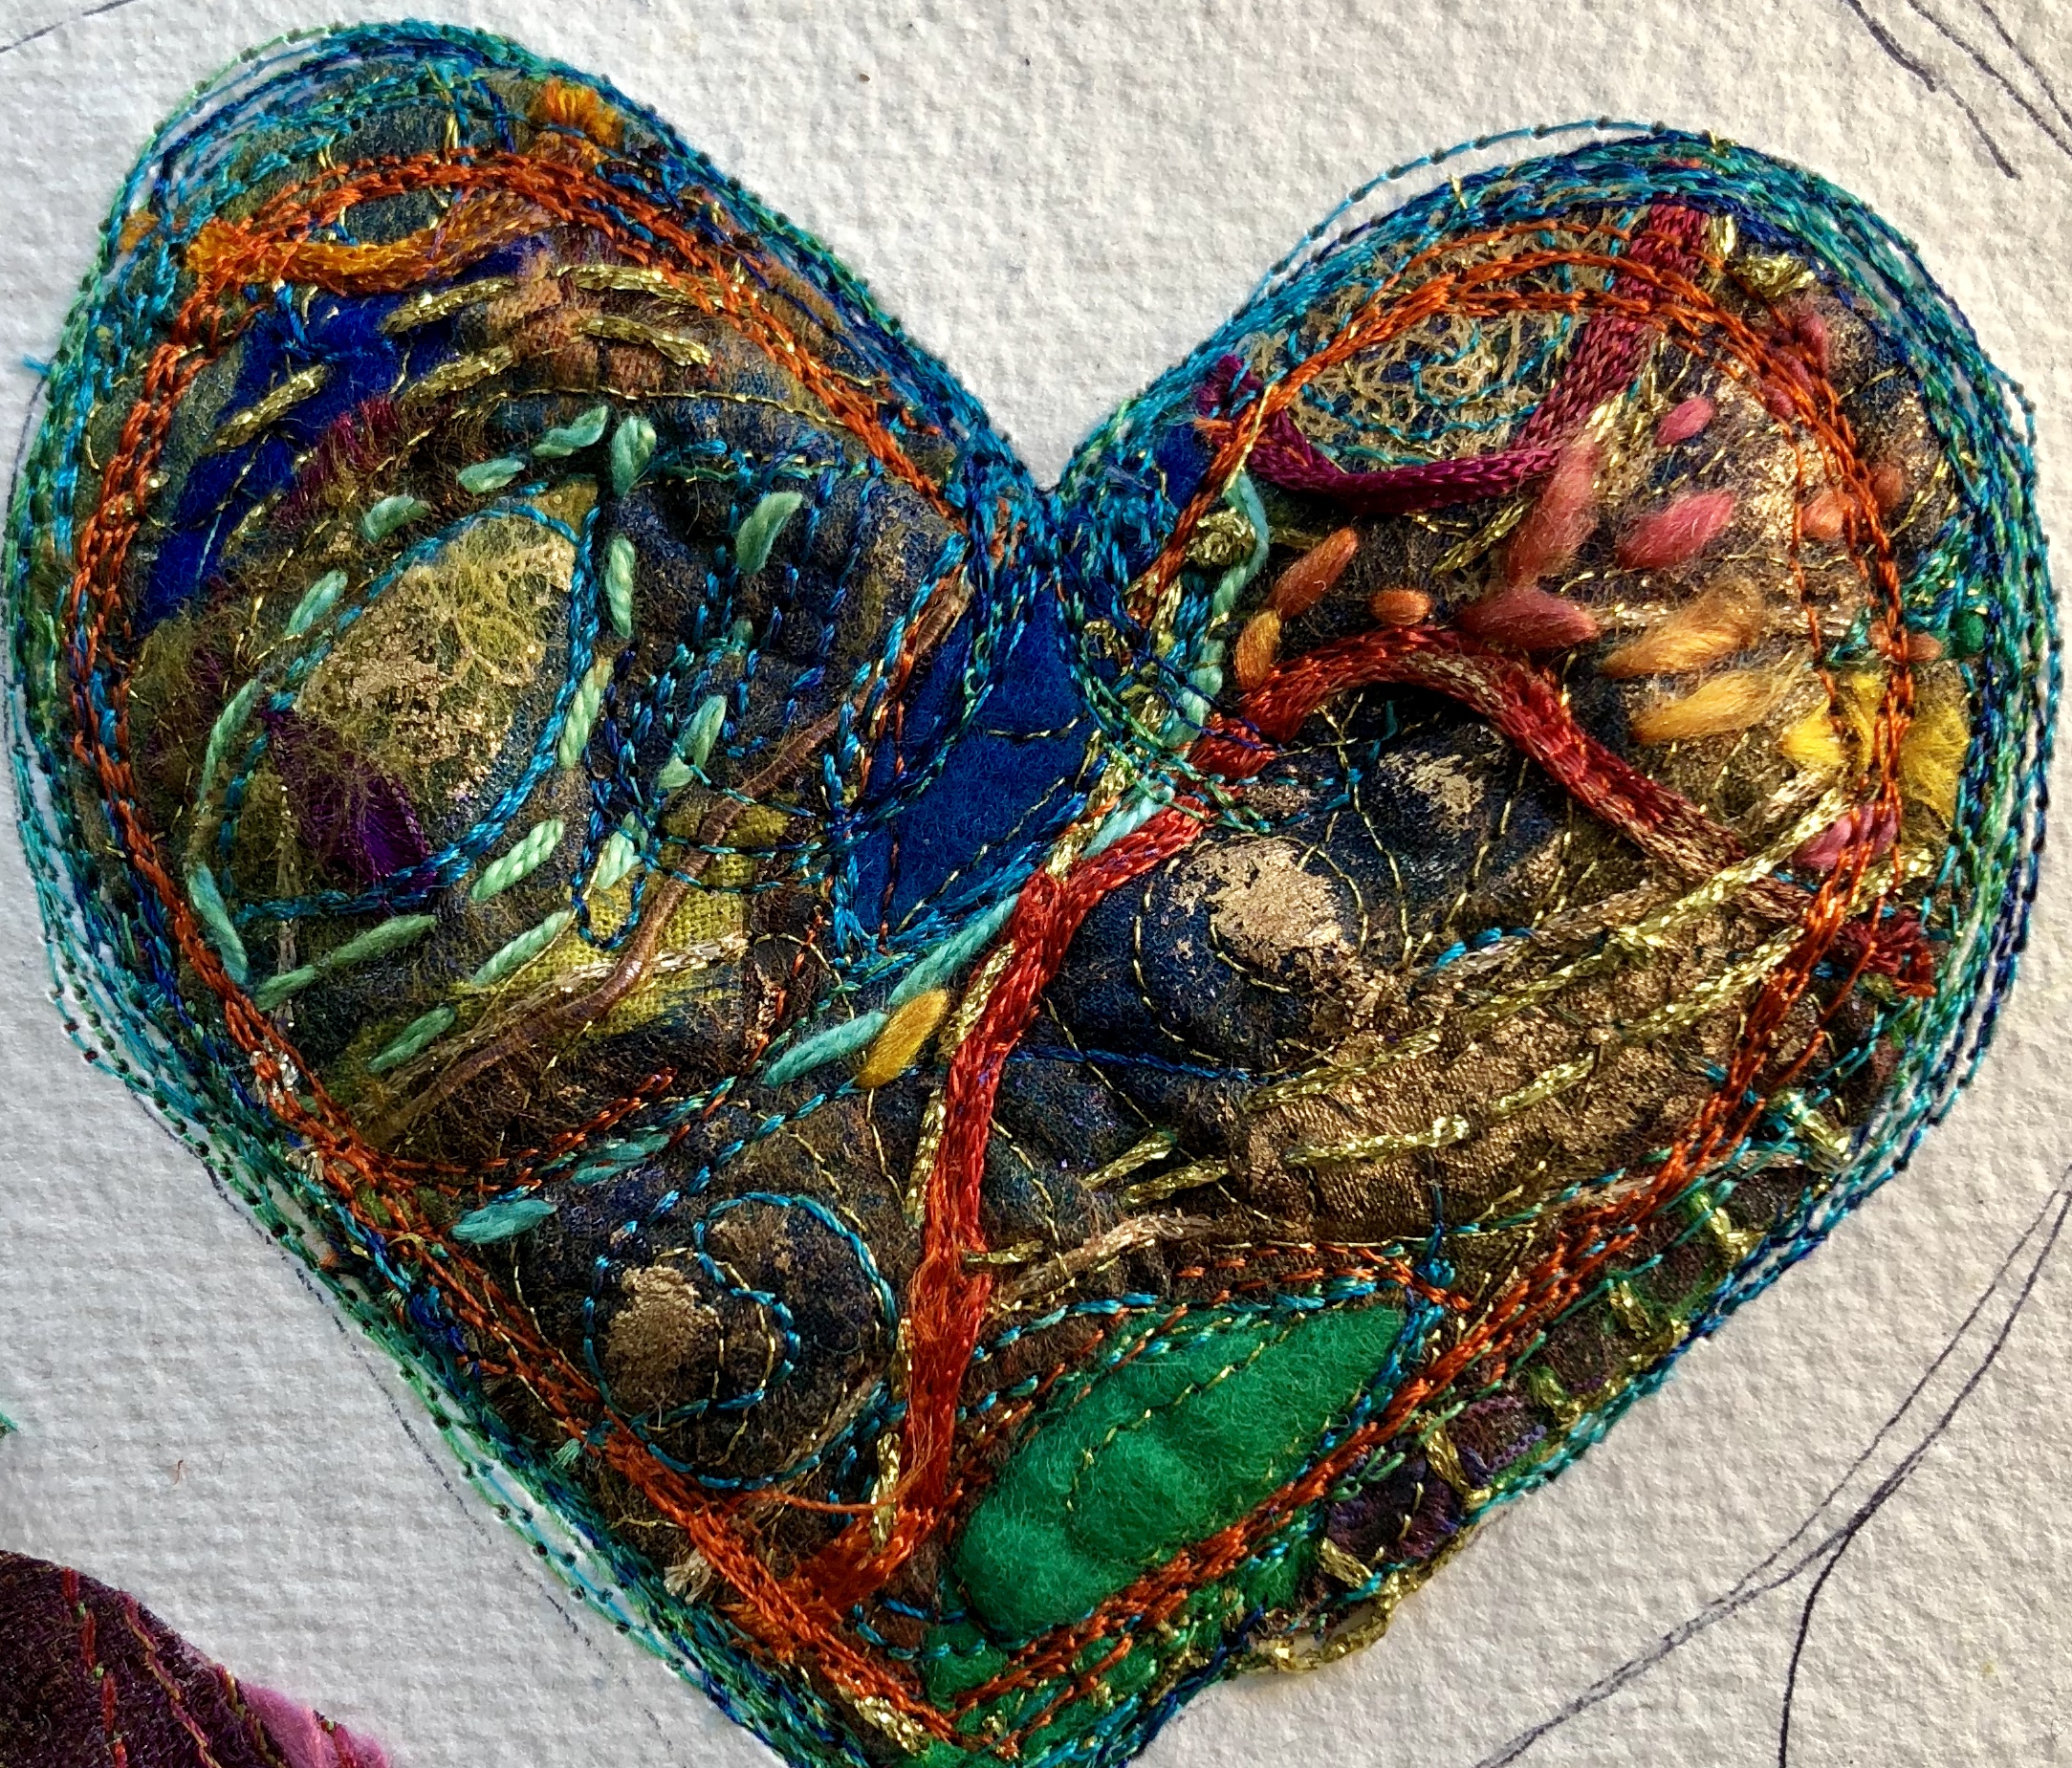
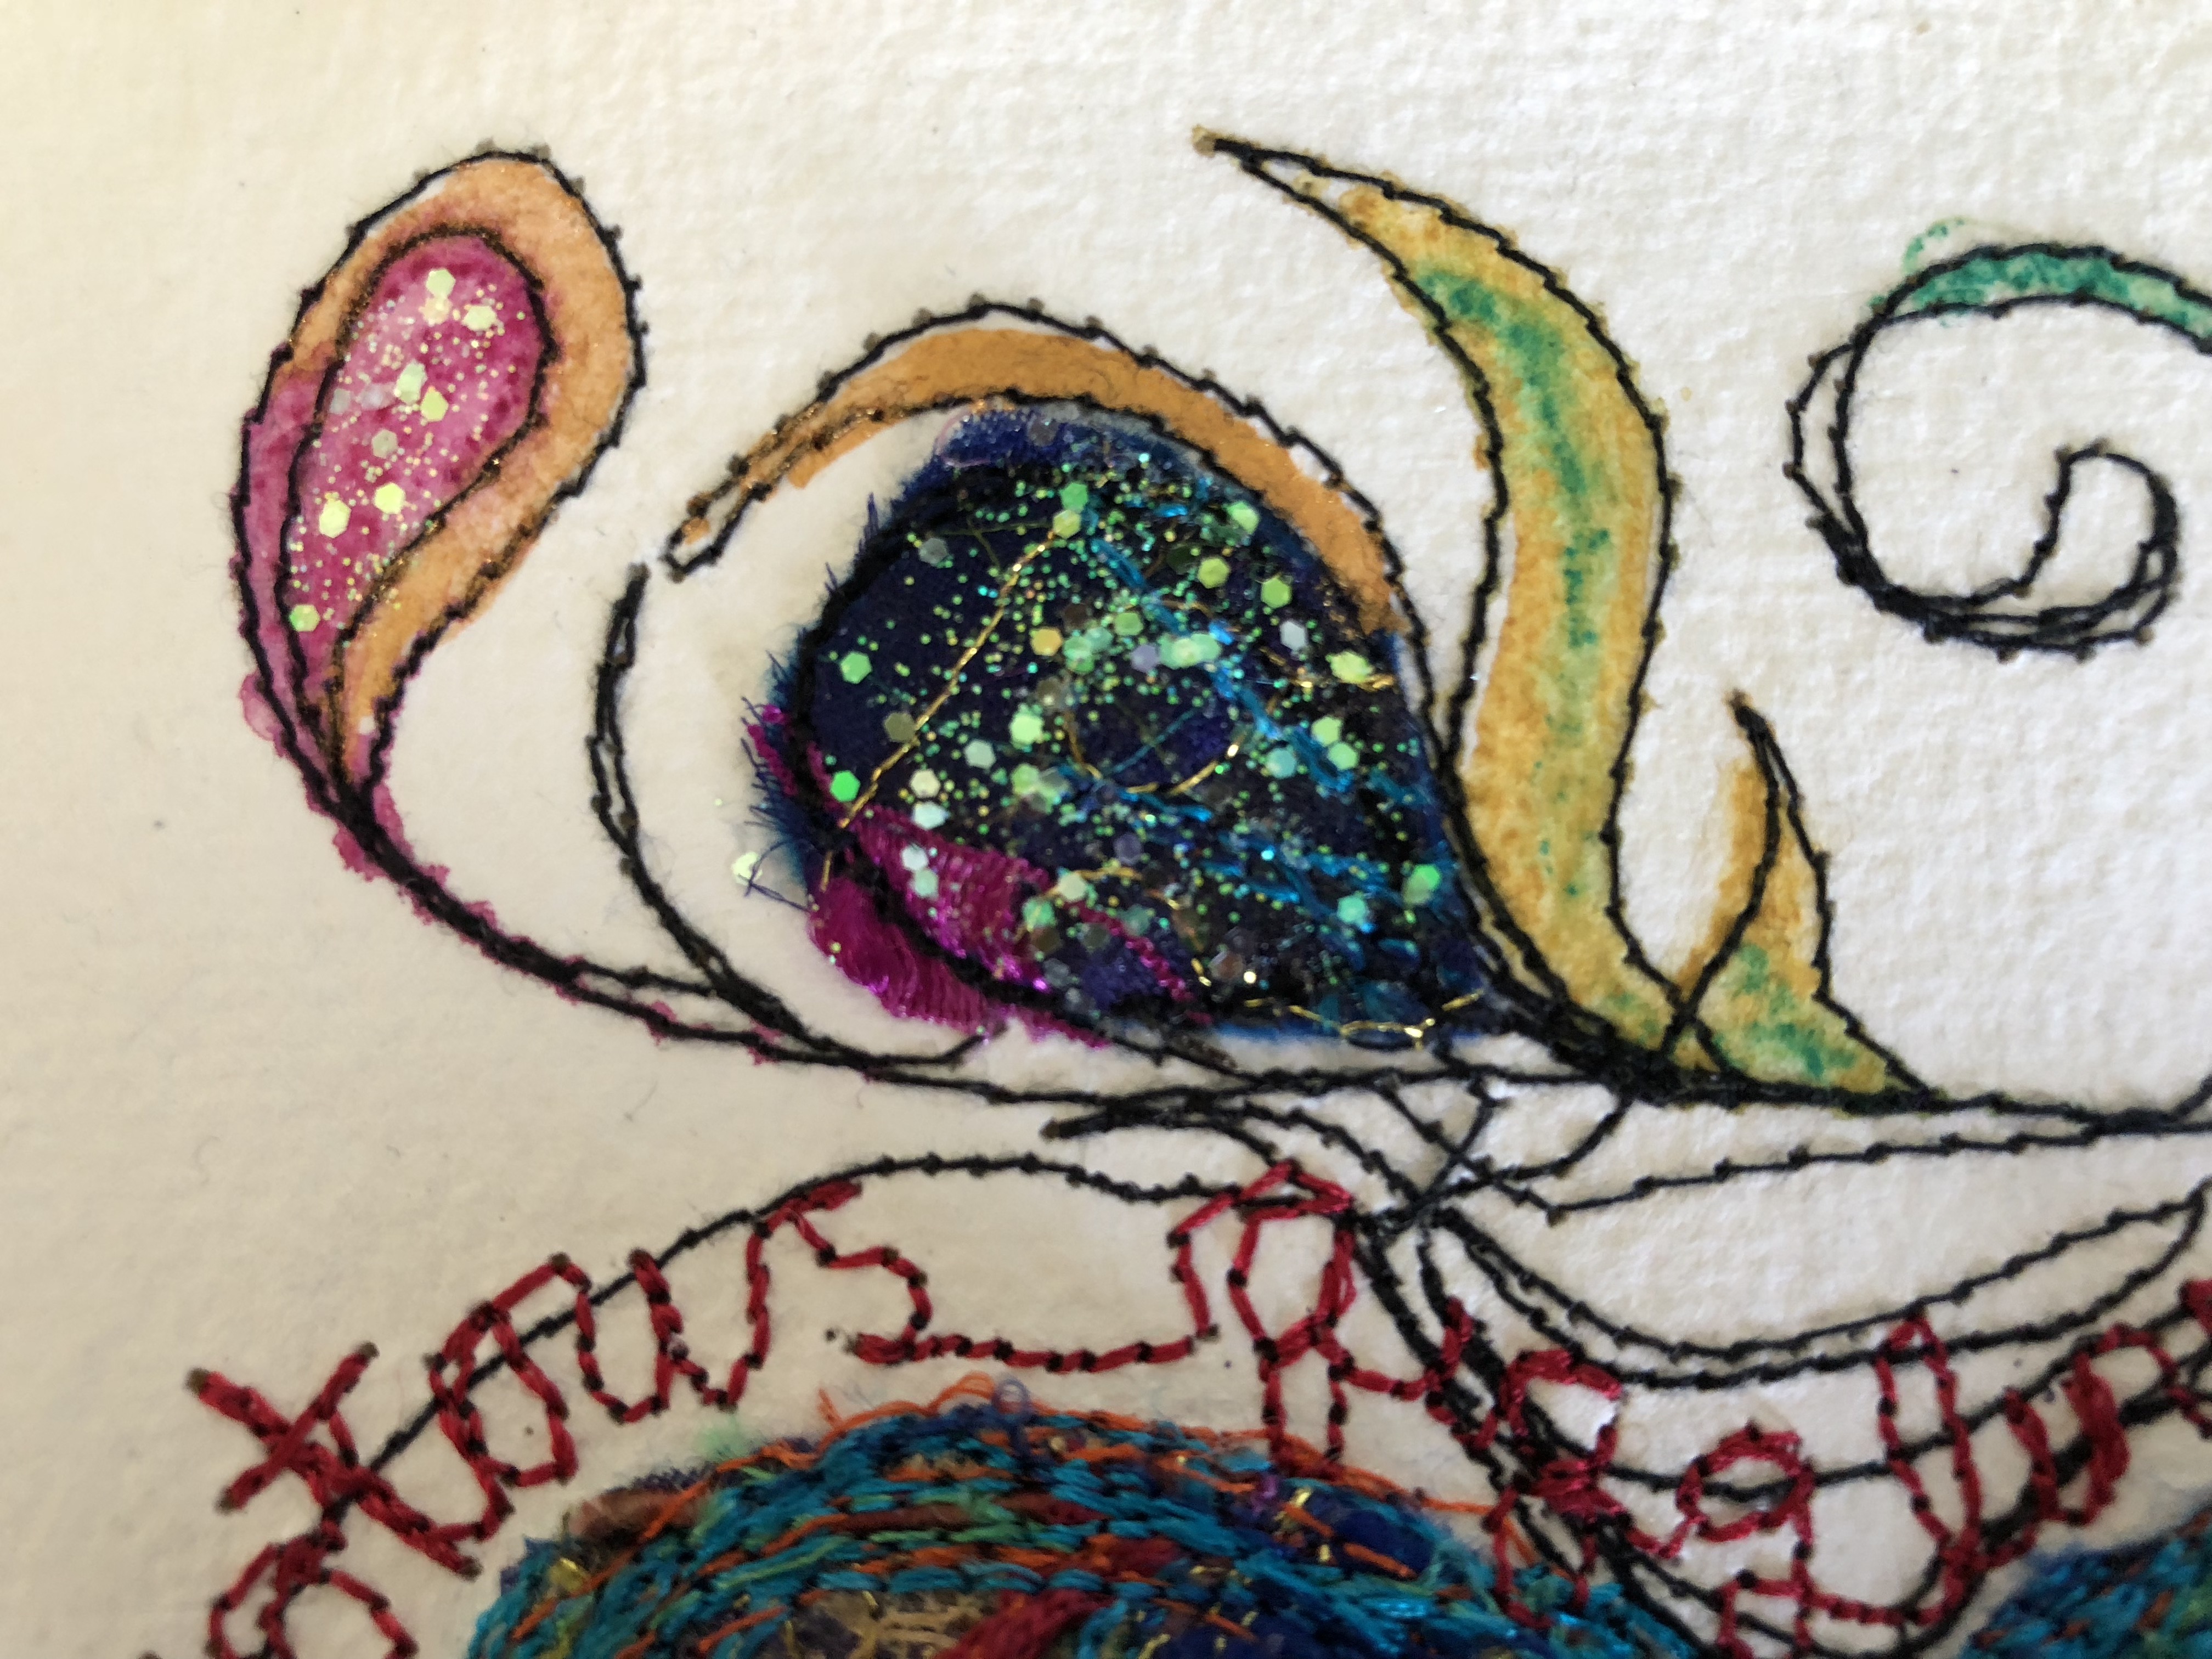
The final bling to your heart I have filled in the open areas of the black stitching with water colour/ inktense pencils , metallic gold paint and a little glitz opal dust.

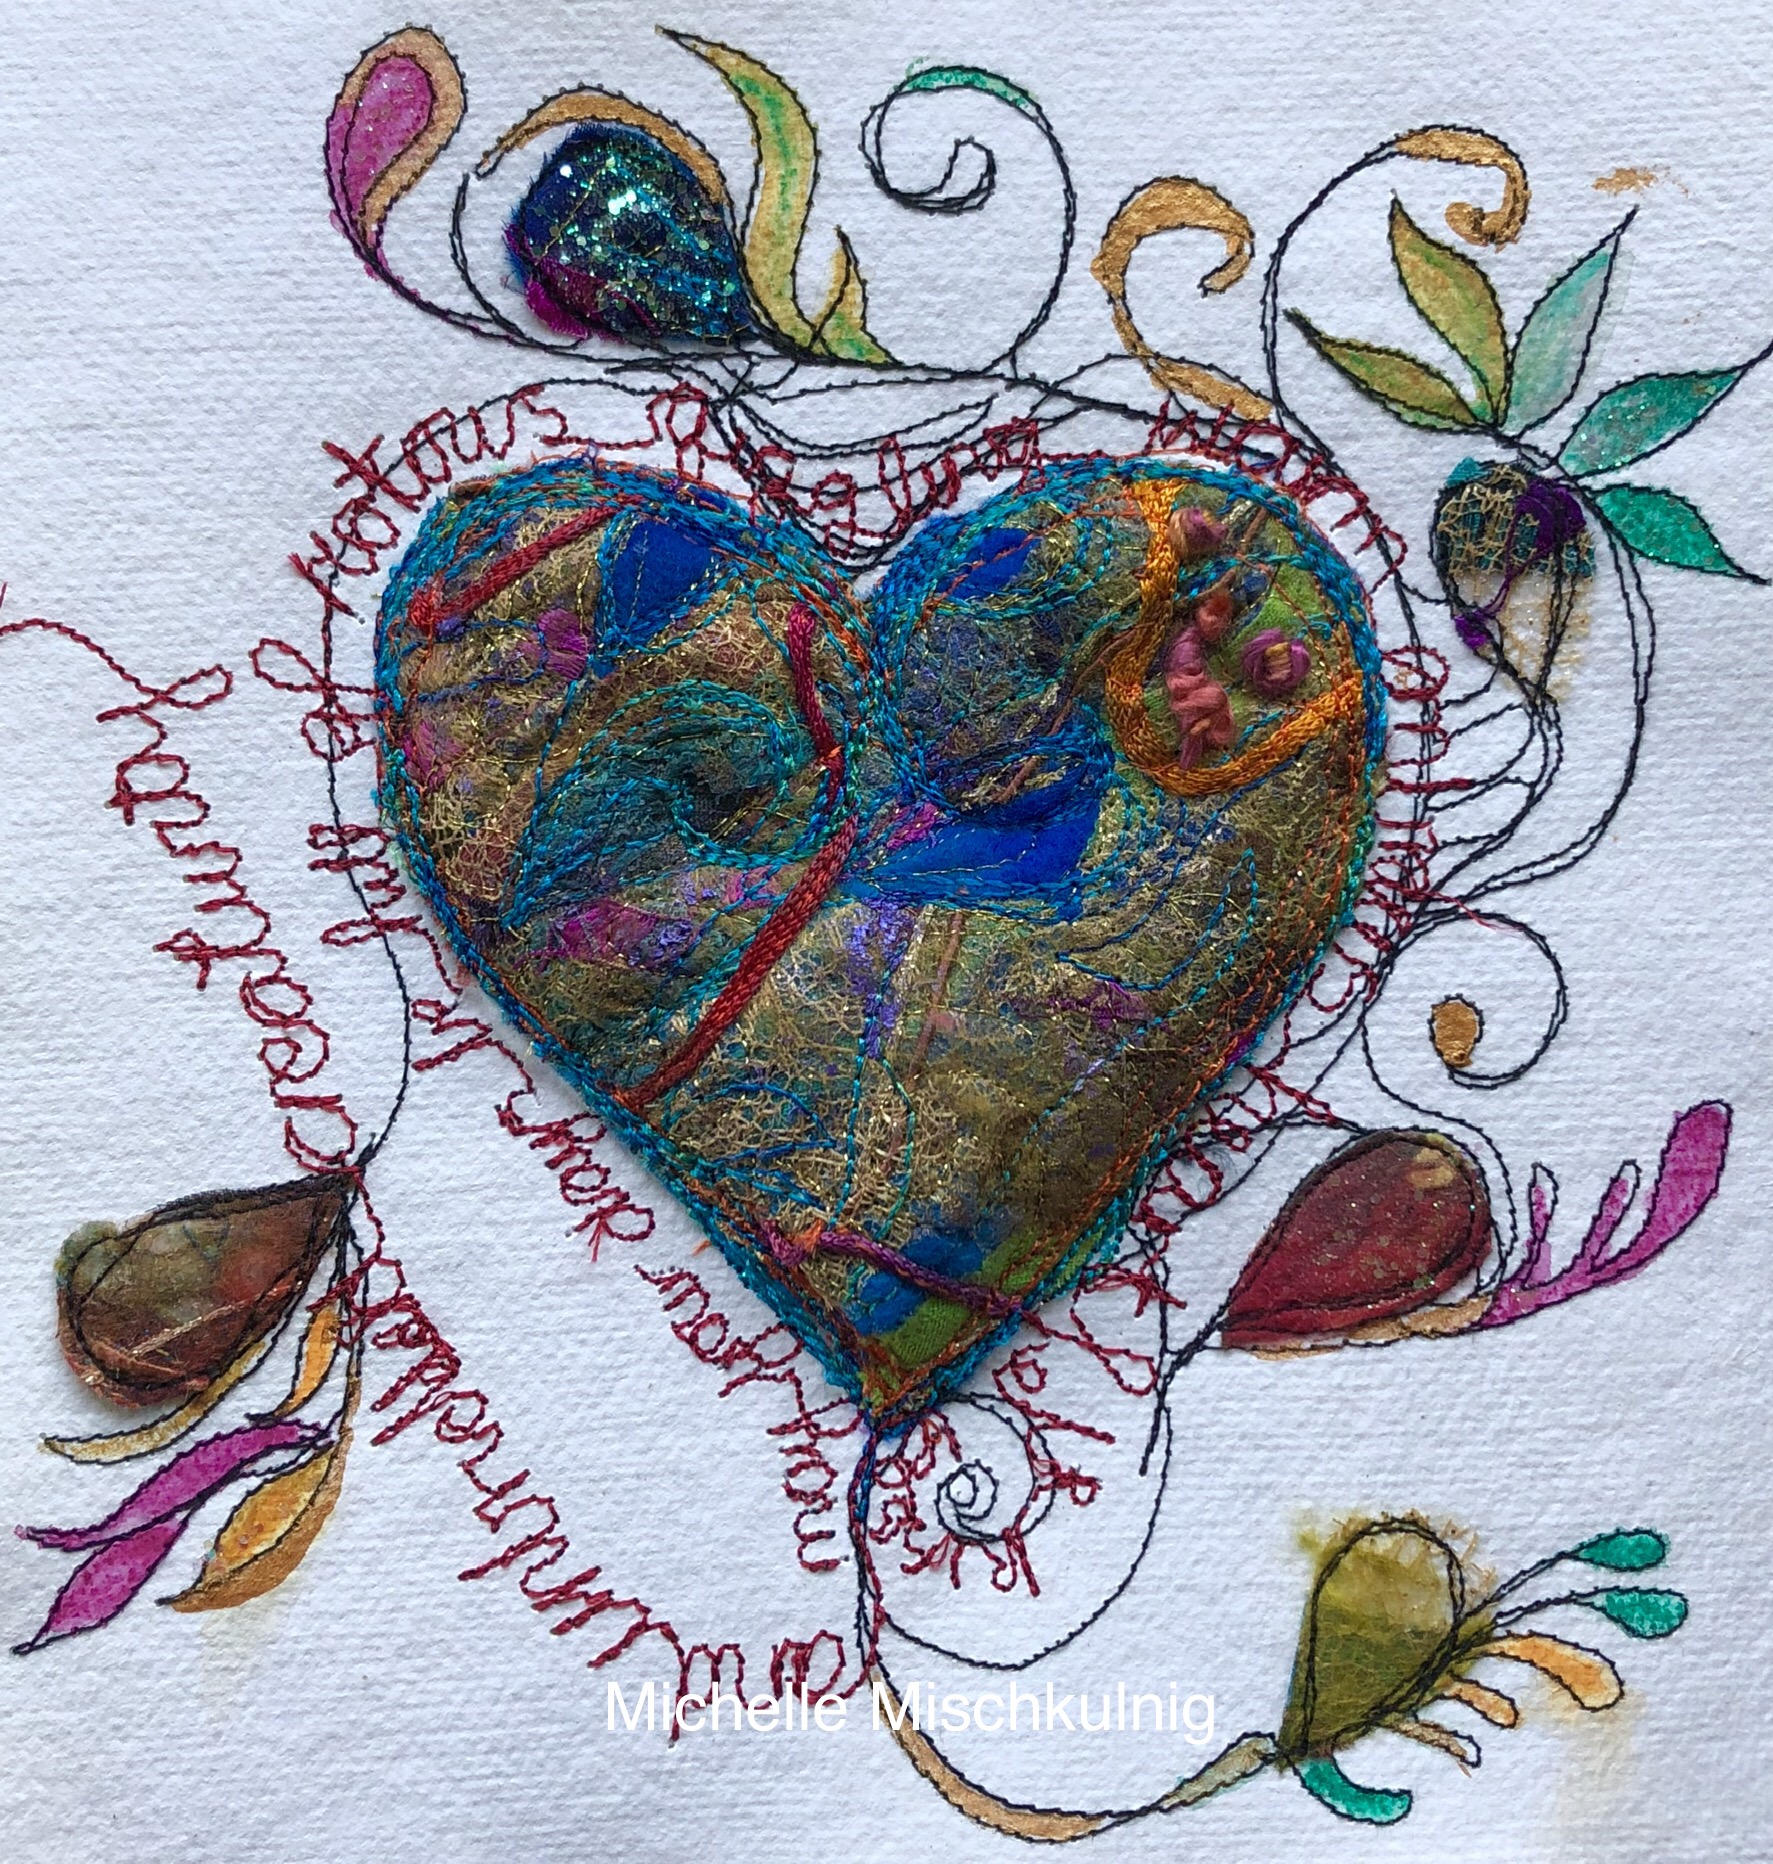
So there it ends how you complete your heart and if you frame it or make it into a special card or just use this blog as a possibility that inspires you is your choice , enjoy and create .
Don’t forget to check out my updated website, events has all my upcoming teaching and the shop has a few goodies in it .
Take care and love every day and always, always look for the magic .
Hi Debbie I am exhibiting in San Diego April-June next year at Visions ay visions museum o f contemporary quilts and textile art but I am teaching at Art Quilt Tahoe November next year https://artquilttahoe.com registration opens in November online, I would suggest you send her an email via the contact page to say you are interested as there id a lot of interest and they will tell you more about the process. Thank you for your interest in my art work :-)
I see you will be in San Diego in 2019,,,will you share when and where you will be…are you doing some teaching, and when could one sign up for classes, if available…or maybe they are already booked?? Thanks,,,I absolutely love your creative designs.