Using some of that “stuff “in the sewing room
Mystery is at the heart of creativity. That, and surprise. Julia Cameron
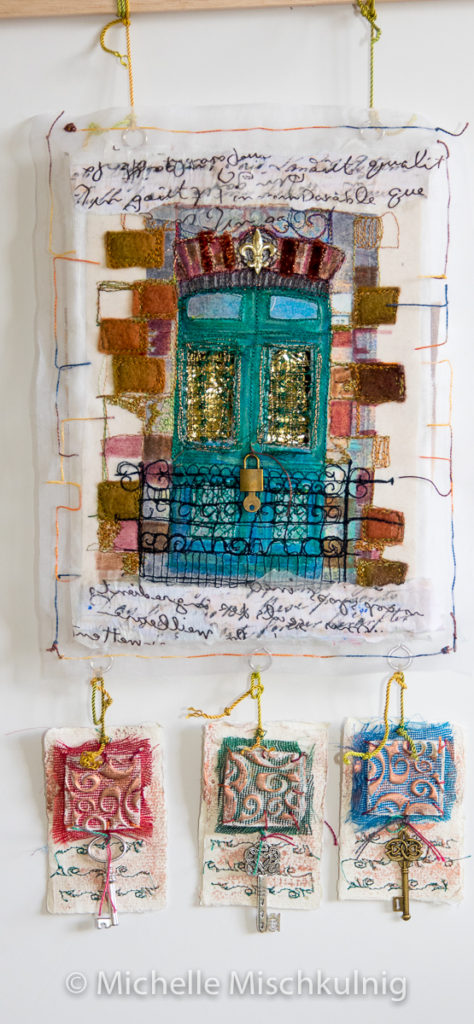
While doing the New year tidy up in my sewing, creating, playing work room over Christmas, I was prompted to wonder why I had collected up so many small stretched canvases and where was I going to store them ?????? , you know that feeling ?????. What can I make with them as a project to share ?. The reason I had sourced so many of them was for a brilliant idea in the past that wasn’t quite as brilliant as I thought, time to move them on. Before I give them away I thought I would have a little play with a couple of possibilities to share with you. Some new projects to mess up my newly tidied work room and yours.
Ps had a fantastic Christmas full of good stuff and 2017 is looking pretty exciting, I truly hope your year is full of good creative “stuff”.
Materials
Old city door image inspiration to work from. This image of the door must have the ability to have windows to cut out.
Silk organza or sheer fabric.
Rayon machine embroidery threads.
Closed toe, free motion embroidery foot.
Small portrait size canvas , pre stretched, the size is dependent on your door image but no smaller than 15cm x 20 cm
PVA Glue or equivalent.
Craft glue.
Fusible web.
Watercolour paper or Khadi cotton rag paper.
Fimo light optional.
Hand threads.
Chord for hanging.
Hanging timber, the length dependent on size of canvas .
Embellishments such as keys and padlocks.
Small piece of water soluble fabric.
To start with visit good old google and do some image research for your door design, when you have the one you love print it out on normal computer paper. I use sourced images but resize and play with the colours etc in some basic apps or I draw them from the original altered when stitched. If you are confident and have the time draw your own inspiration.Make sure you print out size is proportional to the canvas. My door size does not fill the canvas.
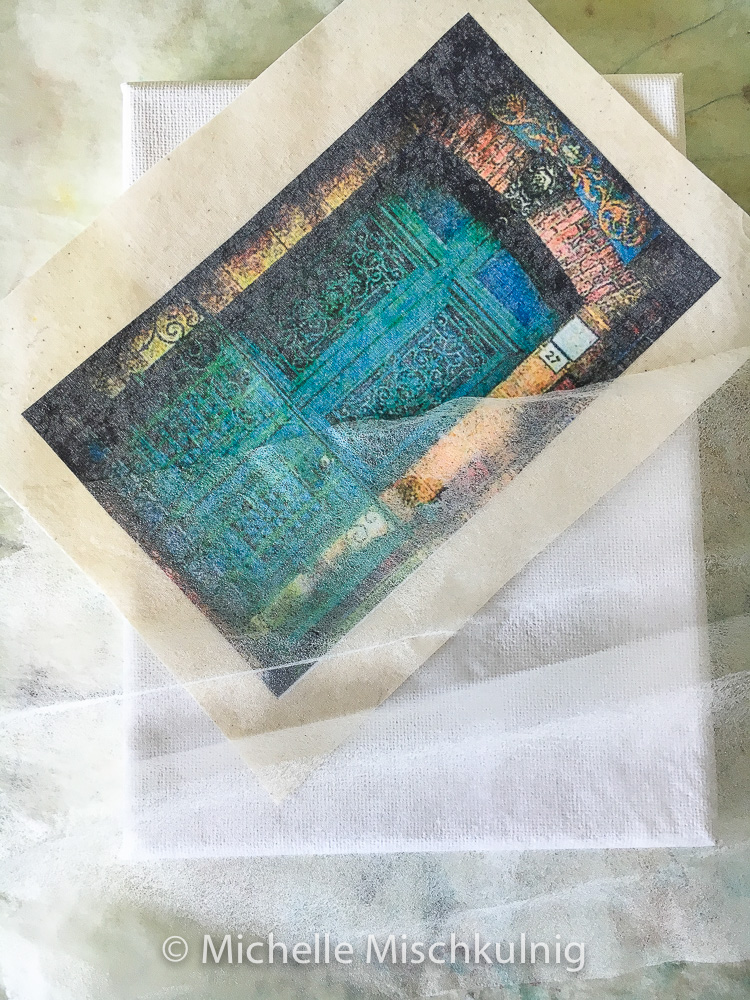
After you have printed the image trim to size and using a layer of fusible web attach the paper image to a calico backing to give it strength when sewing.To do this peel a piece of fusible web of the backing and sandwich between calico and image. Fuse using a hot dry iron and baking paper to protect the iron and the image print.
Using the same method as above fuse a layer of organza to the the image of the door . I have cut the organza a little larger than the canvas to, this gives it a fabric look and a lovely surface to paint and stitch it softens the image and strengthens the paper for stitch. To do this peel a piece of fusible web of the backing and sandwich between organza and image.Fuse using a hot dry iron and baking paper to protect the iron and the organza.
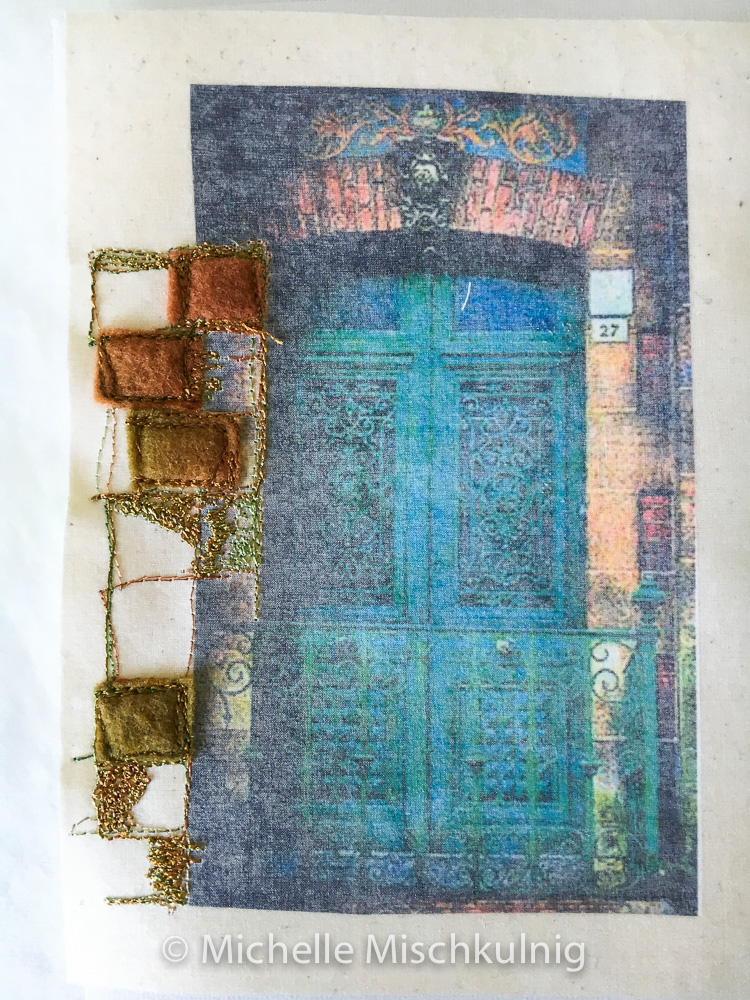
Free motion embroider the organza covered image, highlighting areas and adding textures and colours with interesting fabrics and papers .Colour in with fabric pens special details etc
Cut out your 2 windows
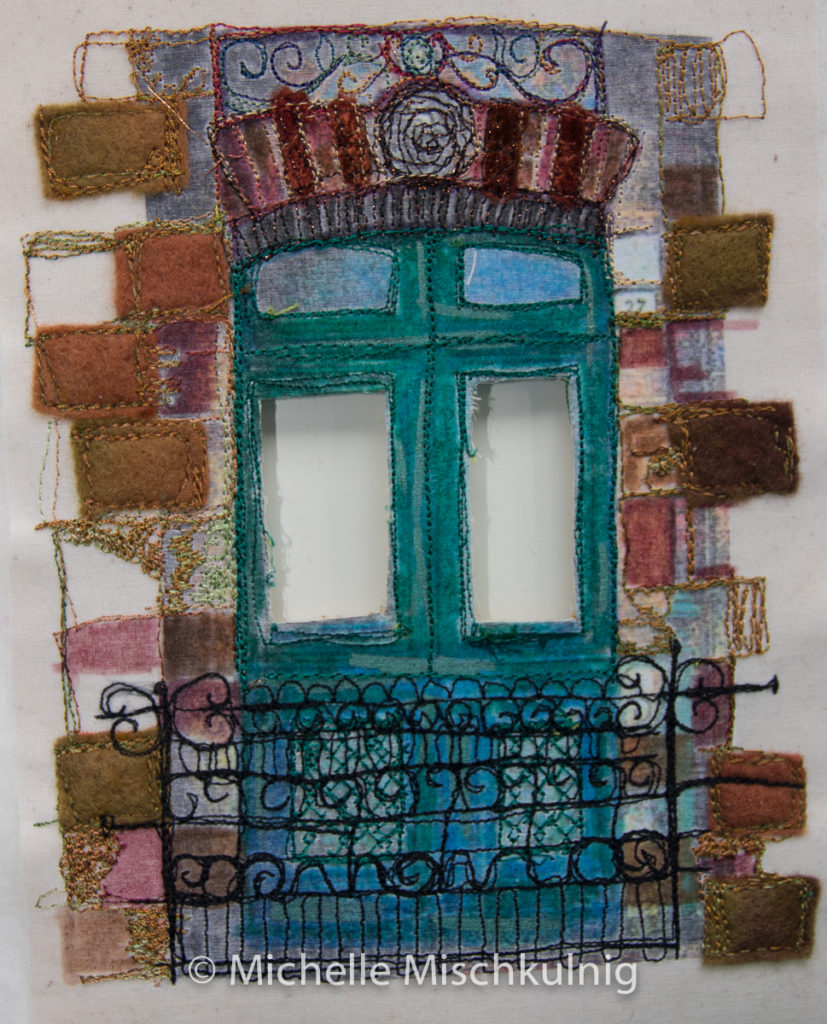
Lay the image with cut out windows on the top surface of the stretched canvas and mark the window size then cut .
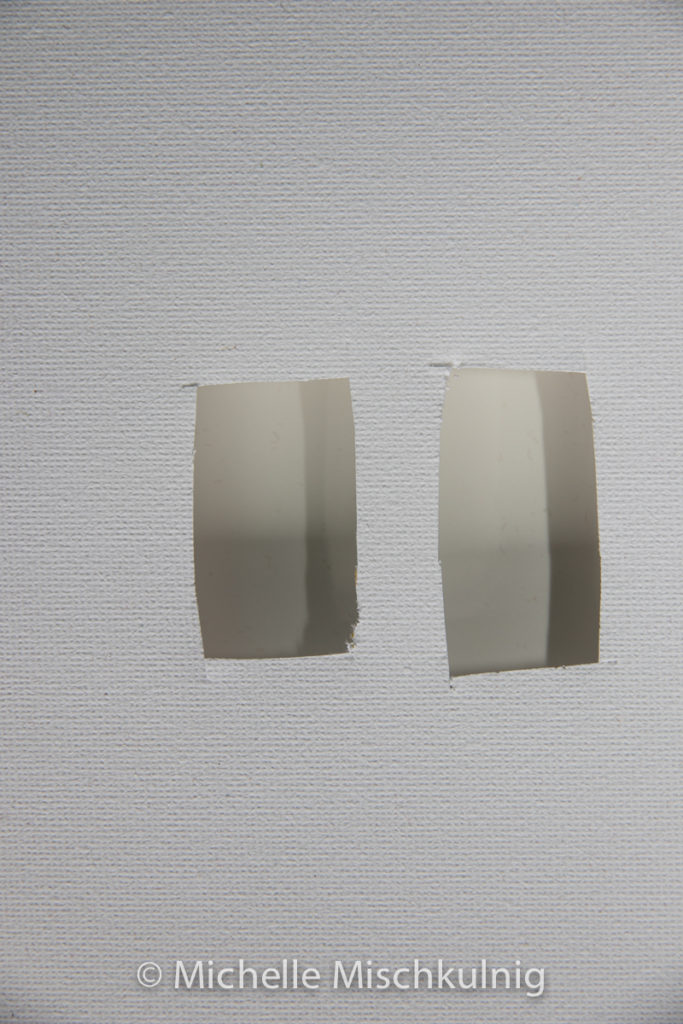
Turn the canvas upside down and stitch from the back. Before you stitch place the windows of the door stitched design to match the canvas cut out areas and then stitch around the edge of the windows.This holds the layers together and the windows tight to the canvas
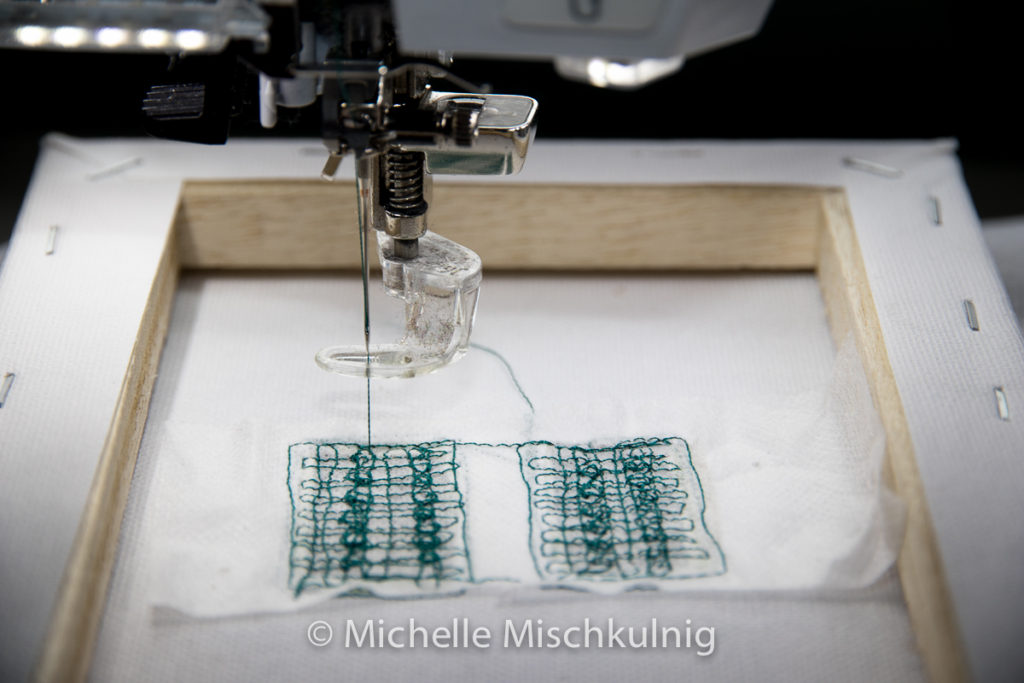
Think of the canvas frame as a embroidery hoop as you move it under the needle . You need to carefully slide the canvas a stitched design under the needle and foot for the free motion embroidery foot.
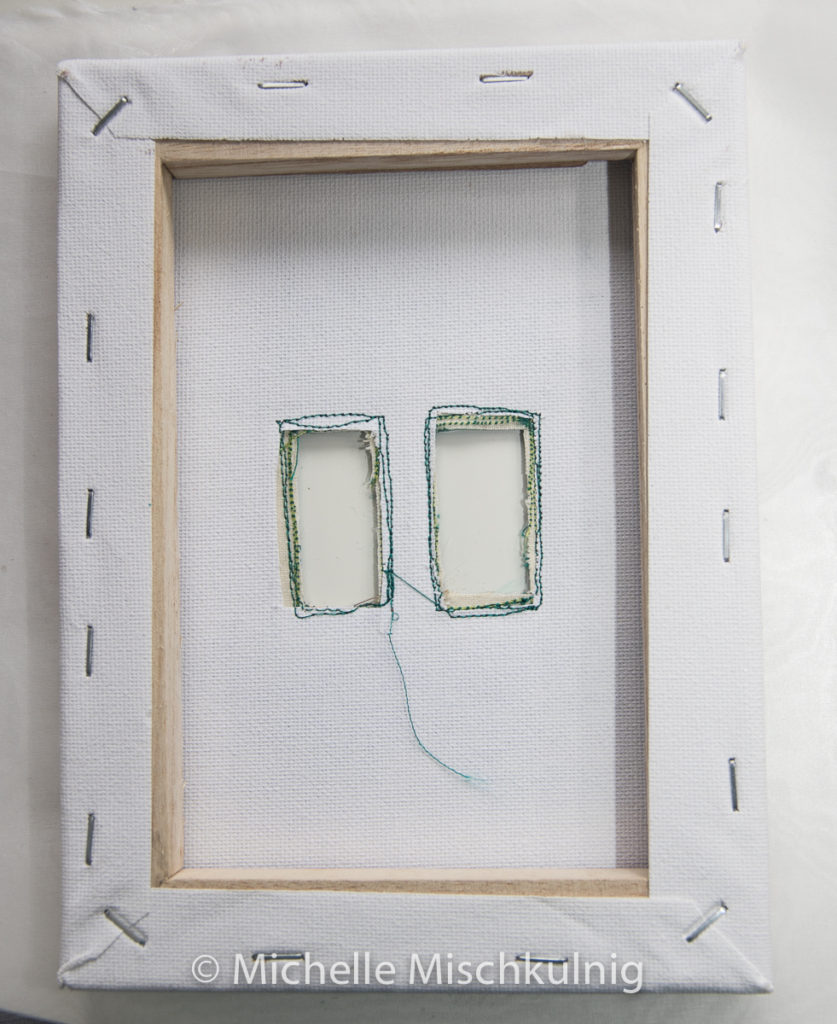
Cut a piece of water soluble fabric just a little larger than the cut out windows and free motion stitch the inside window cut out area, be sure all your stitches connect and that they catch the cut edge of the window.
Now that you have completed the stitching you will need to dissolve the water soluble carefully using warm water on a sponge. To do this I placed the canvas upside down on a old bath towel and careful sponged the window stitching with warm water on a sponge
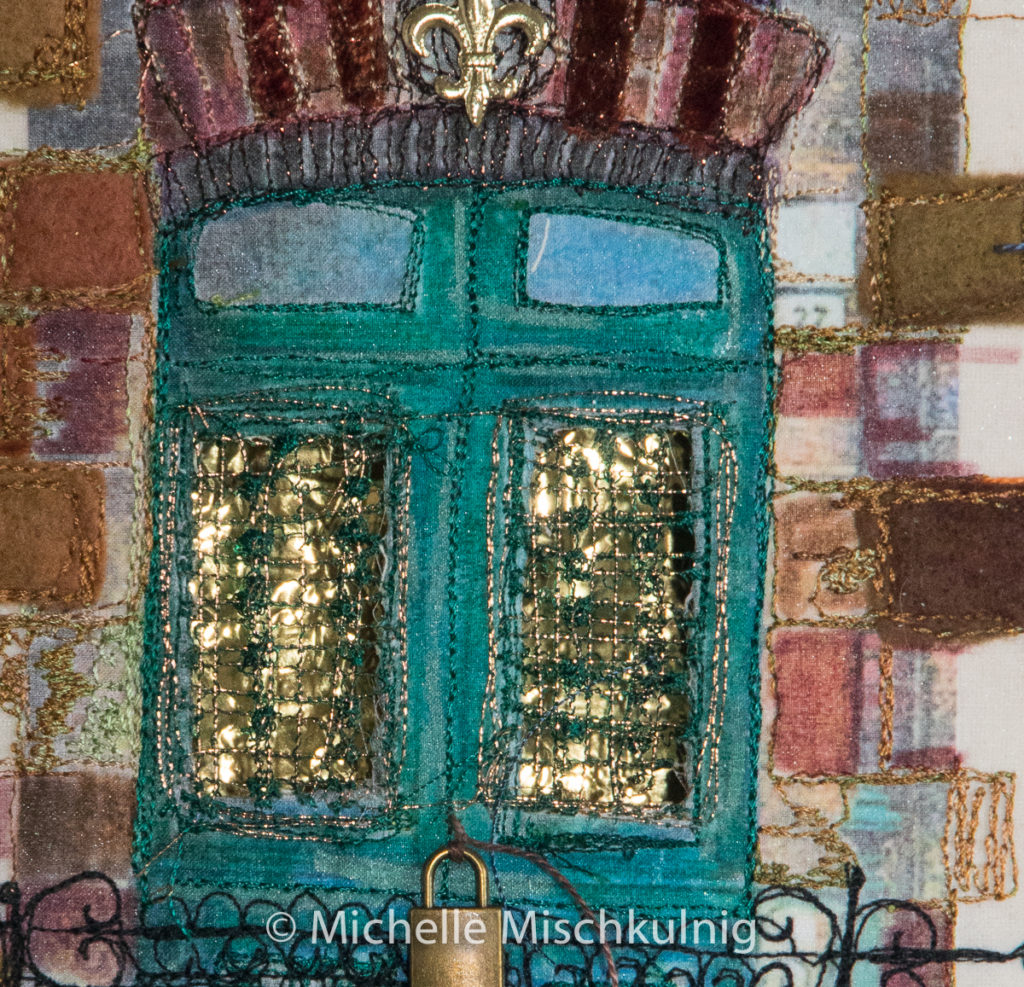
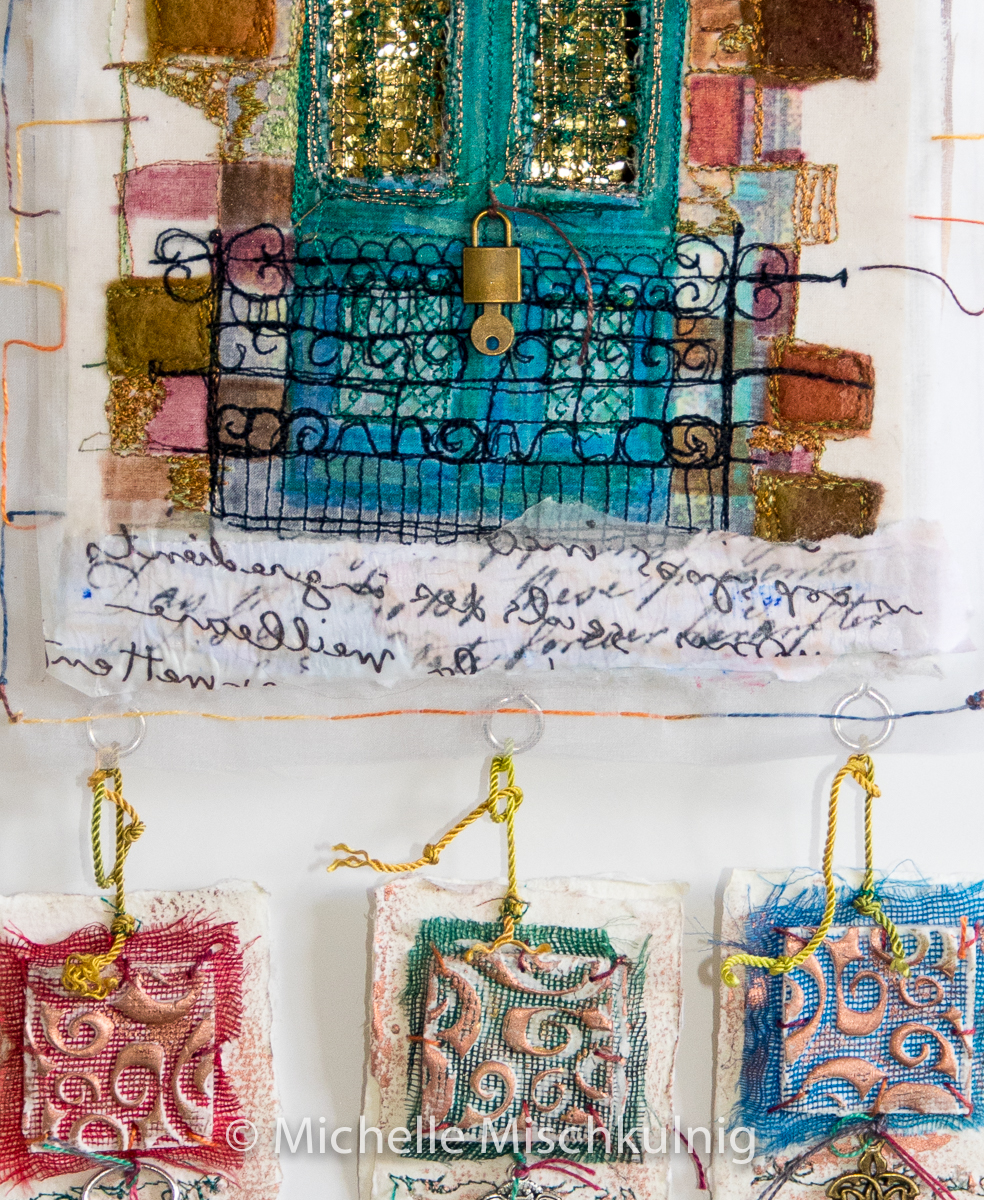
Glue the body of the door i.e. the stitched calico image to the canvas using craft glue. At the back of the canvas frame I stretched some gold foil from timber to timber of the frame which sets it back from the window and adds depth giving the appearance that there is a light on inside. I have also decorated with printed deli paper and old writing printed of the computer.This is attached to the canvas with layers of PVA glue.I use found objects such as a padlock to tell more of the story.I have hand stitched around the organza edging.
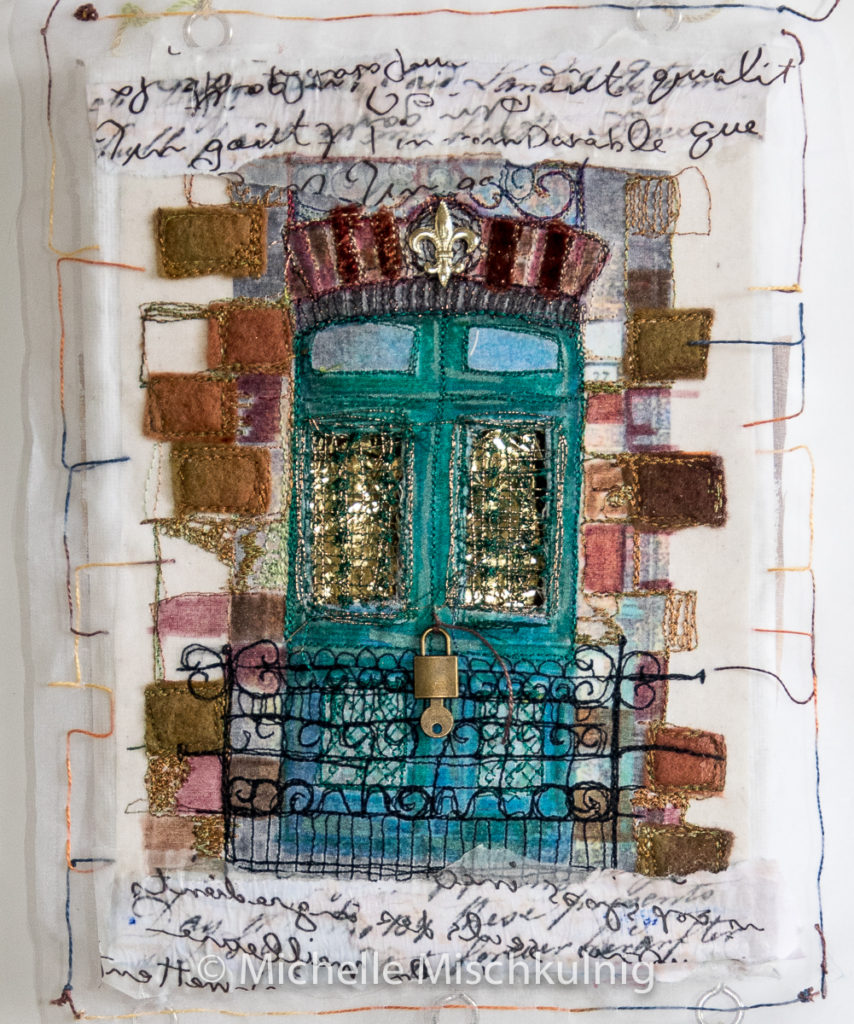
Using screw eyes I prepare the art work for hanging, I have screwed in 2 screw eyes into the wooden frame of the canvas at the top of the door and 3 to the bottom of the canvas frame.
From the bottom 3 I am going to dangle some bling.This is optional and ope to any interpretation.

The bling optional
I have previously made some “fimo light” tiles with a mould . I pressed the fimo light with a fine mesh fabric on the surface into a small tile mould and after it was dried I used a copper buff to pick up the raised areas.
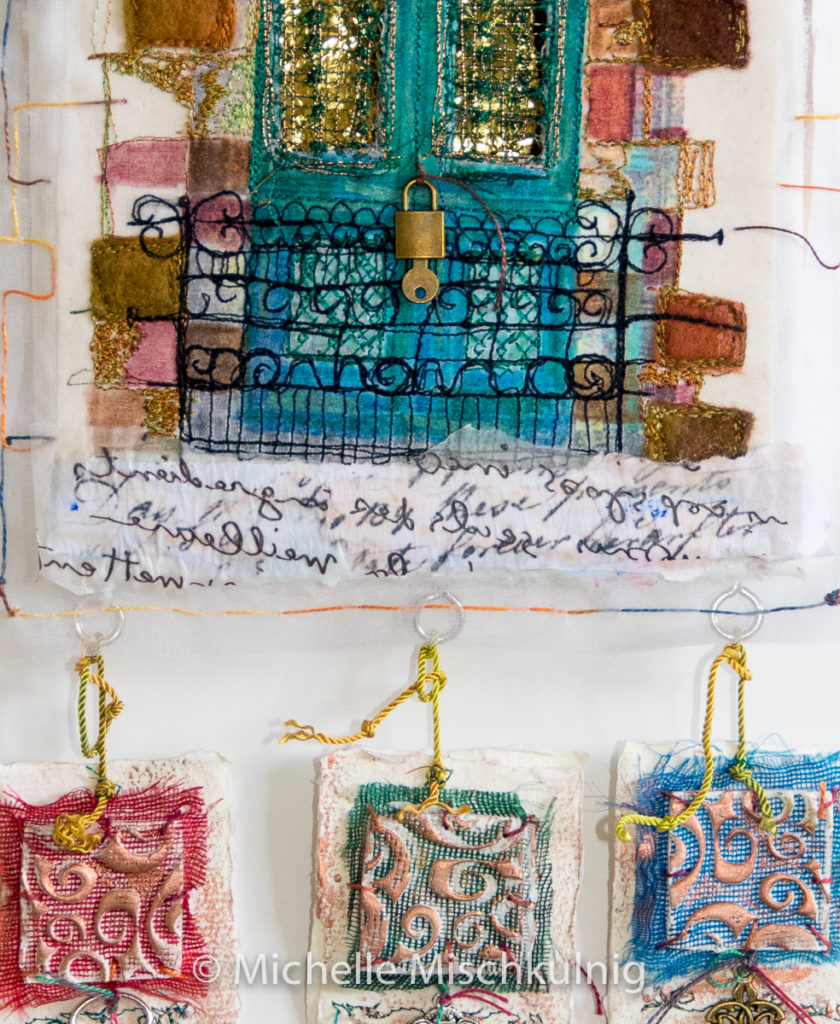
I hand stitch these little tiles onto some hand made cotton rag paper but you could use a heavy weight watercolour paper. The tiles can also be carefully machine stitched, nice and slowly if you prefer machine t to hand stitch.
The bottom half of the hanging bling paper is stitched with a computerised sewing pattern and then rubbed over with a copper metallic rub and hung swinging to the screw eyes with chord stitched to the top of the hand made paper.
I then hang keys on the paper by hand stitching
You have now finished and I hope that this is just a possibility that you can grow and own as yours.
Happy creating.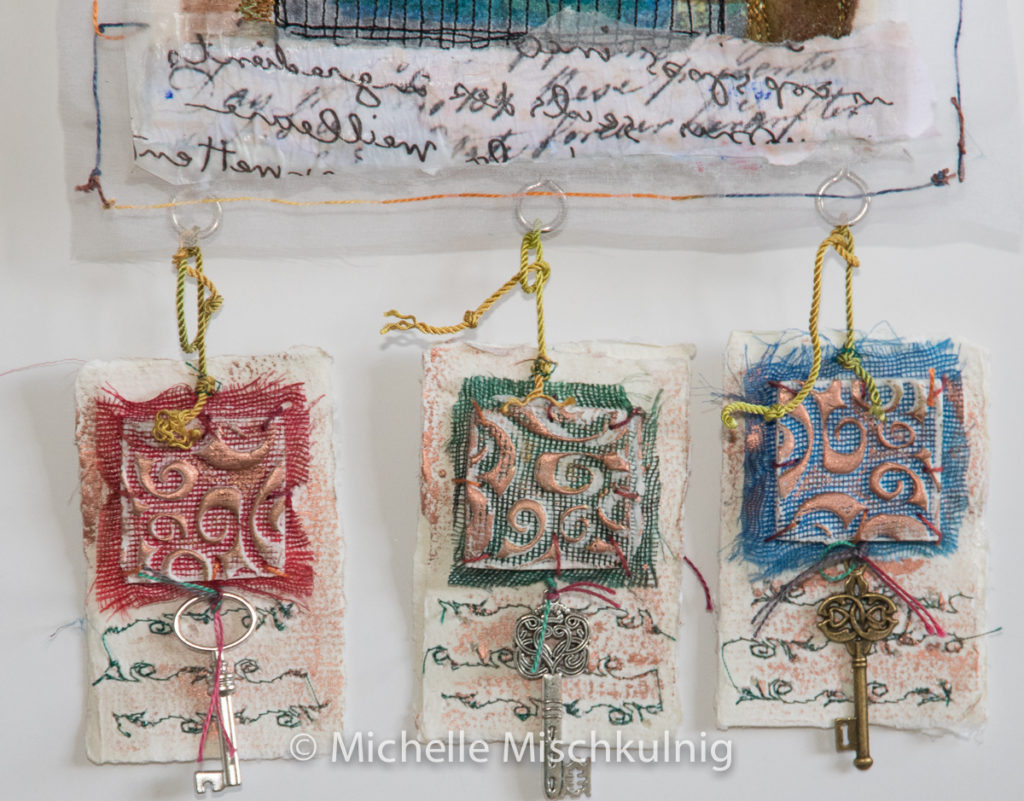
Stay tuned there is a second blog with another idea for the small starched canvases arriving very soon.
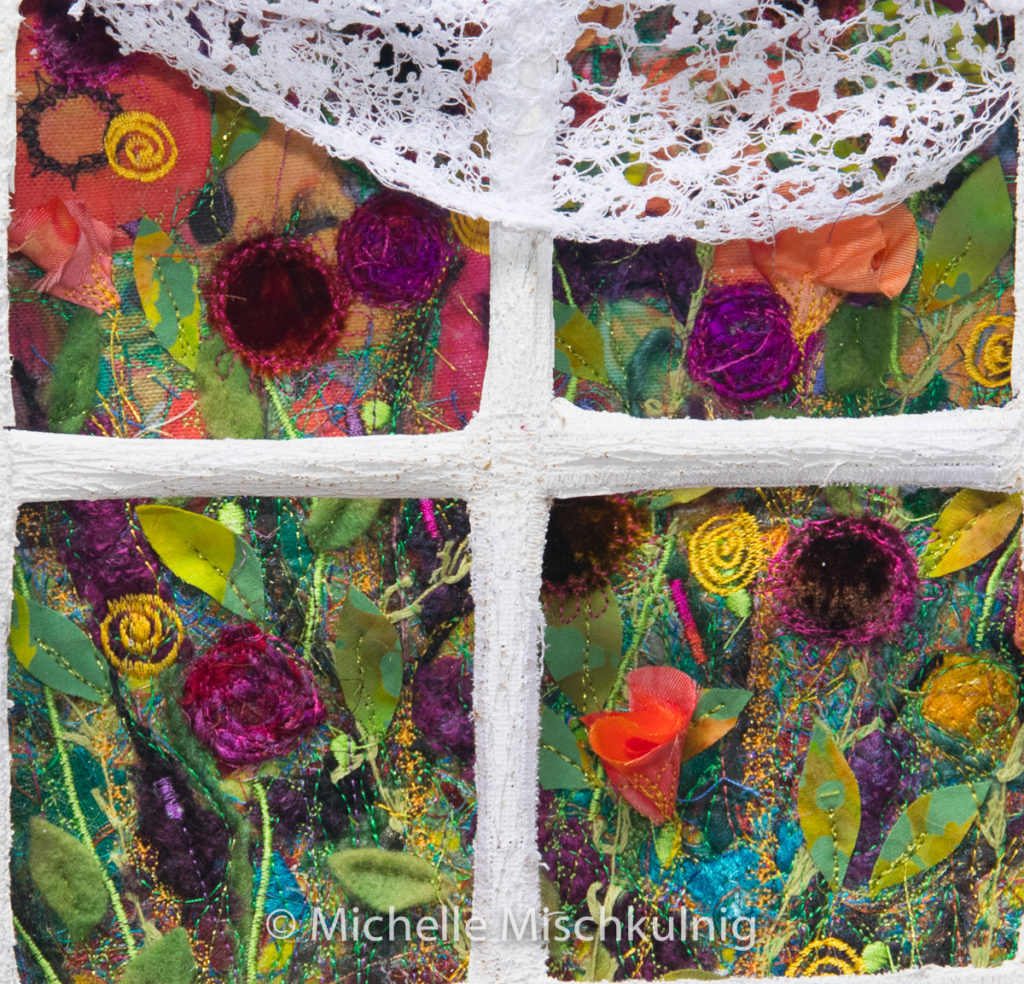
Dont forget to visit my events page for teaching in 2017 some are already booked out but there are others to choose from. https://chelletextiles.com.au/events/
Below is my project for Lake Tahoe in November http://artquilttahoe.com
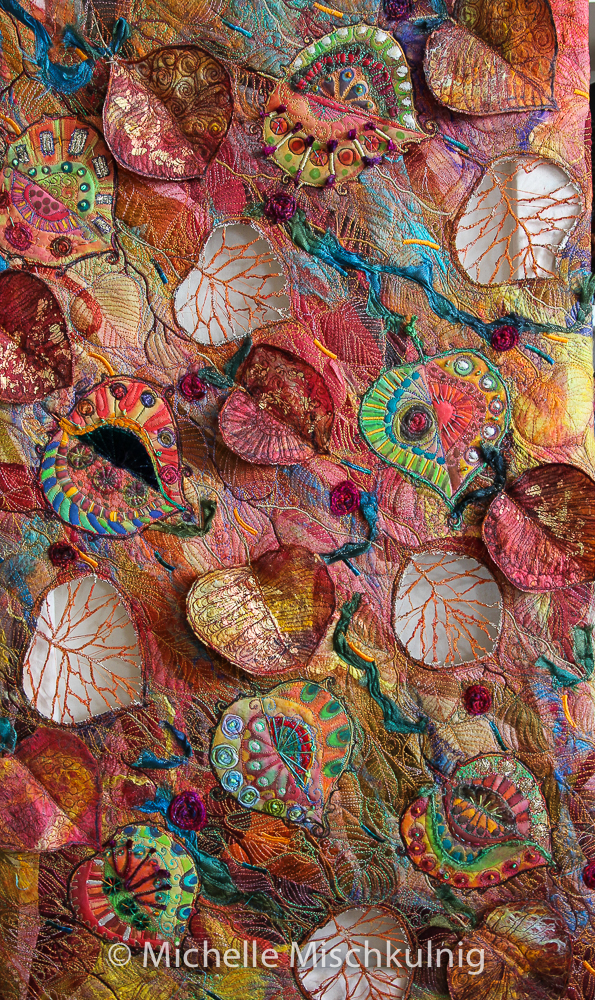

Hi Anne thats exciting I am really looking forward to teaching there and meeting you all we will be excited together and have lots of fun and a adventure in textiles to share.
Am excited – have signed up for your Lake Tahoe workshop. So looking forward to it!
Thanks Marilyn look forward to seeing where you might take this .
Another fabulous tutorial full of great ideas