Textural Journey 2
Where did the last two weeks go ??????
The world always seems brighter when you’ve just made something that wasn’t there before. Neil Gaiman
I said I would publish a texture every two weeks this one is a little early but it slotted in nicely to today , who knows when the next one will be, please play and have fun.
Material for play
Please remember you are just playing substitute anything you done have on hand. The number of different thread colours is up to you I use many , because that is me.
Small amount of fusible web.
Small amount of pre felt or felt , this is where i get my pre-felt from. http://www.thethreadstudio.com/catalogue/fab/fab2.htm
Small piece of velvet .
Small piece of hand dyed gauze or soft mesh.
Short piece of chord.
Metallic paint or similar.
Derwent intense blocks or water/ acrylic paints.
Hand thread.
Machine embroidery threads.
Stencil, optional.
Free motion foot.
Giding flakes optional. this is what I use http://www.thethreadstudio.com/catalogue/exp/gilding.htm
Gold buff optional.
Iron .
Sewing machine.
Baking papaer.
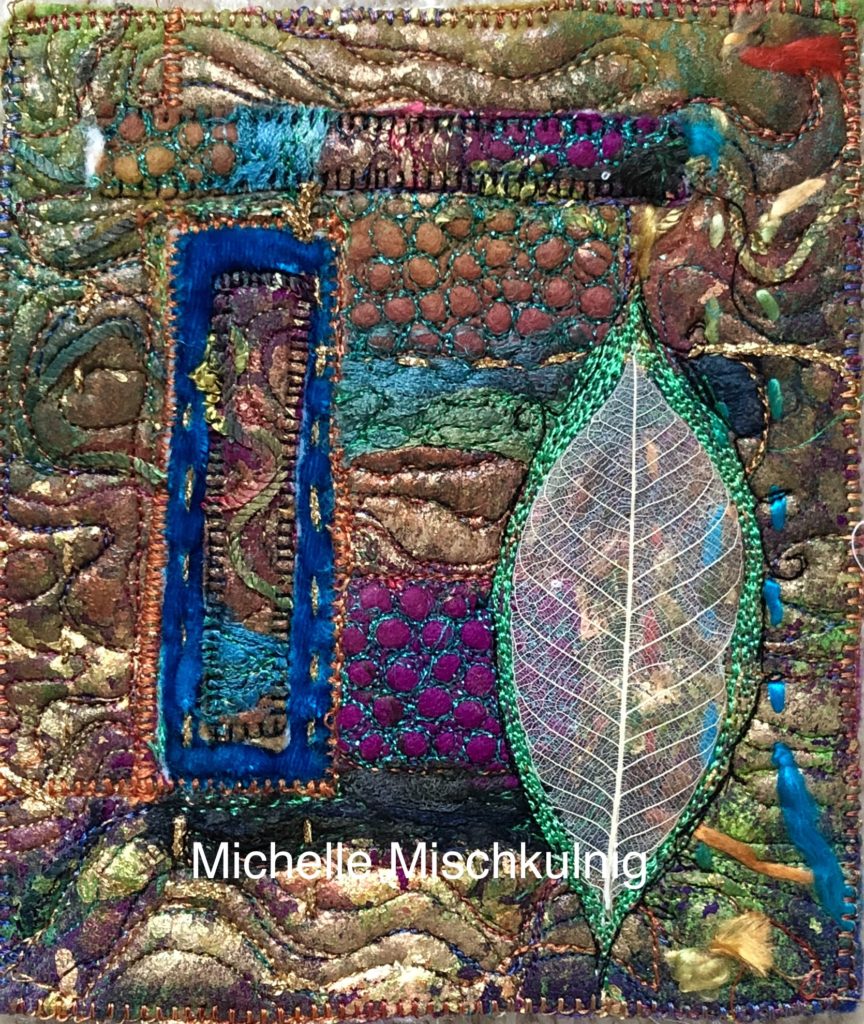
Step 1
Cut two pieces of fusible web to the same size. 
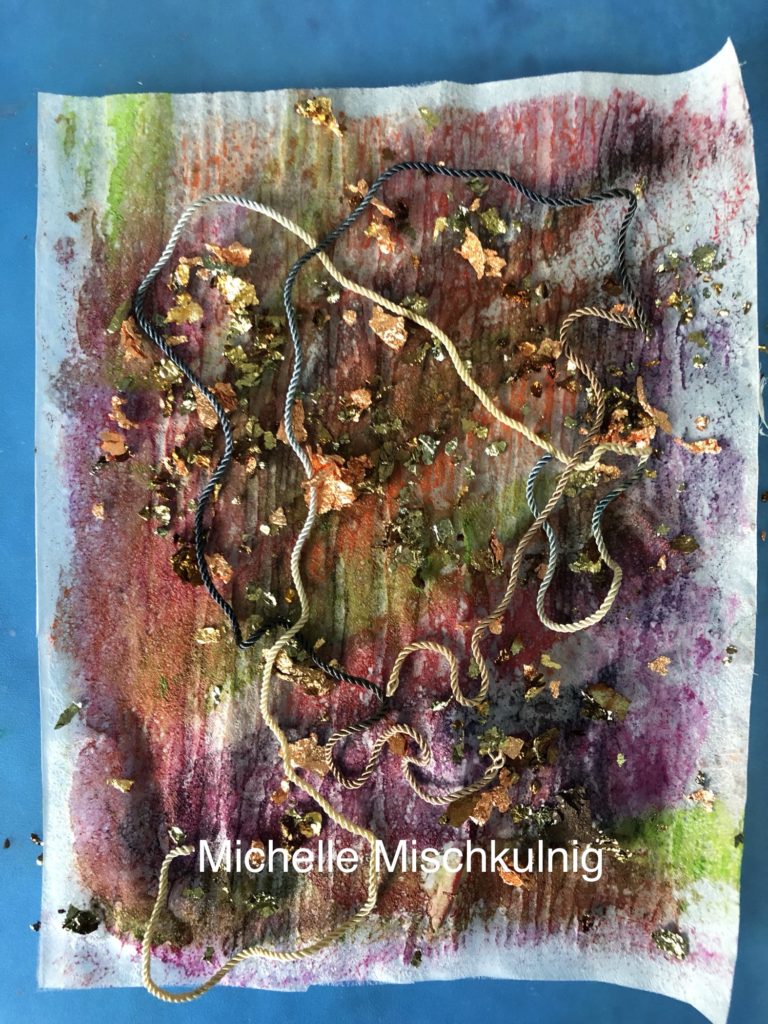
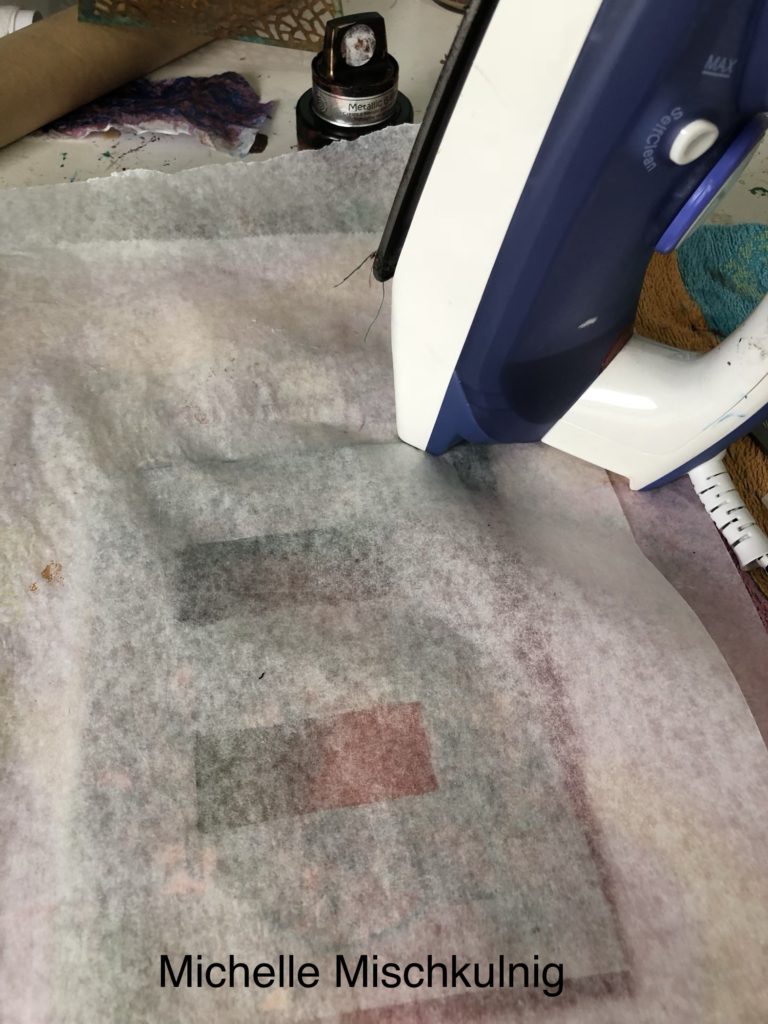
Put one pice to the side to use later and lay the second piece paper side down, textured side facing up. Carefully wet this side and then paint with the intense blocks or paints, do this gently so as not to tear the fusible web.
Step 2
When dry sprinkle gilding leaf or anything similar over the painted surface and also lay some chord with a nice texture.
Take your second piece of fusible web and peel form the backing paper.
Lay the peeled piece of fusible web over the painted surface and top with
baking paper then fuse with a hot dry iron.
Step 3
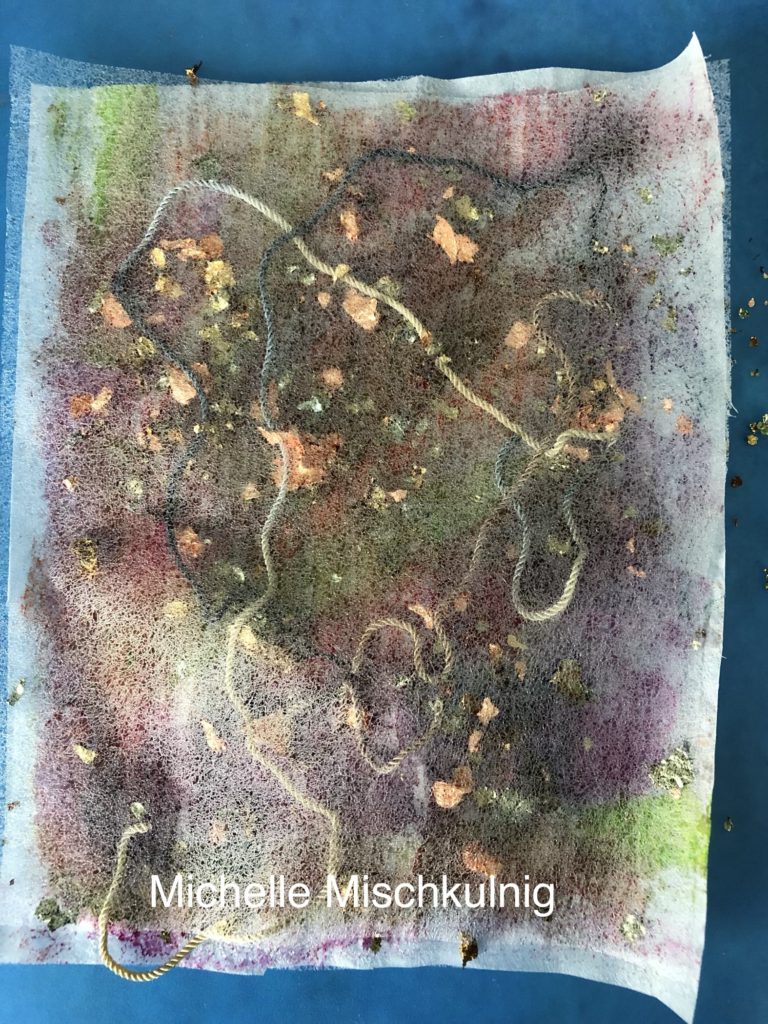
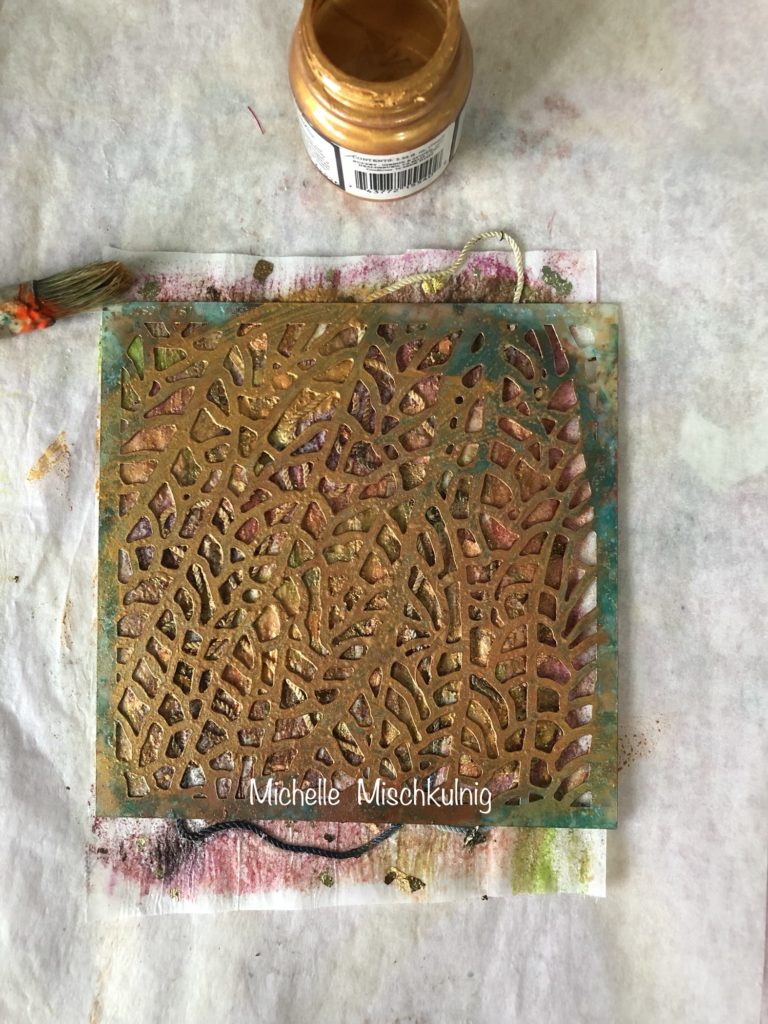
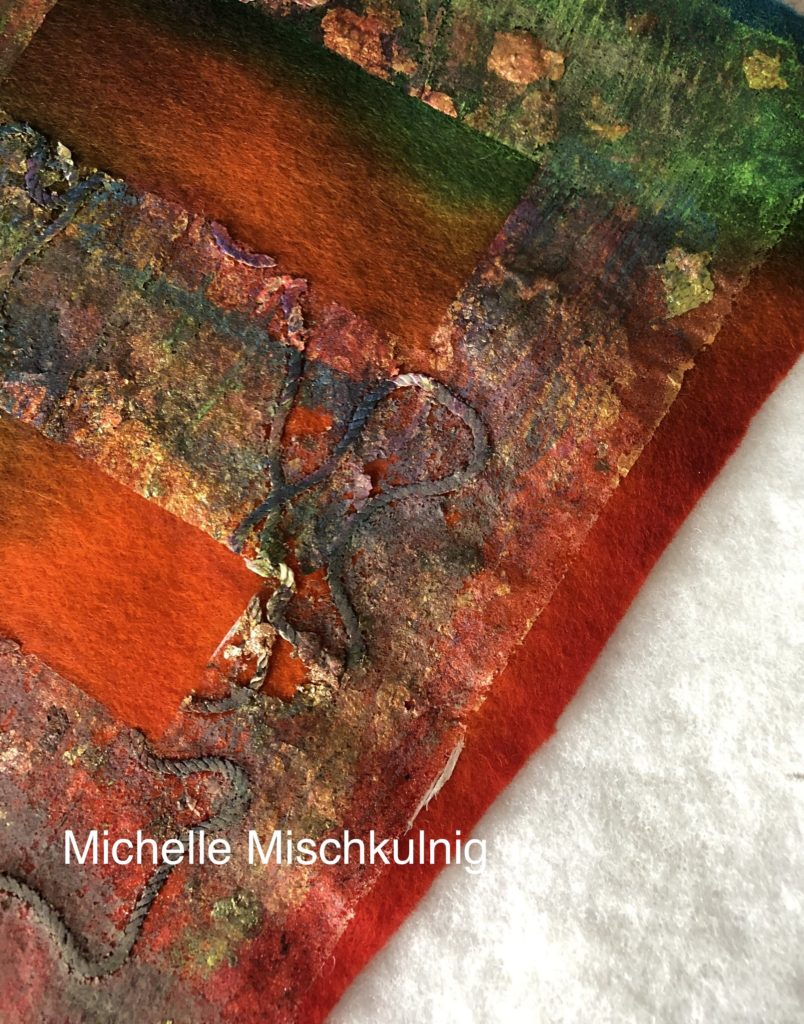
Peel the baking paper carefully away from the web leaving the web attached to the original backing paper. Then stencil with gold /metallic colour or if you don’t have a stencil you can just blob some metallic paint but not to much coverage.
Step 4
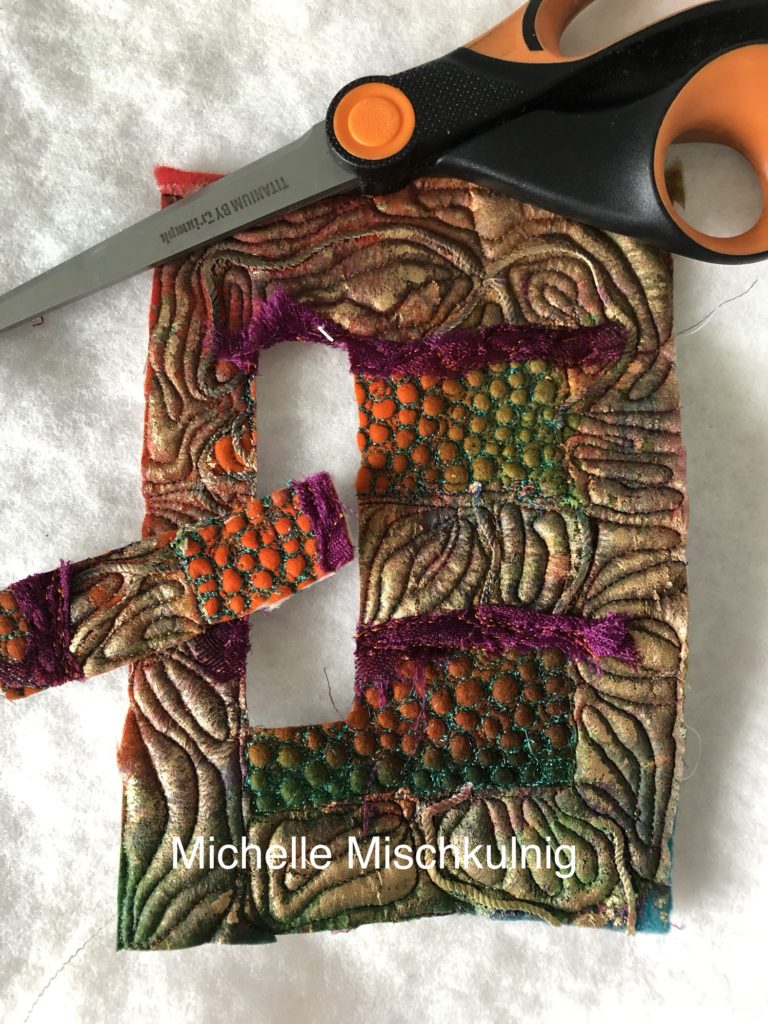
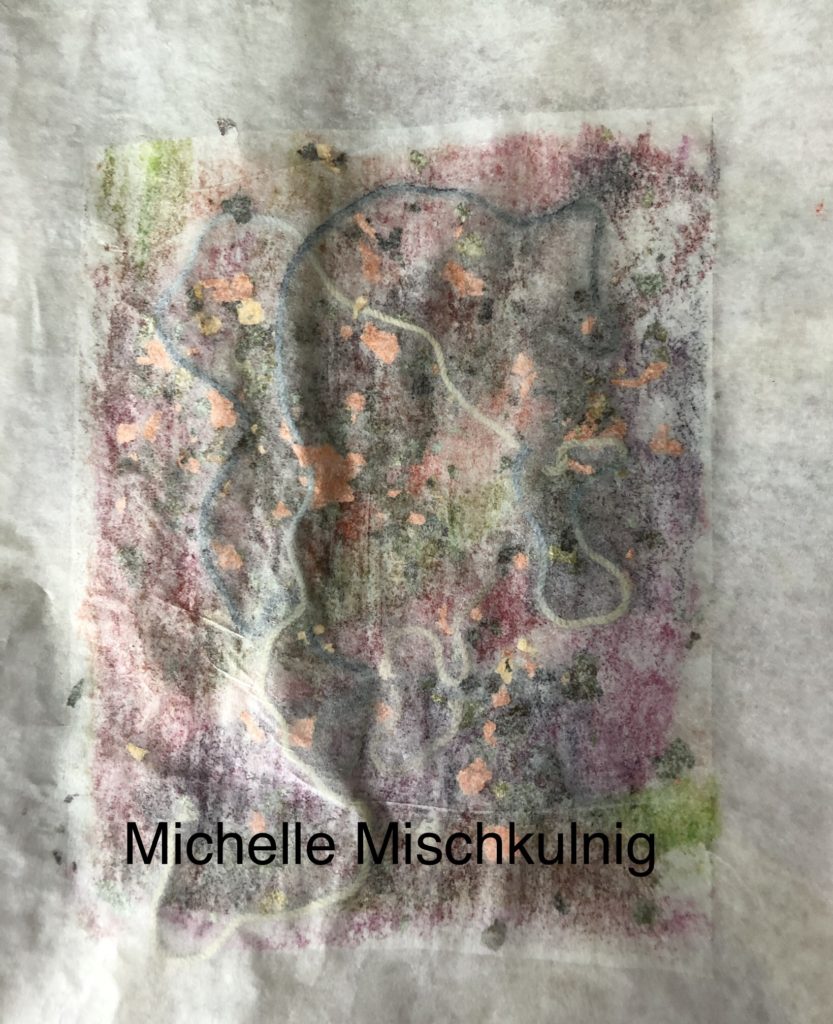
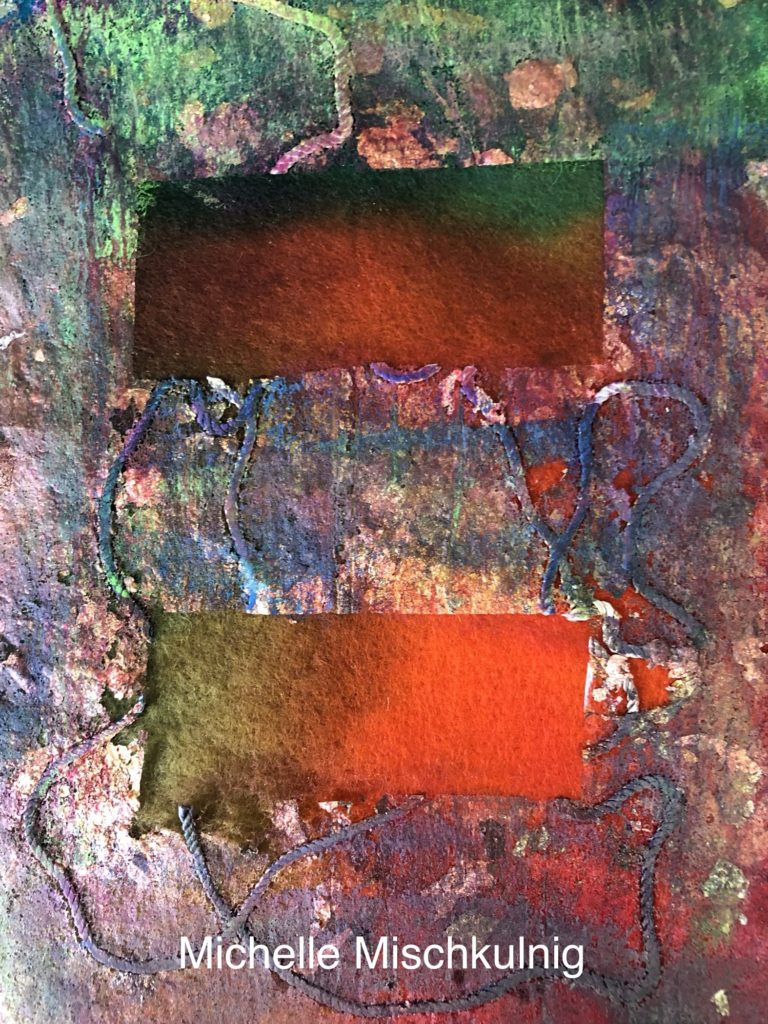
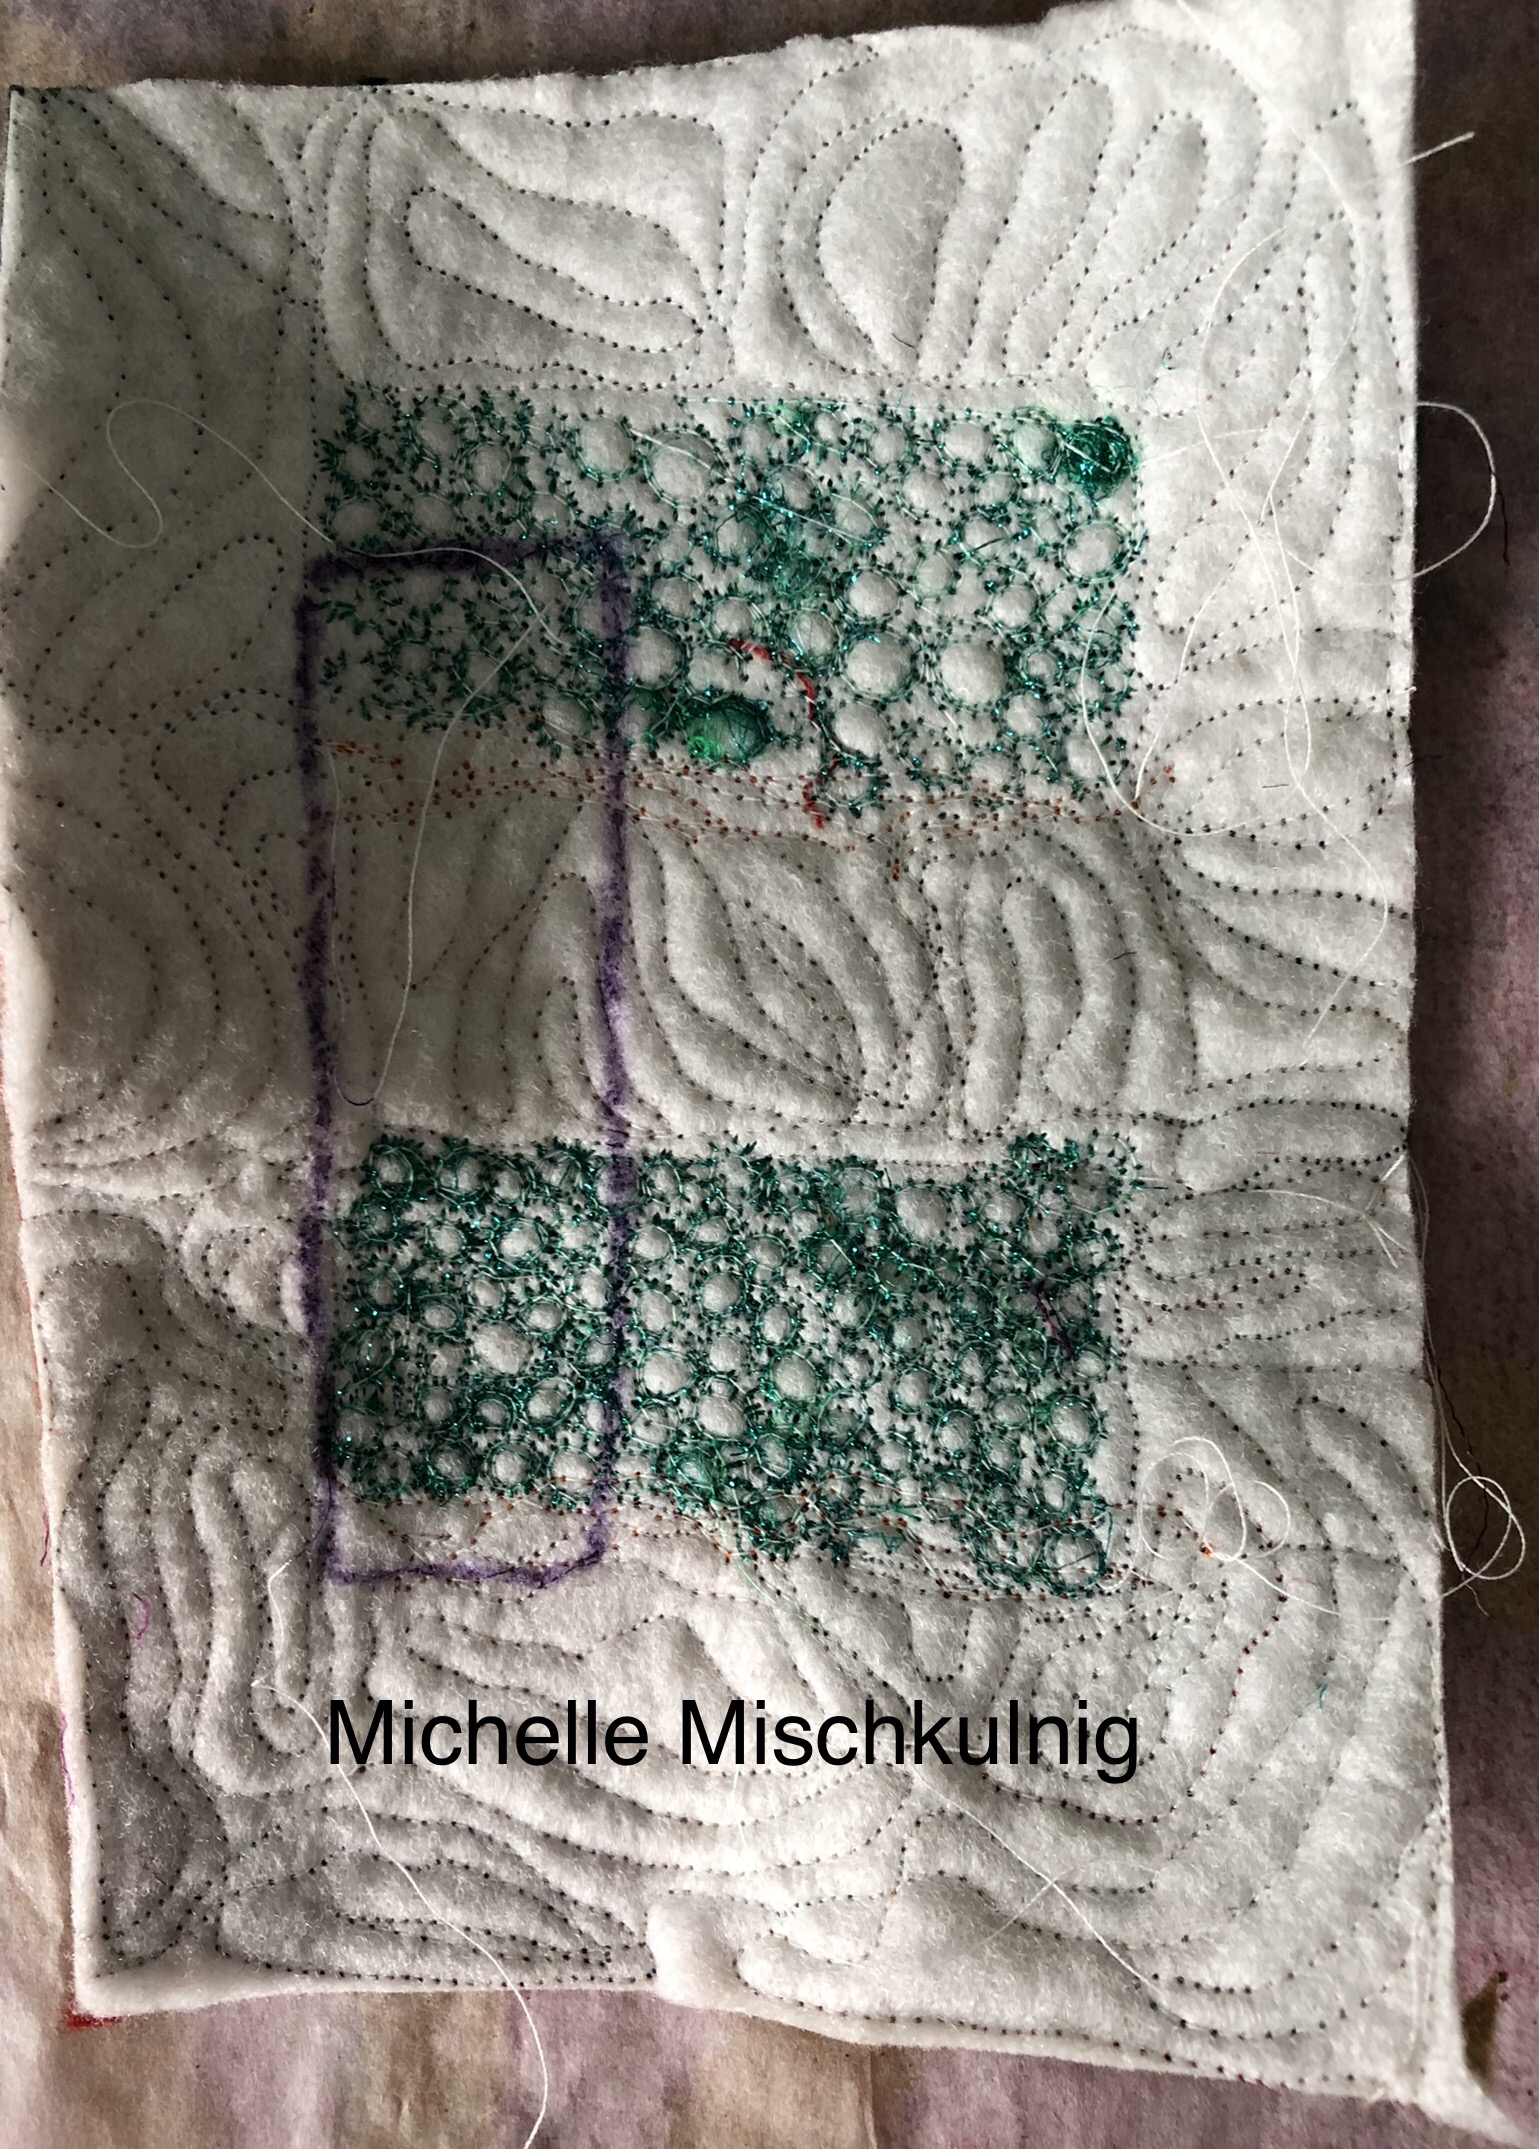
When the gold paint is dry mark some rectangles or whatever shape you choose to cut out of the fusible web sheet.Put aside the cut out pieces for future play.
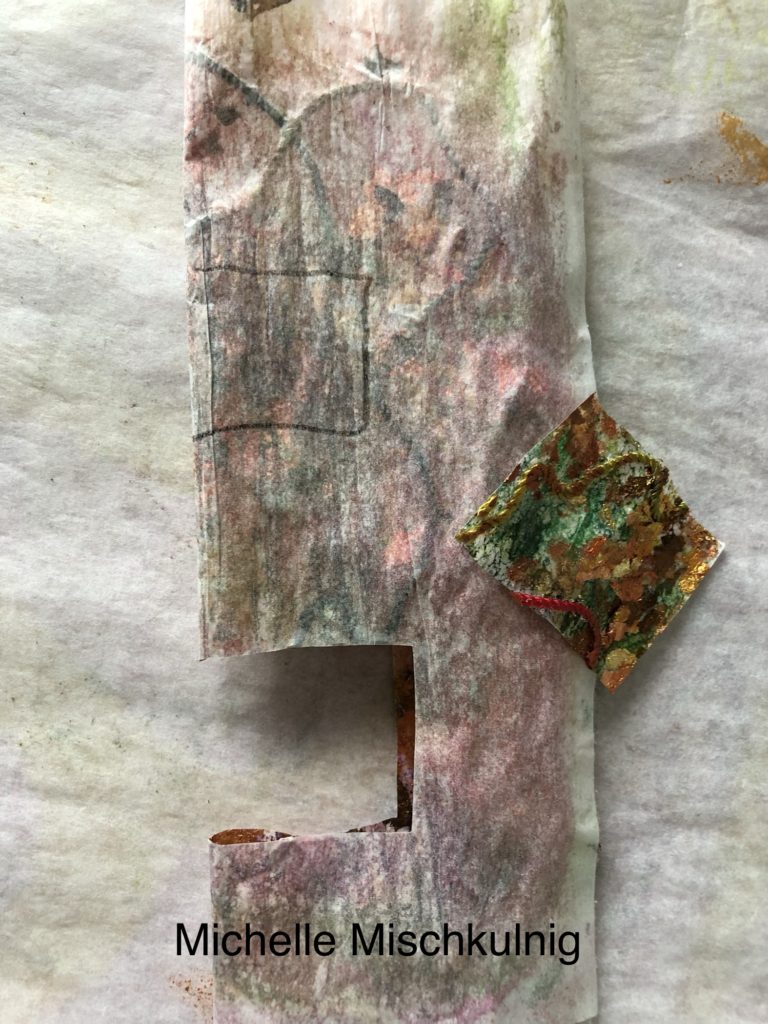
When you have cut your shapes lay the fusible web face down on some felt or pre felt ( which I prefer) and then put cover with baking paper to protect it while you fuse the coloured web to the felt.
Carefully peel the backing paper of the web to leave the coloured web surface texture fused onto the felt .
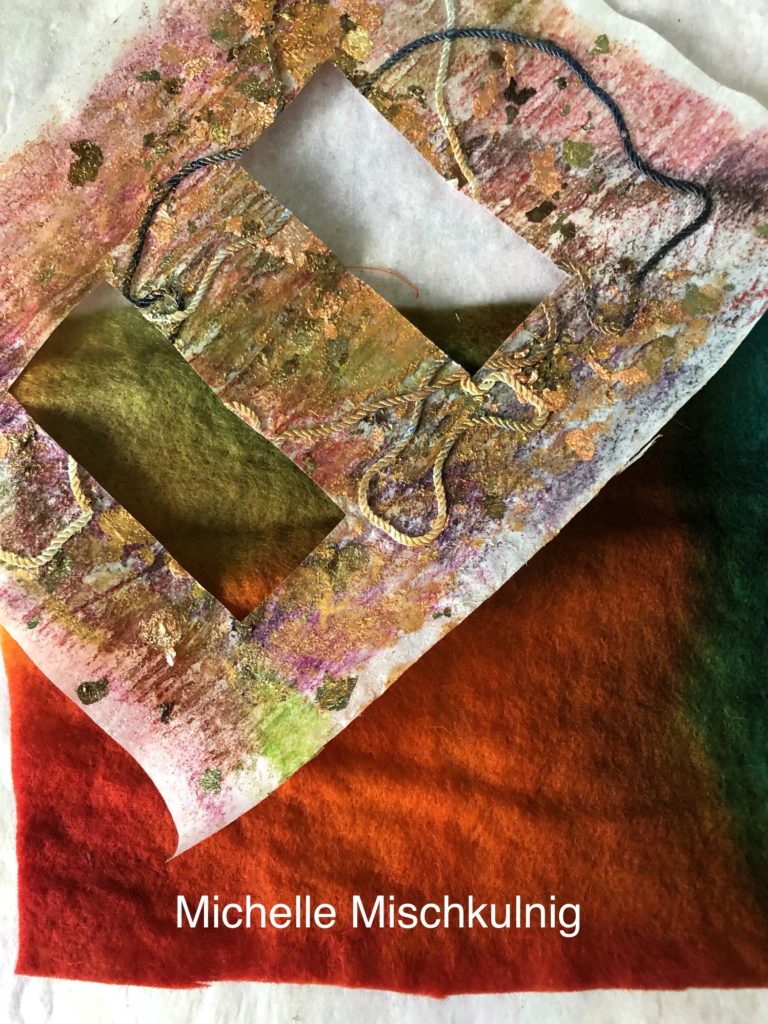
Step 5
I added a little more colour to the fused area by using intense blocks. You can decide if you need more colour.back it with your felt and a piece of batting. It is now ready for free motion stitching .
Step 6
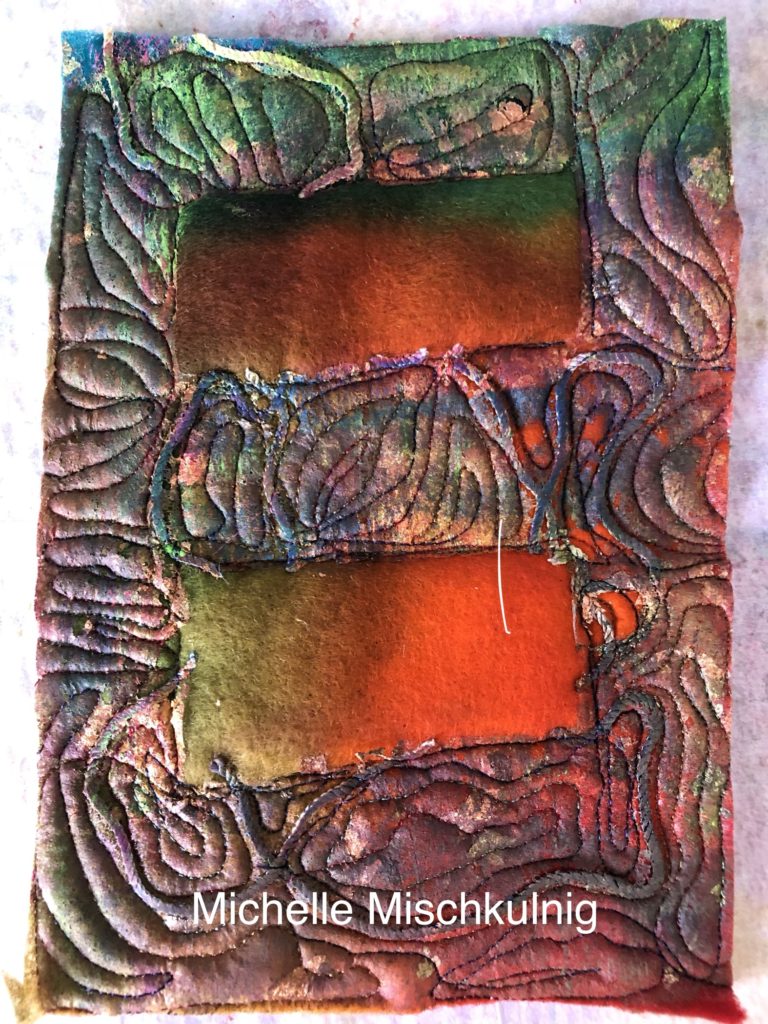
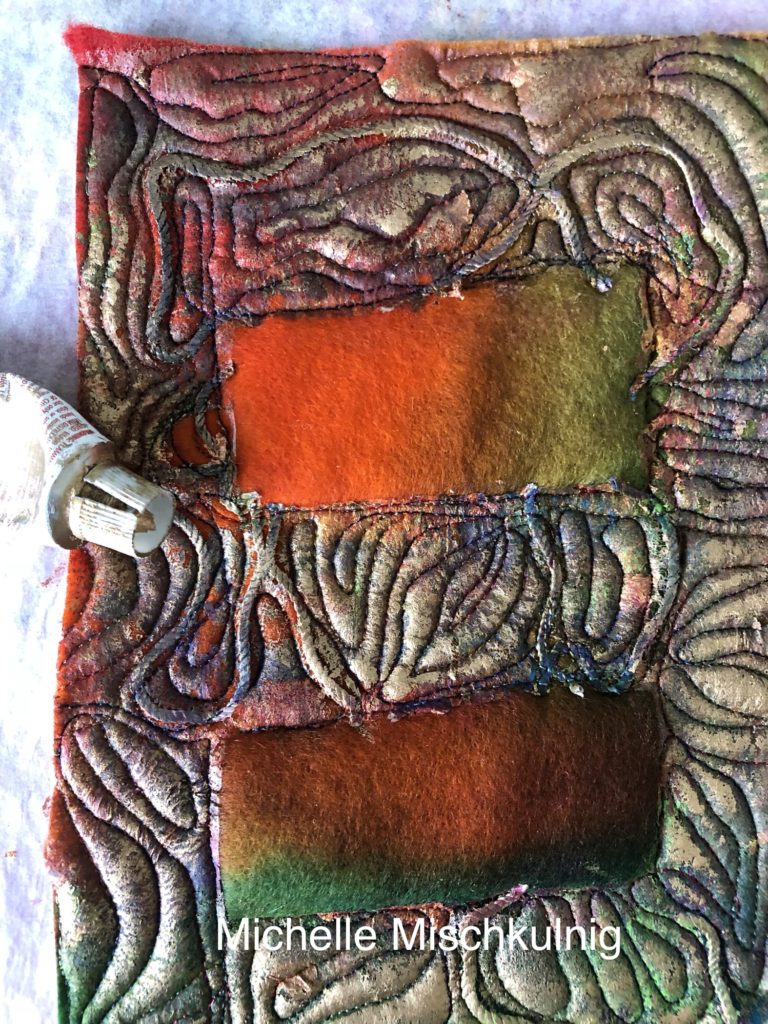
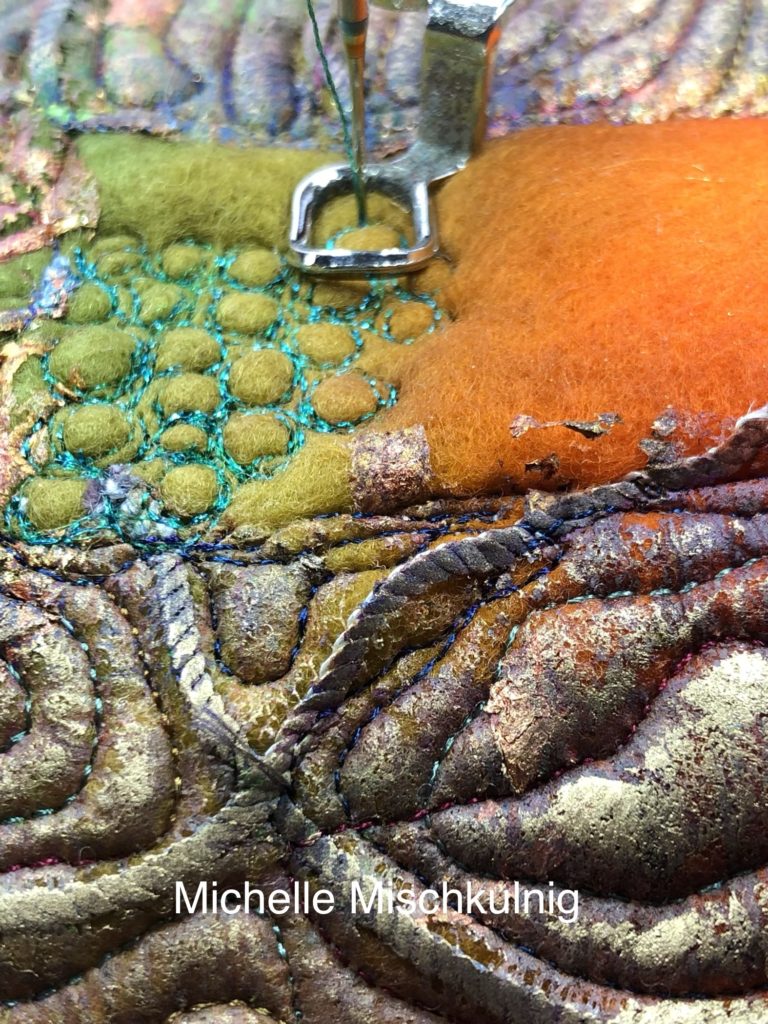
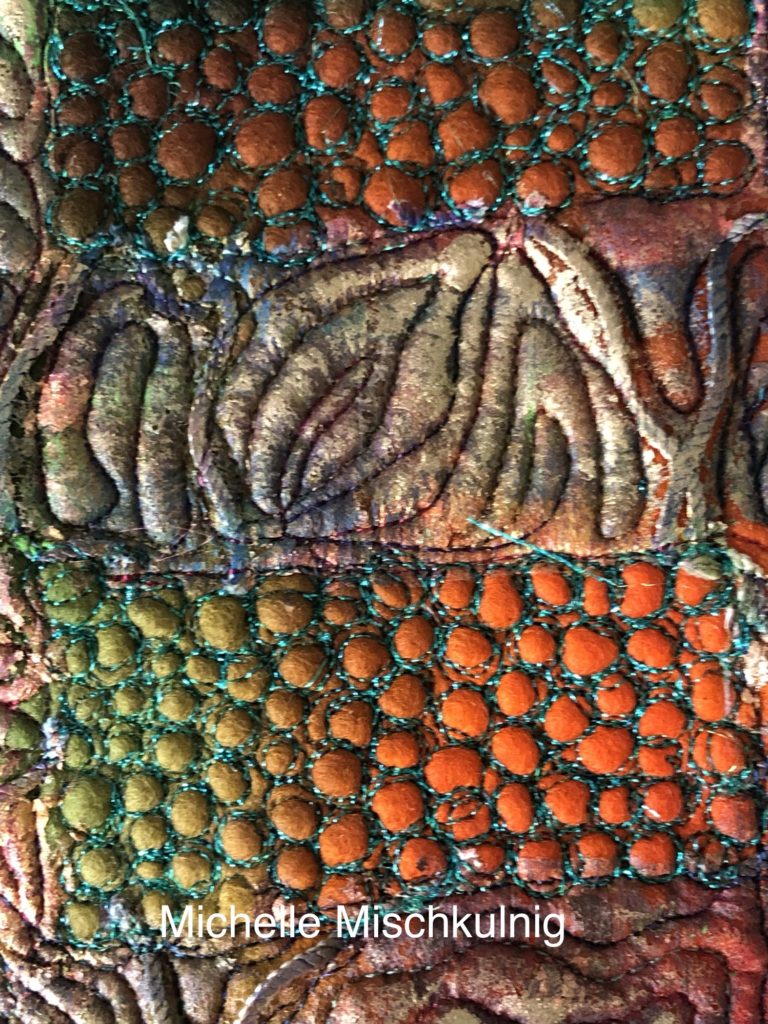
Free motion stitch to your hearts delight.When you have finished stitching you may like to use some gold buff over the raised areas or leave as is.
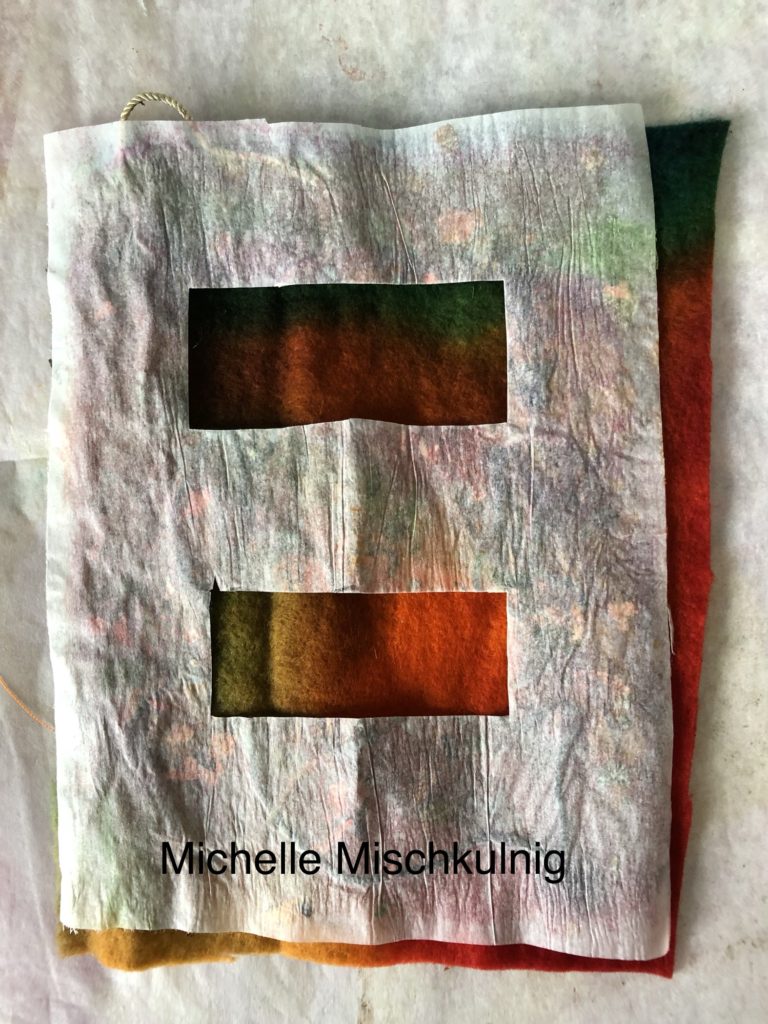
Step 7
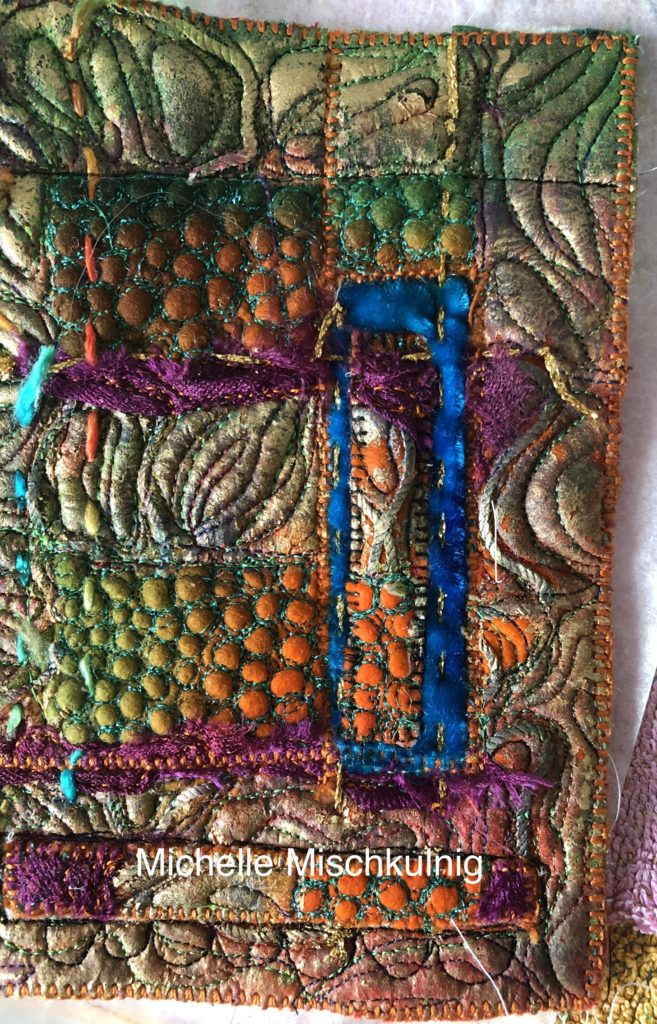
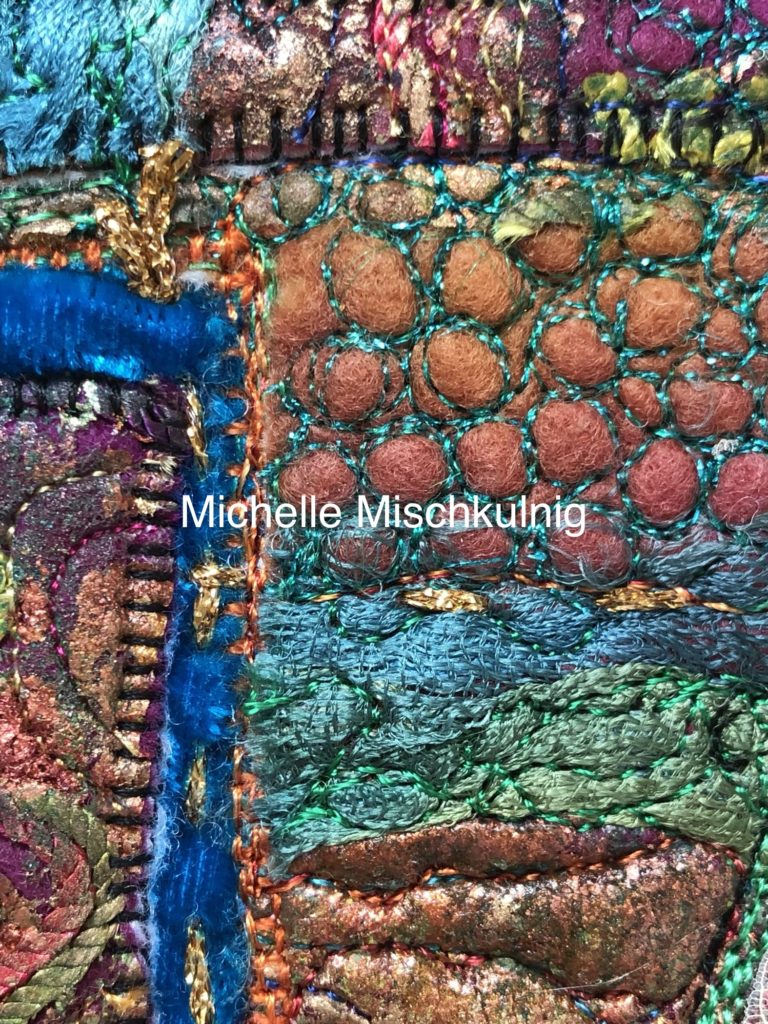
I use pre-felt because I love the texture they create when being stitched. I have stitched the felt areas with lots of tiny circles which leave a lovely pebbled affect.
Step 8
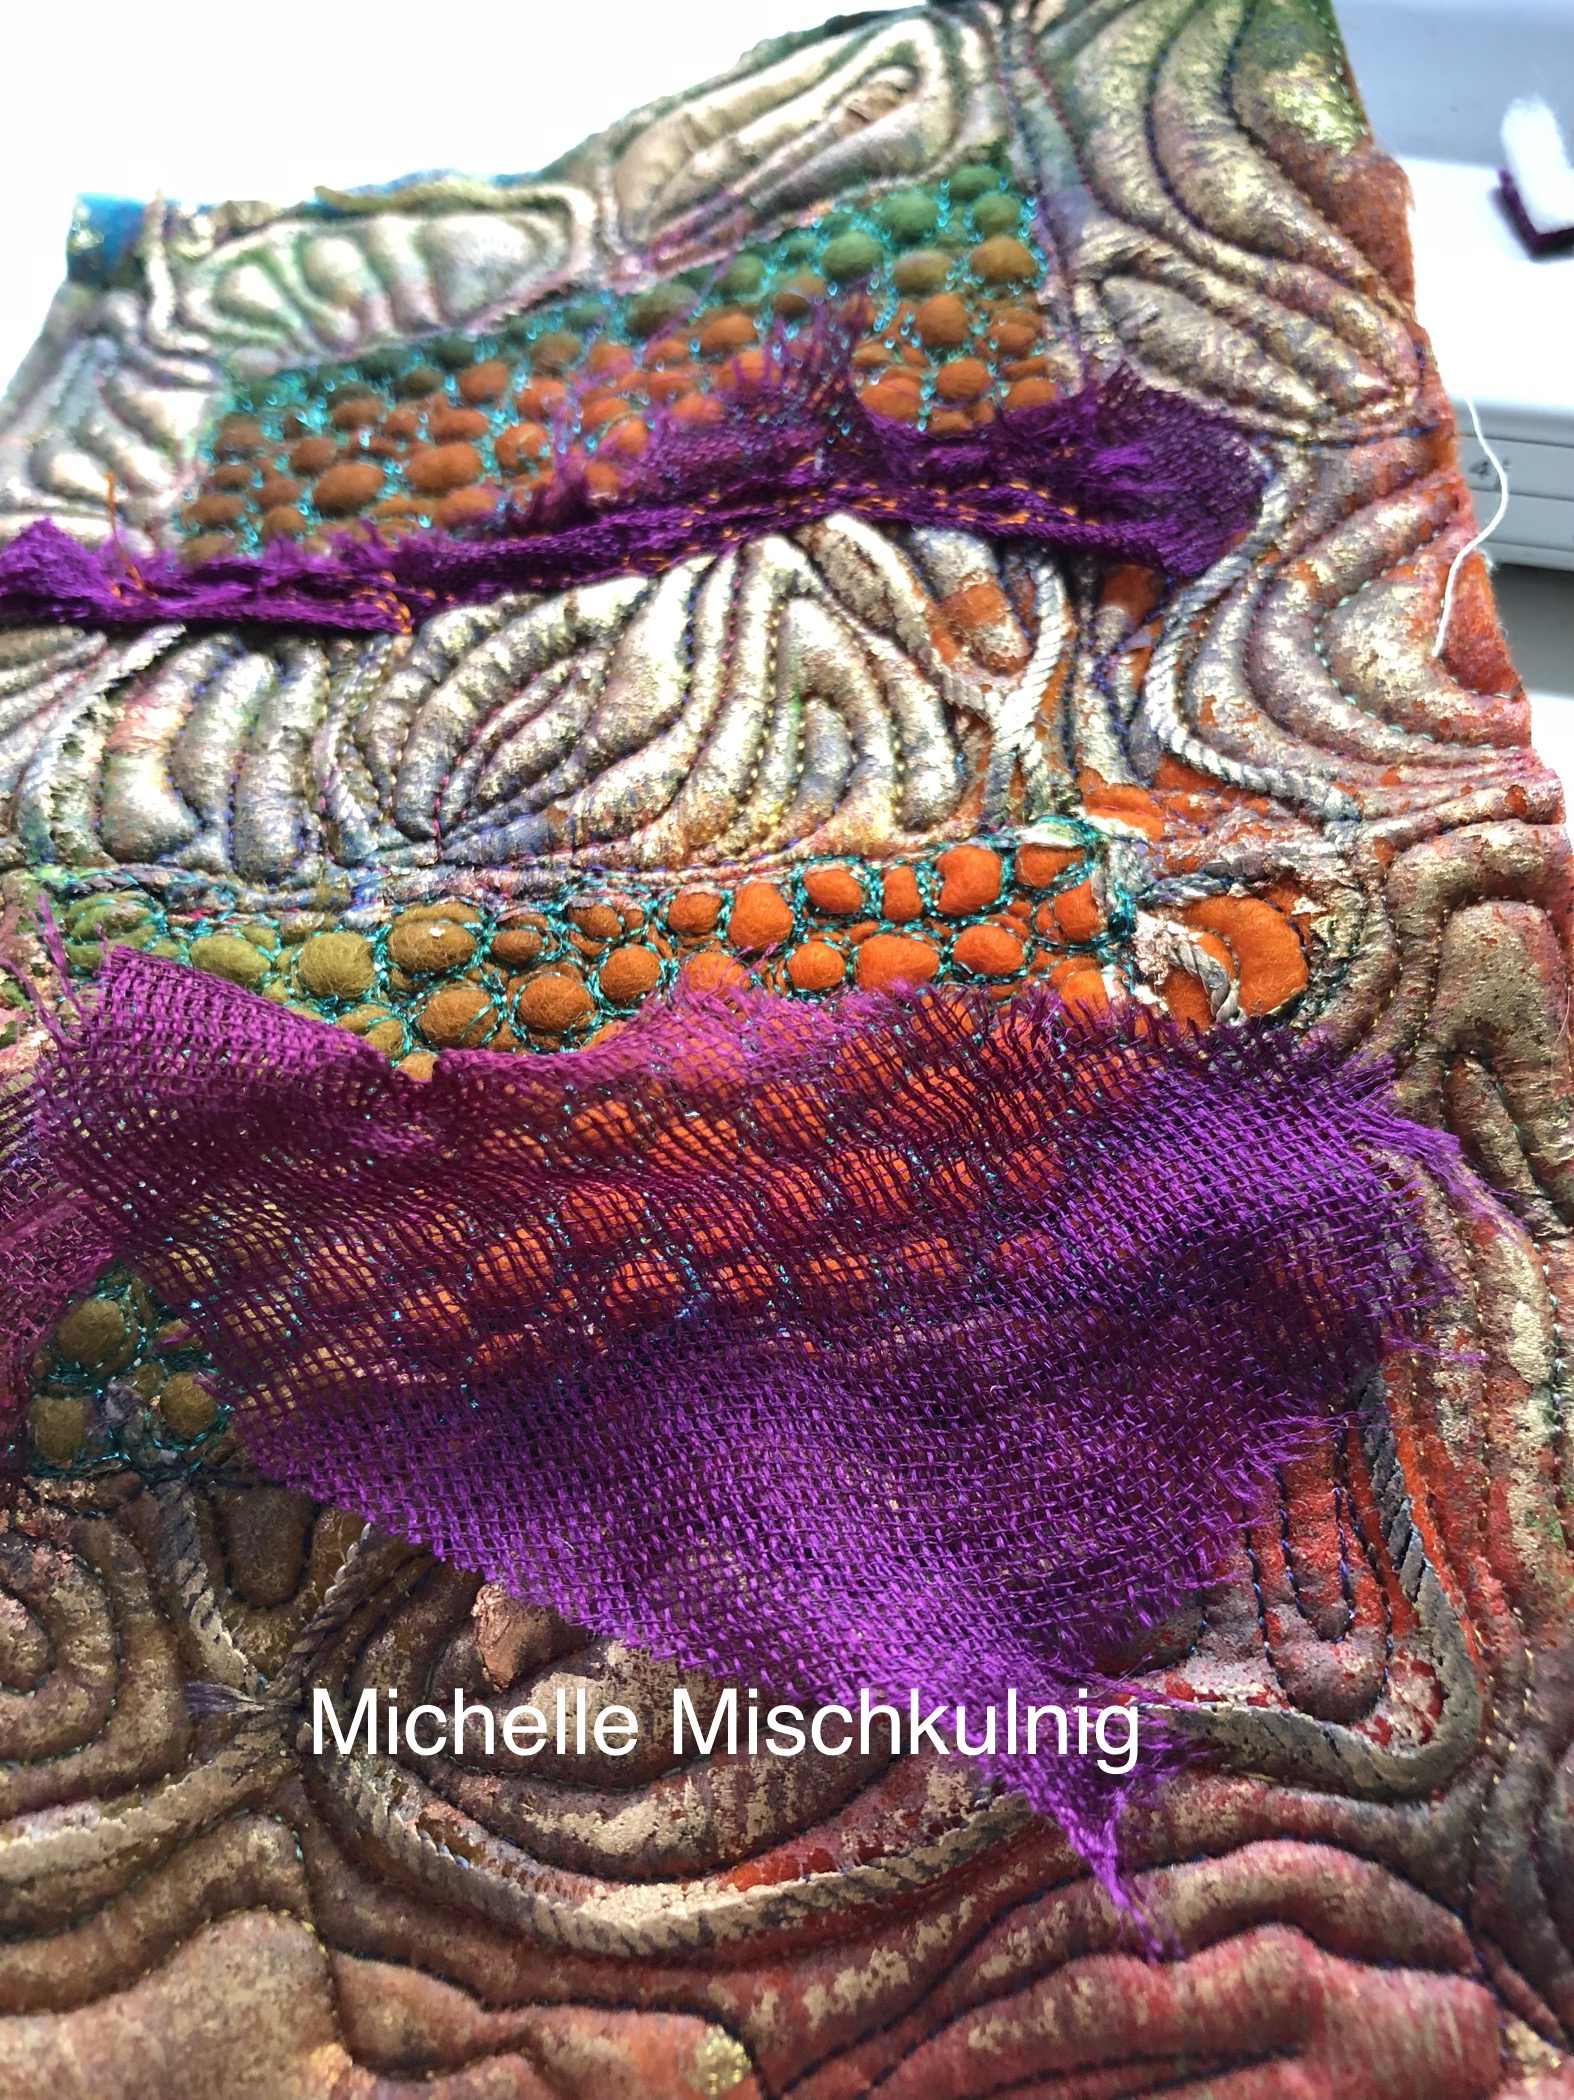
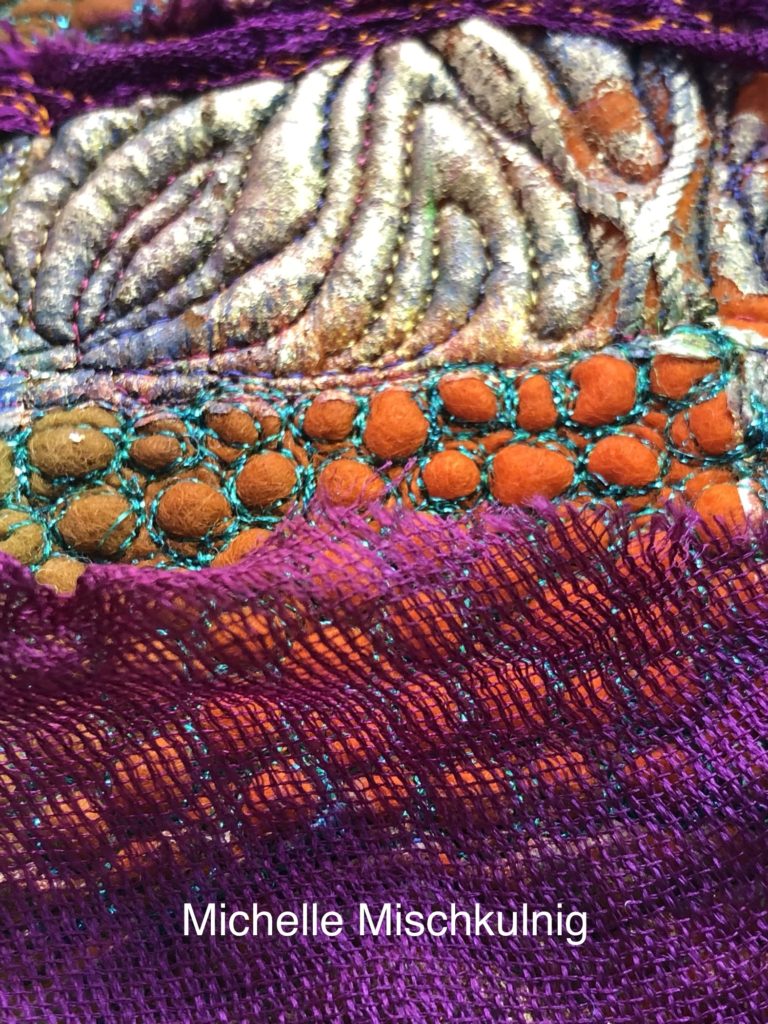
Think about adding a little colour and texture zing with a small piece of muslin/gauze or soft mesh (whatever you have in your sewing room as a substitute )

Step 9
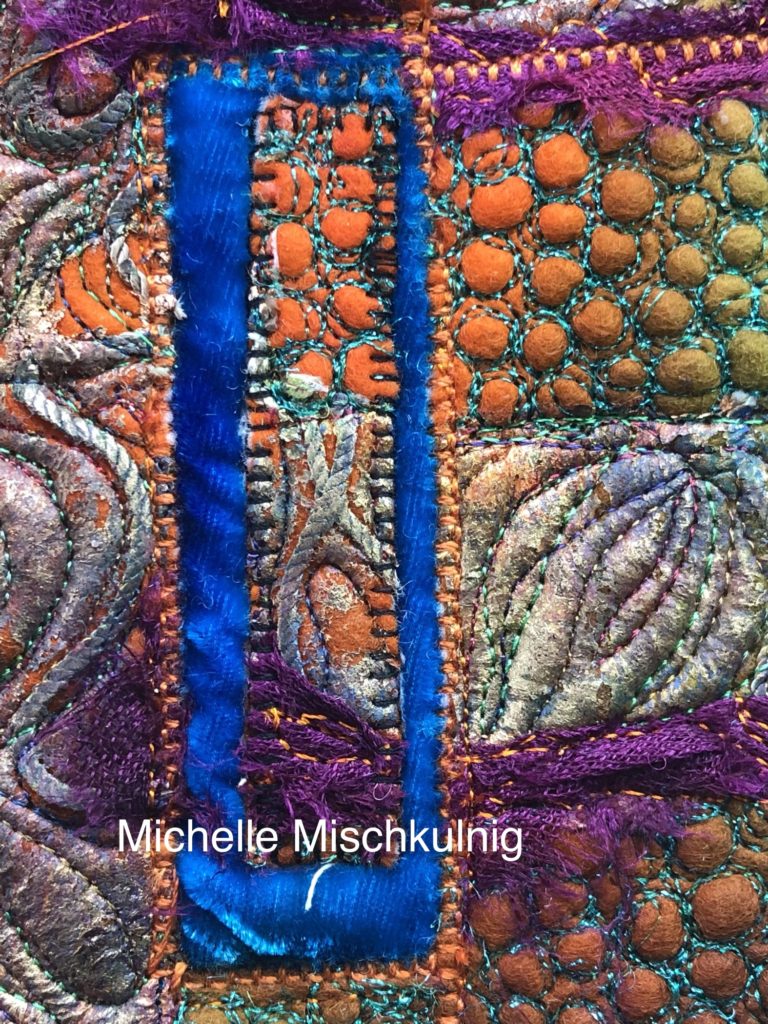
Turn your stitched fabric over and mark a rectangle to cut out back this with some velvet and another piece of batting.Then secure the velvet and backing with some stitching. I suggest you go back over some of the past stitch lines and around your felt outer cut out edges to define shapes and textures.

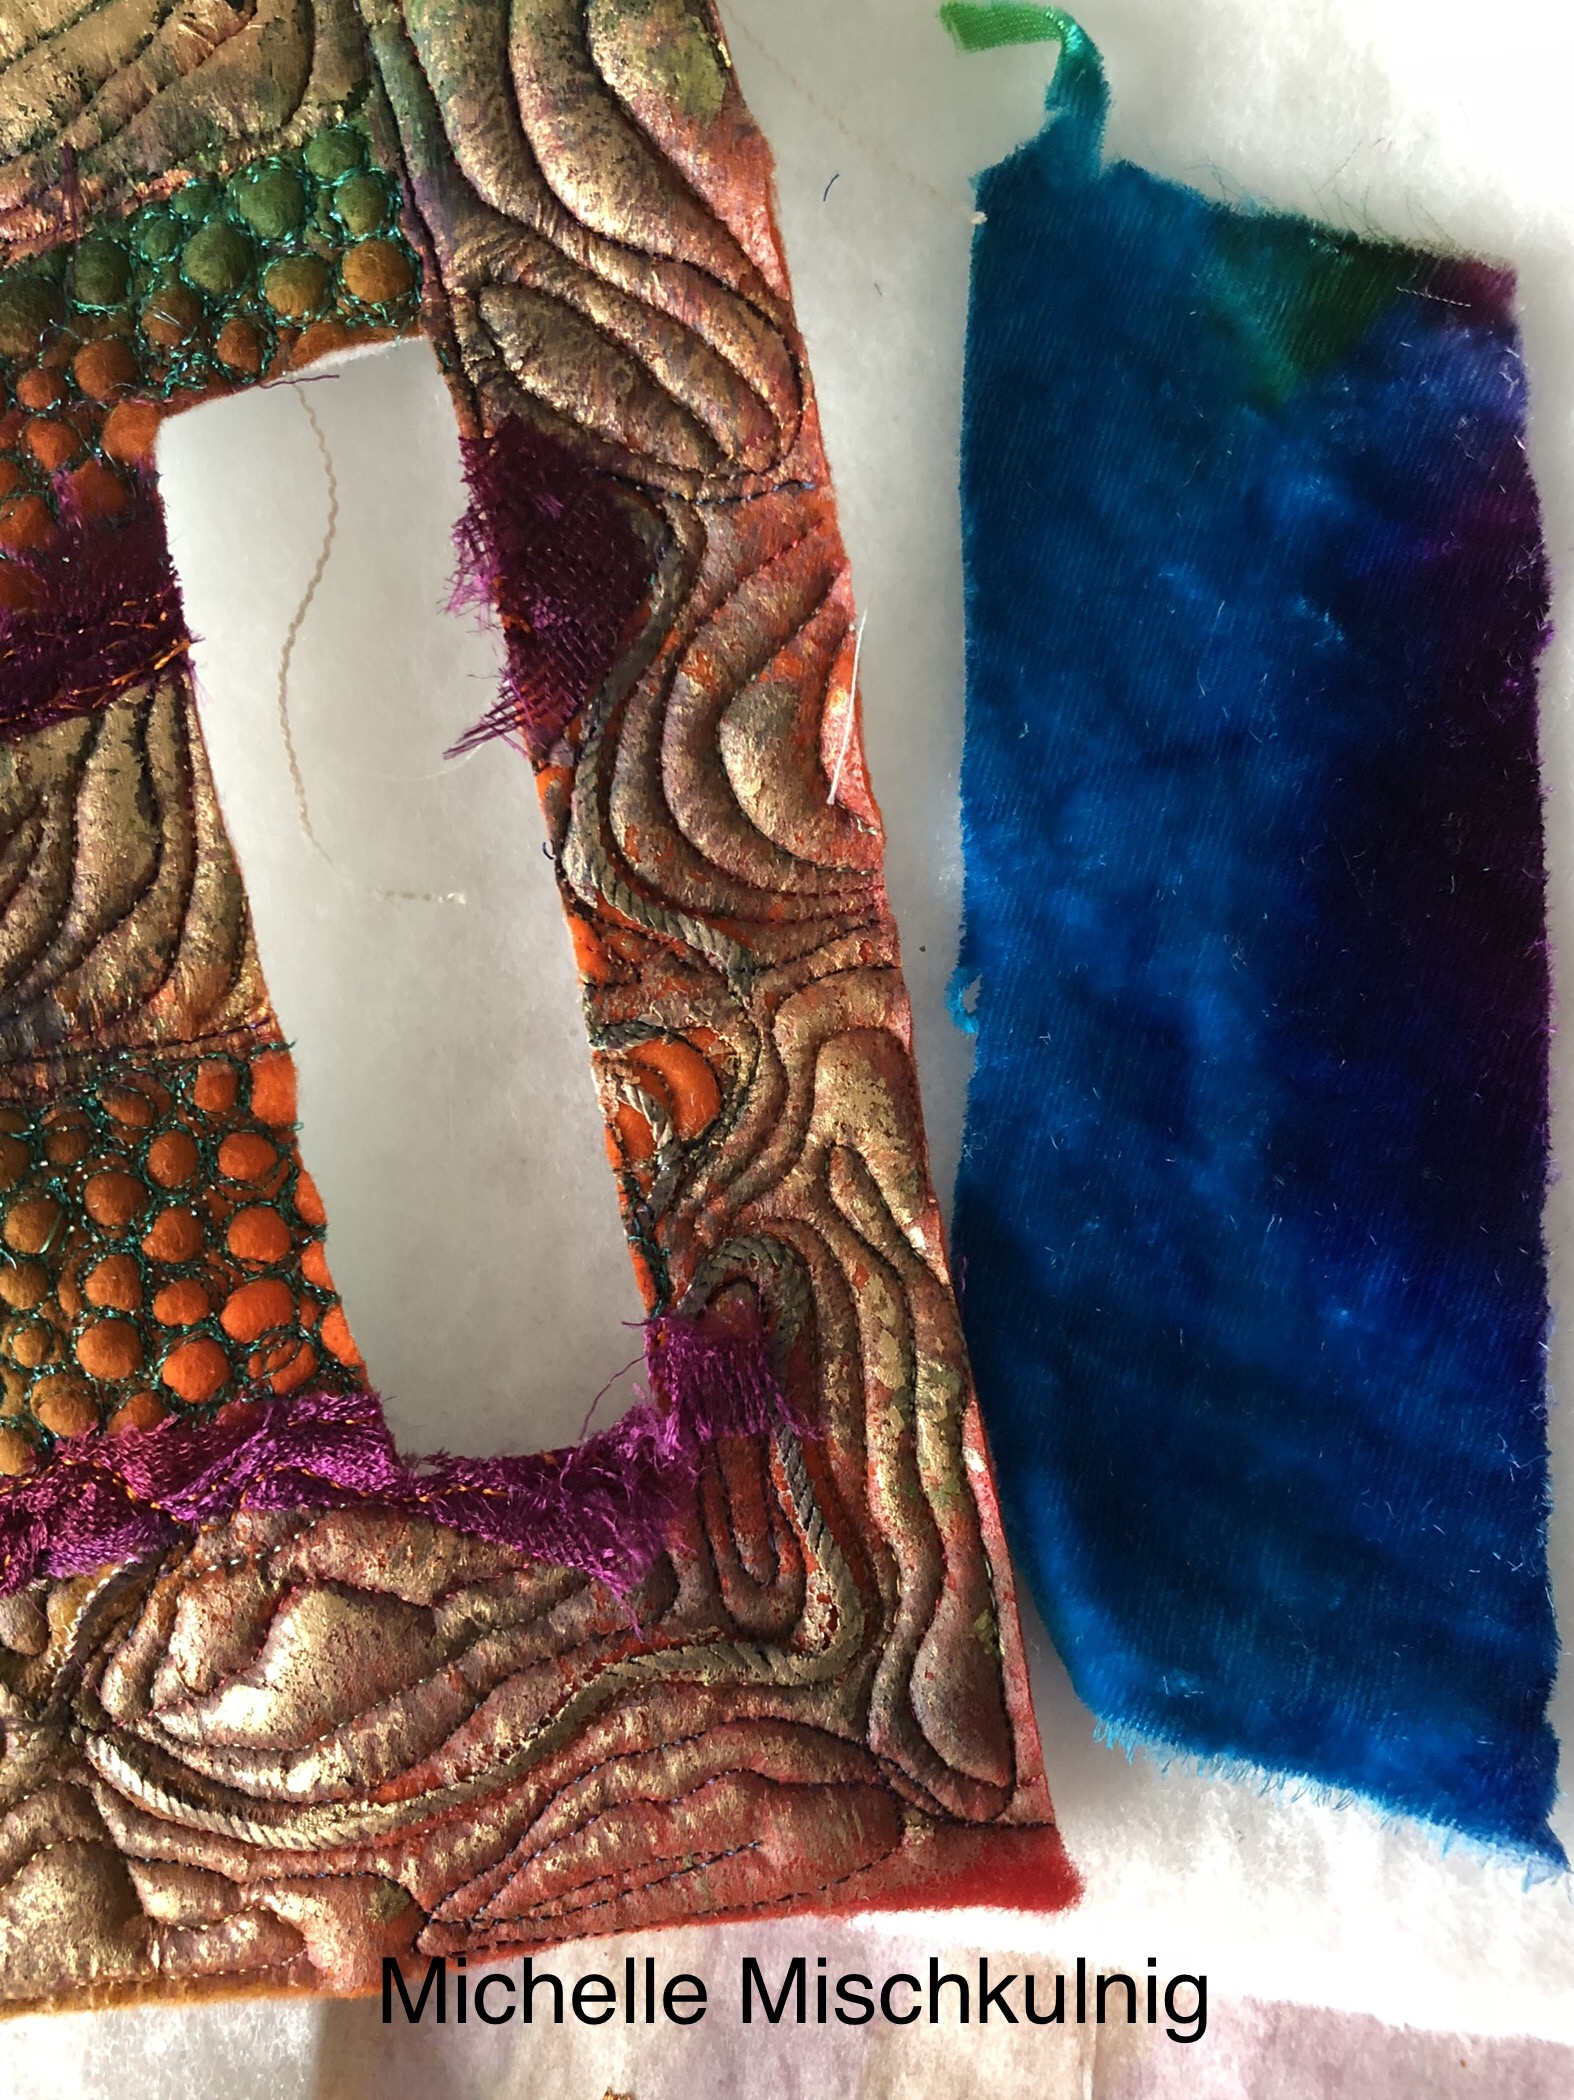
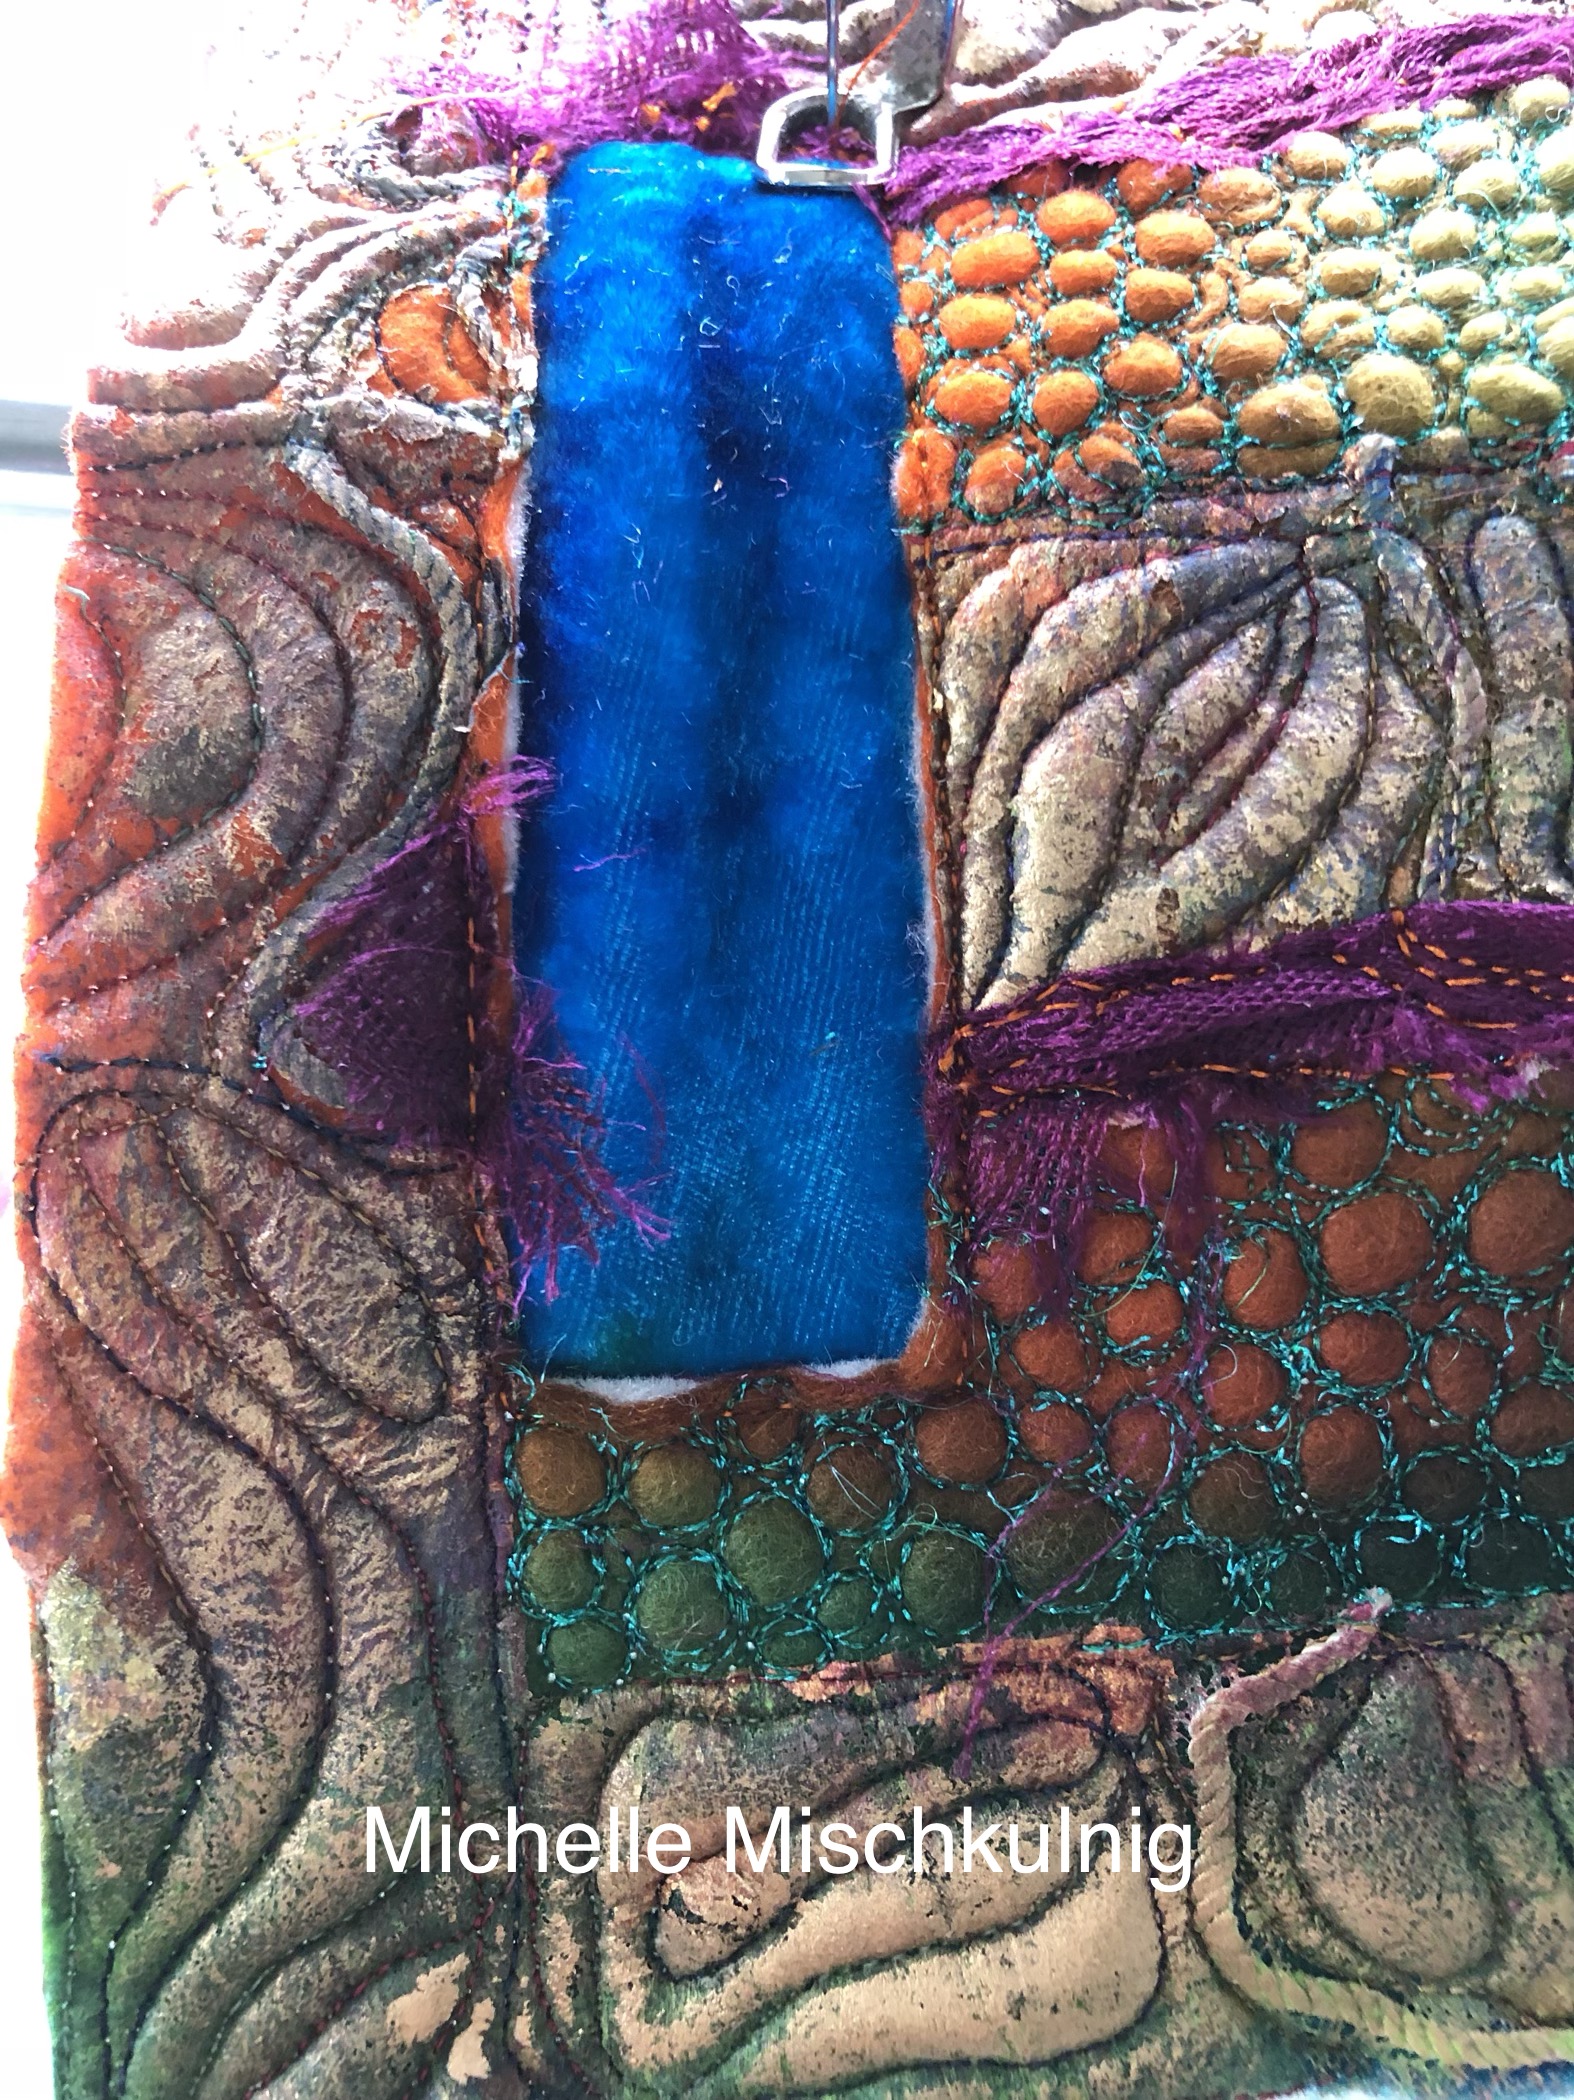
Step 10
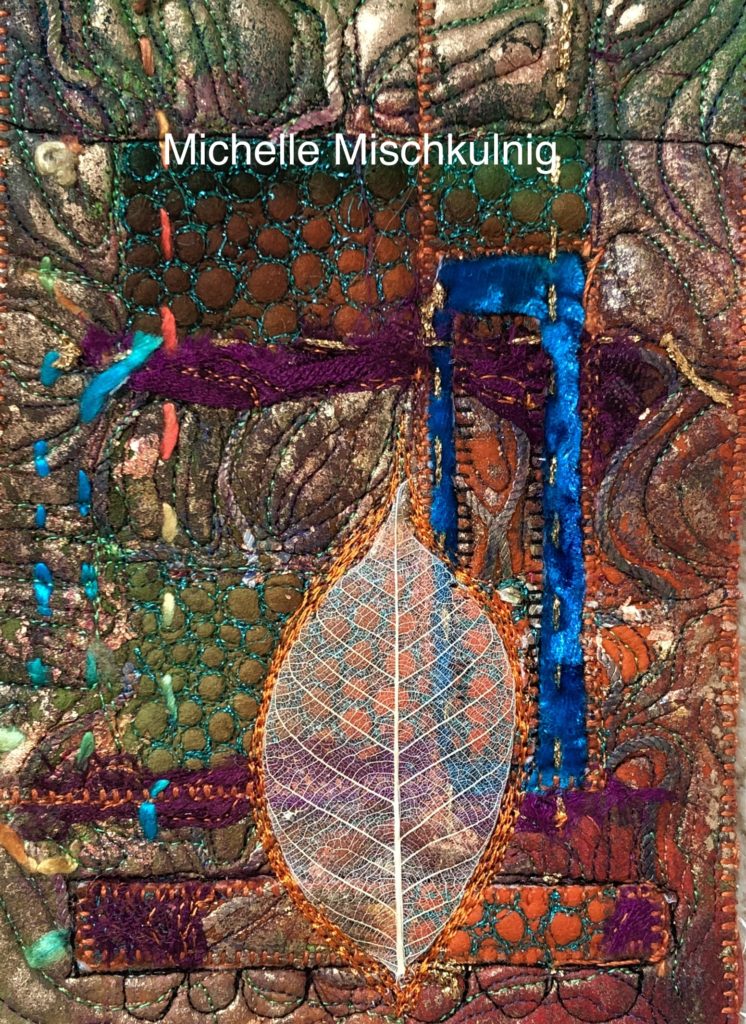
A little hand stitching is added
Around the edges of the rectangle use a decorative stitch or zig zag.
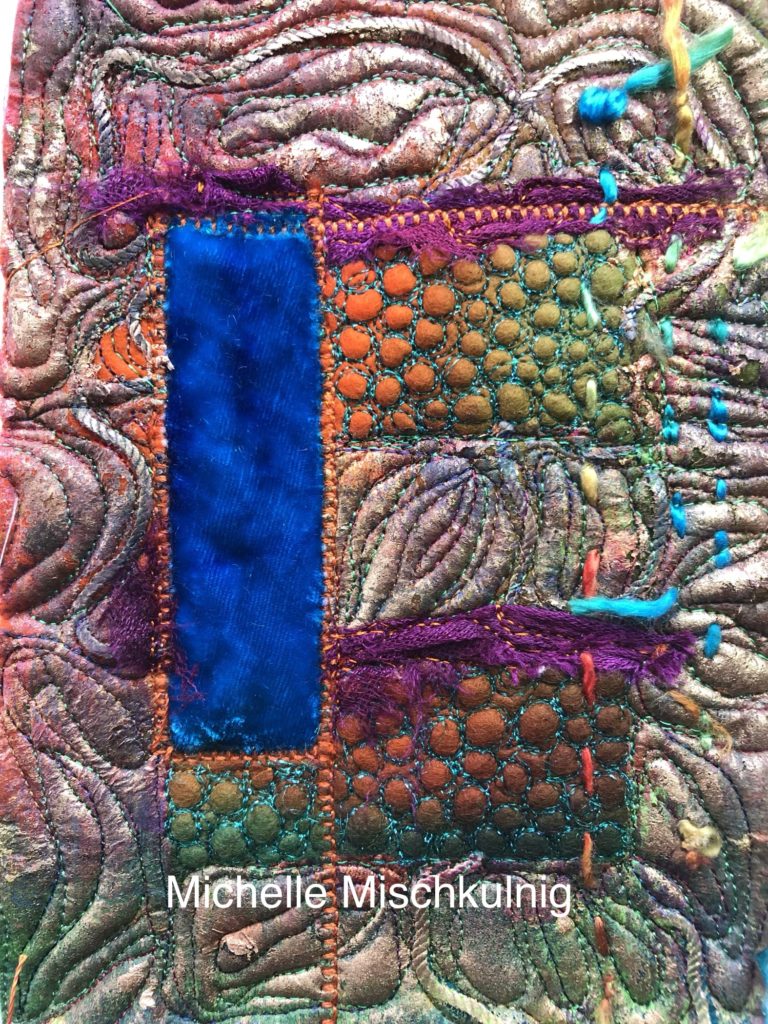
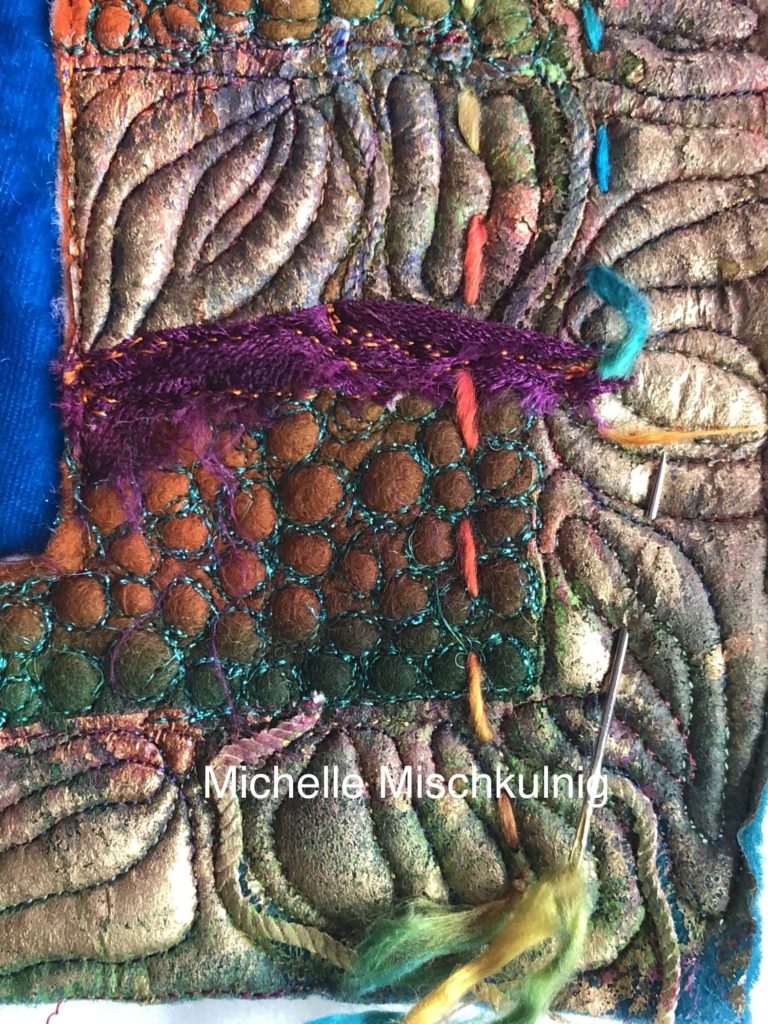
Step 11
Using the rectangular piece that you cut out, trim it down to size to insert on top of the velvet rectangle and edge it with a decorative stitch.
then hand stitch some gold thread through all the layers.
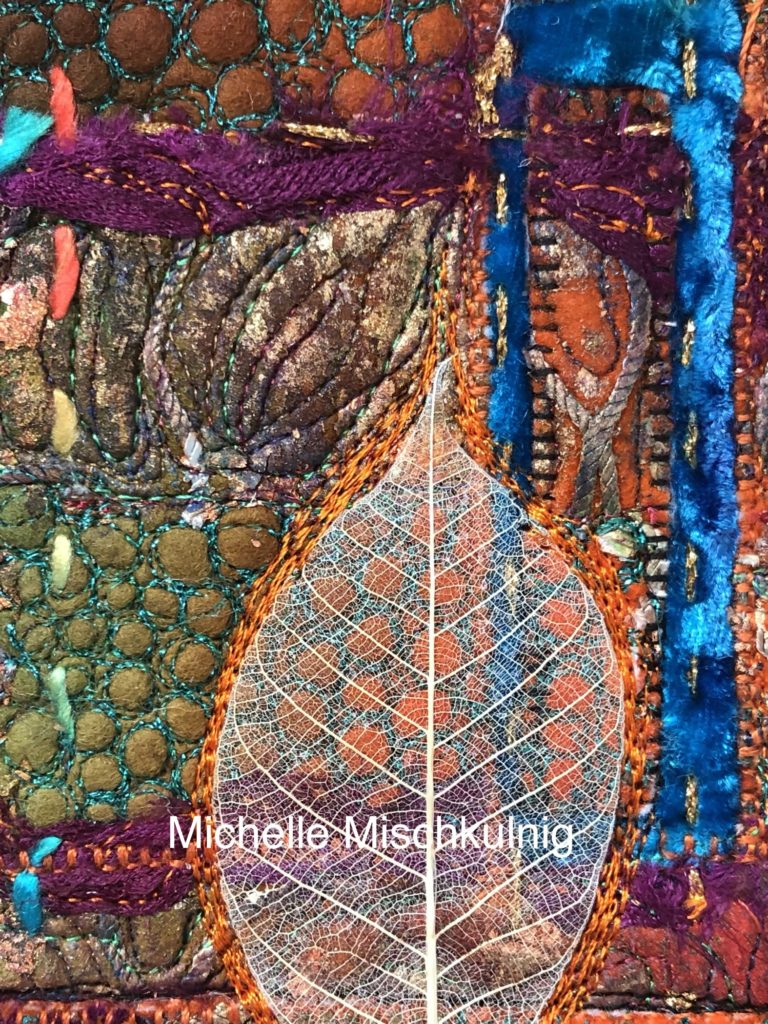
All these ideas I am showing you are about playing not the final product so from here it you are on your own to discover the possibilities, to own with your one style. It could be a small art work a cover for a journal or a beautiful card endless possibilities. I have added some skeleton leaves and I am sure you have other ideas on what you could add to finish this piece of textile art.
Upcoming events
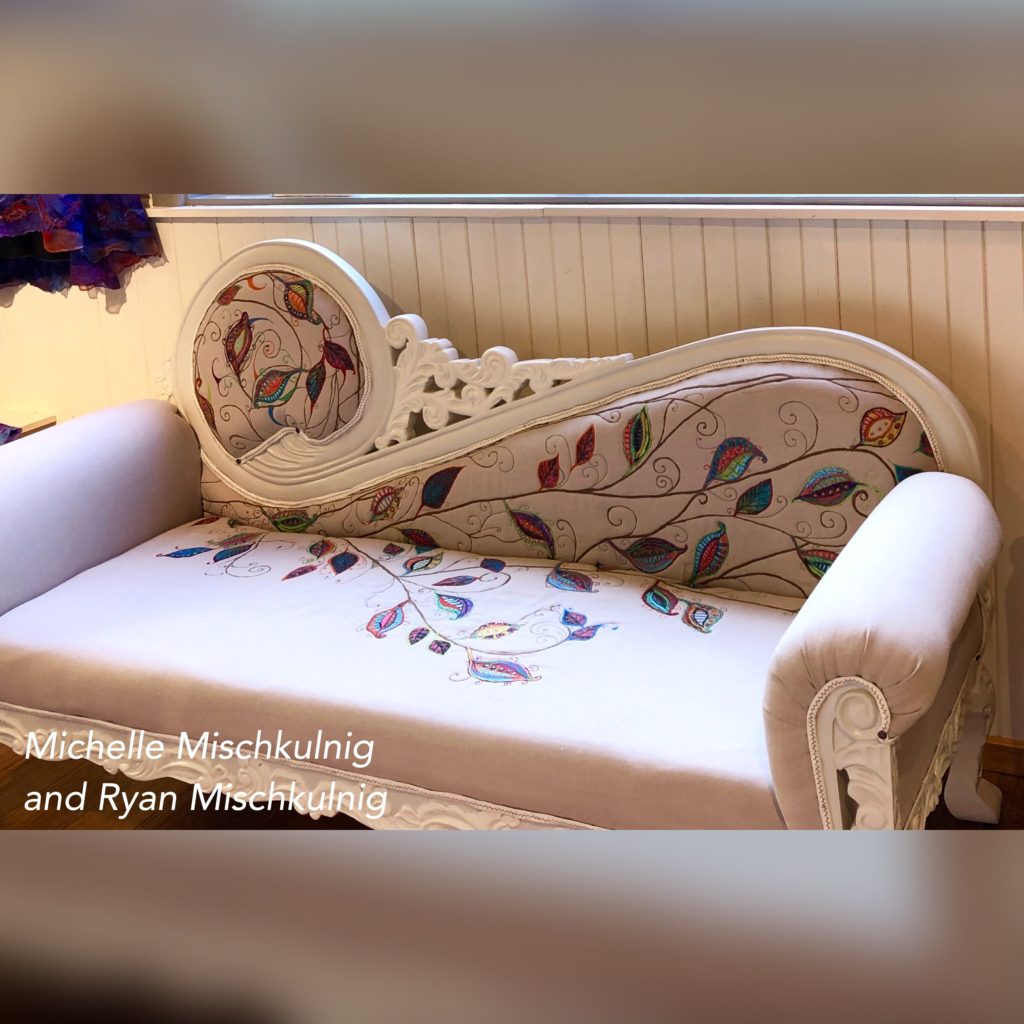
Dont forget that our beautiful couch is for sale and viewing at until the endd of May 2018 https://www.stonehousegallery.com
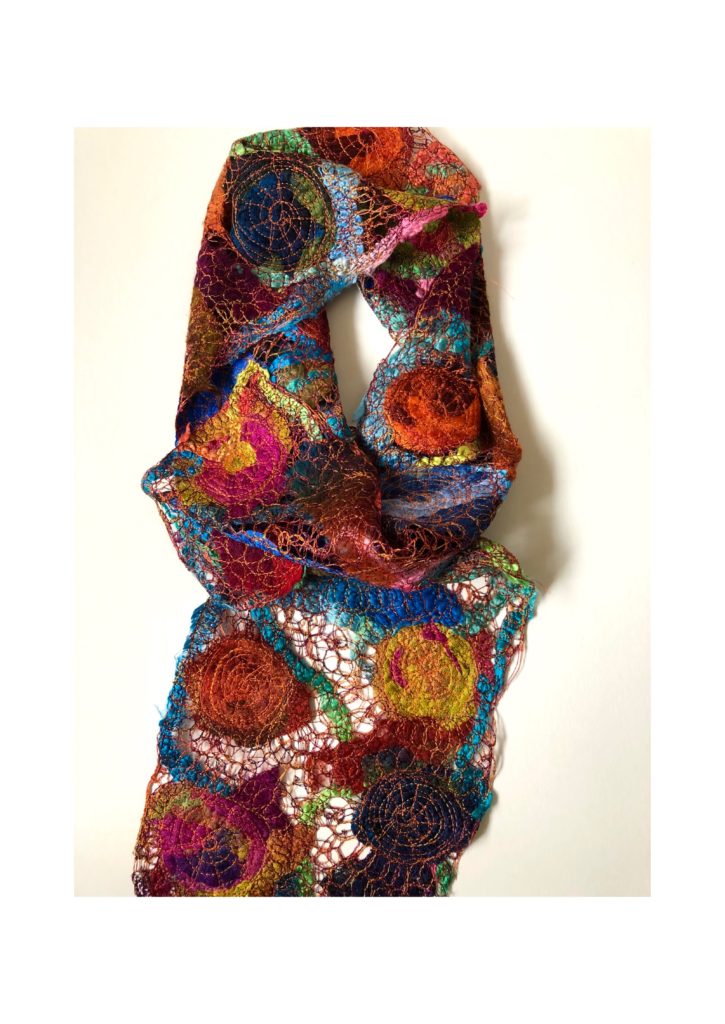
Don’t forget my scarf kits https://chelletextiles.com.au/product-category/scarfs-wraps/
I will be at the Bernina stand demonstrating at the Melbourne, Sydney and Brisbane Craft and Quilt fairs, and small body of my work will also be traveling to Hobart, Adelaide and Canberra with Bernina. I hope you can come and visit me at the stand and see me at work on my beloved Bernina .
This will be a fabulous trip 3x 1/2 day work shops with me small group of 10 and 3 x 1/2 day work shops with Jim West check it out.
Teaching and travelling to Bali http://www.craftours.com/trips/?page=bali_michelle_1018
Thank you very much life is colour just dive in and swim around in it :-)
Love, love your expression with color!